Add a Blazor component to an existing ASP.NET Core MVC application
19 Jun 20264 minutes to read
This guide explains how to add a Blazor component to an existing ASP.NET Core MVC application.
-
Open the existing ASP.NET Core MVC application in Visual Studio 2022.
-
Right-click the project and select
Manage NuGet Packages.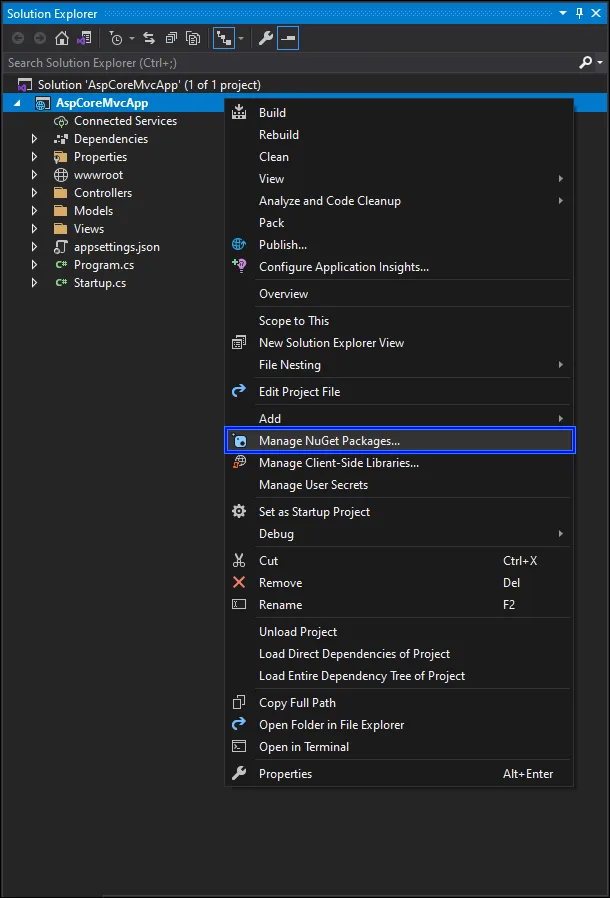
-
Search for the
Syncfusion.Blazor.GridandSyncfusion.Blazor.ThemesNuGet packages and install them.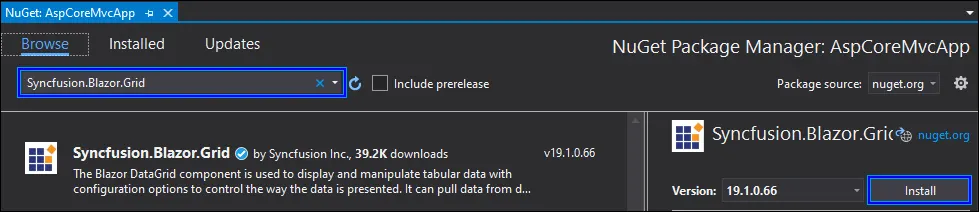
-
Register Blazor Server and Blazor services in the
~/Program.csfile.using Syncfusion.Blazor; .... builder.Services.AddServerSideBlazor(); builder.Services.AddSyncfusionBlazor(); -
Add BlazorHub in the
~/Program.csfile.// Map your endpoints here... app.MapRazorPages(); app.MapBlazorHub(); app.MapFallbackToPage("/_Host"); -
Create a
~/_Imports.razorfile at the root of the application and add the following namespaces.@using System.Net.Http @using Microsoft.AspNetCore.Authorization @using Microsoft.AspNetCore.Components.Authorization @using Microsoft.AspNetCore.Components.Forms @using Microsoft.AspNetCore.Components.Routing @using Microsoft.AspNetCore.Components.Web @using Microsoft.AspNetCore.Components.Web.Virtualization @using Microsoft.JSInterop @using AspCoreMvcApp; @using Syncfusion.Blazor @using Syncfusion.Blazor.Grids -
Add Blazor script references at the end of the
<body>tag and theme and script references inside the<head>tag in the~/Views/Shared/_Layout.cshtmlfile.<head> .... .... <link href="_content/Syncfusion.Blazor.Themes/bootstrap4.css" rel="stylesheet" /> <script src="_content/Syncfusion.Blazor.Core/scripts/syncfusion-blazor.min.js" type="text/javascript"></script> </head> <body> .... .... <script src="_framework/blazor.server.js"></script> </body> -
Create a new
~/Componentsfolder at the root of the application. Right-click the~/Componentsfolder and add a new razor component viaAdd -> Razor Component. -
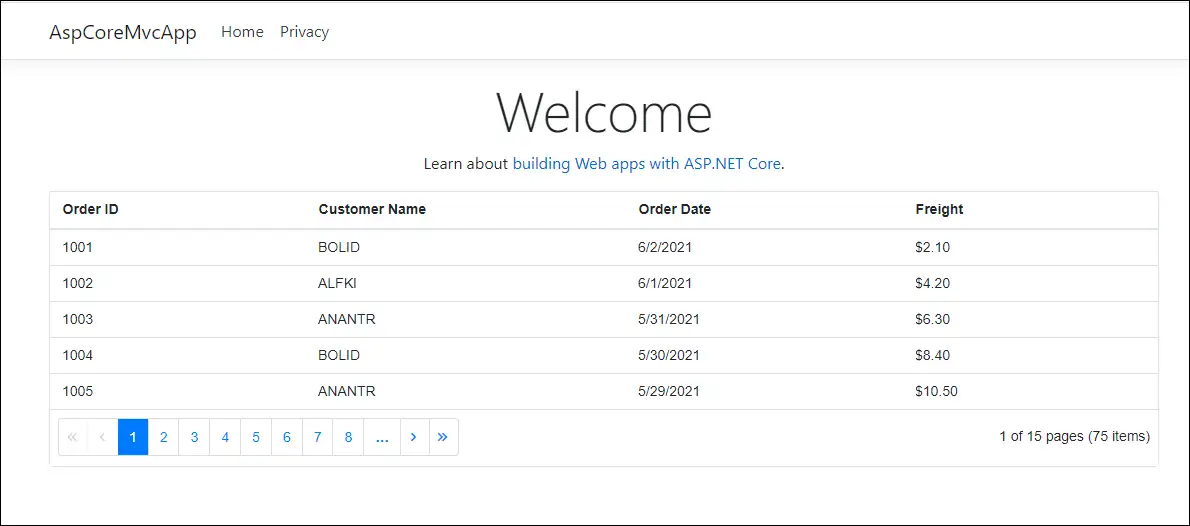
Add the Blazor component in the created razor component file.
<SfGrid DataSource="@Orders" AllowPaging="true"> <GridPageSettings PageSize="5"></GridPageSettings> <GridColumns> <GridColumn Field=@nameof(Order.OrderID) HeaderText="Order ID" Width="120"></GridColumn> <GridColumn Field=@nameof(Order.CustomerID) HeaderText="Customer Name" Width="150"></GridColumn> <GridColumn Field=@nameof(Order.OrderDate) HeaderText=" Order Date" Format="d" Width="130"></GridColumn> <GridColumn Field=@nameof(Order.Freight) Format="C2" Width="120"></GridColumn> </GridColumns> </SfGrid> @code{ public List<Order> Orders { get; set; } protected override void OnInitialized() { Orders = Enumerable.Range(1, 50).Select(x => new Order() { OrderID = 1000 + x, CustomerID = (new string[] { "ALFKI", "ANANTR", "ANTON", "BLONP", "BOLID" })[new Random().Next(5)], Freight = 2.1 * x, OrderDate = DateTime.Now.AddDays(-x), }).ToList(); } public class Order { public int? OrderID { get; set; } public string CustomerID { get; set; } public DateTime? OrderDate { get; set; } public double? Freight { get; set; } } } -
Add the Razor component to the
~/Views/Home/Index.cshtmlpage using thecomponenttag helper. The.razorfile name is the razor component type. For example, theSfGridcomponent above is added in the~/Components/MyGrid.razorfile.@using AspCoreMvcApp.Components; <component type="typeof(MyGrid)" render-mode="ServerPrerendered" /> -
Run the application by pressing
F5. The Blazor Grid component is rendered in the ASP.NET Core MVC application.