Getting Started with Blazor Playground
16 Jun 20264 minutes to read
The Blazor Playground allows you to develop and test any Blazor component, including both general components and pre-built Blazor components.
To get started quickly with Blazor Playground, watch the following video.
Create a Blazor component
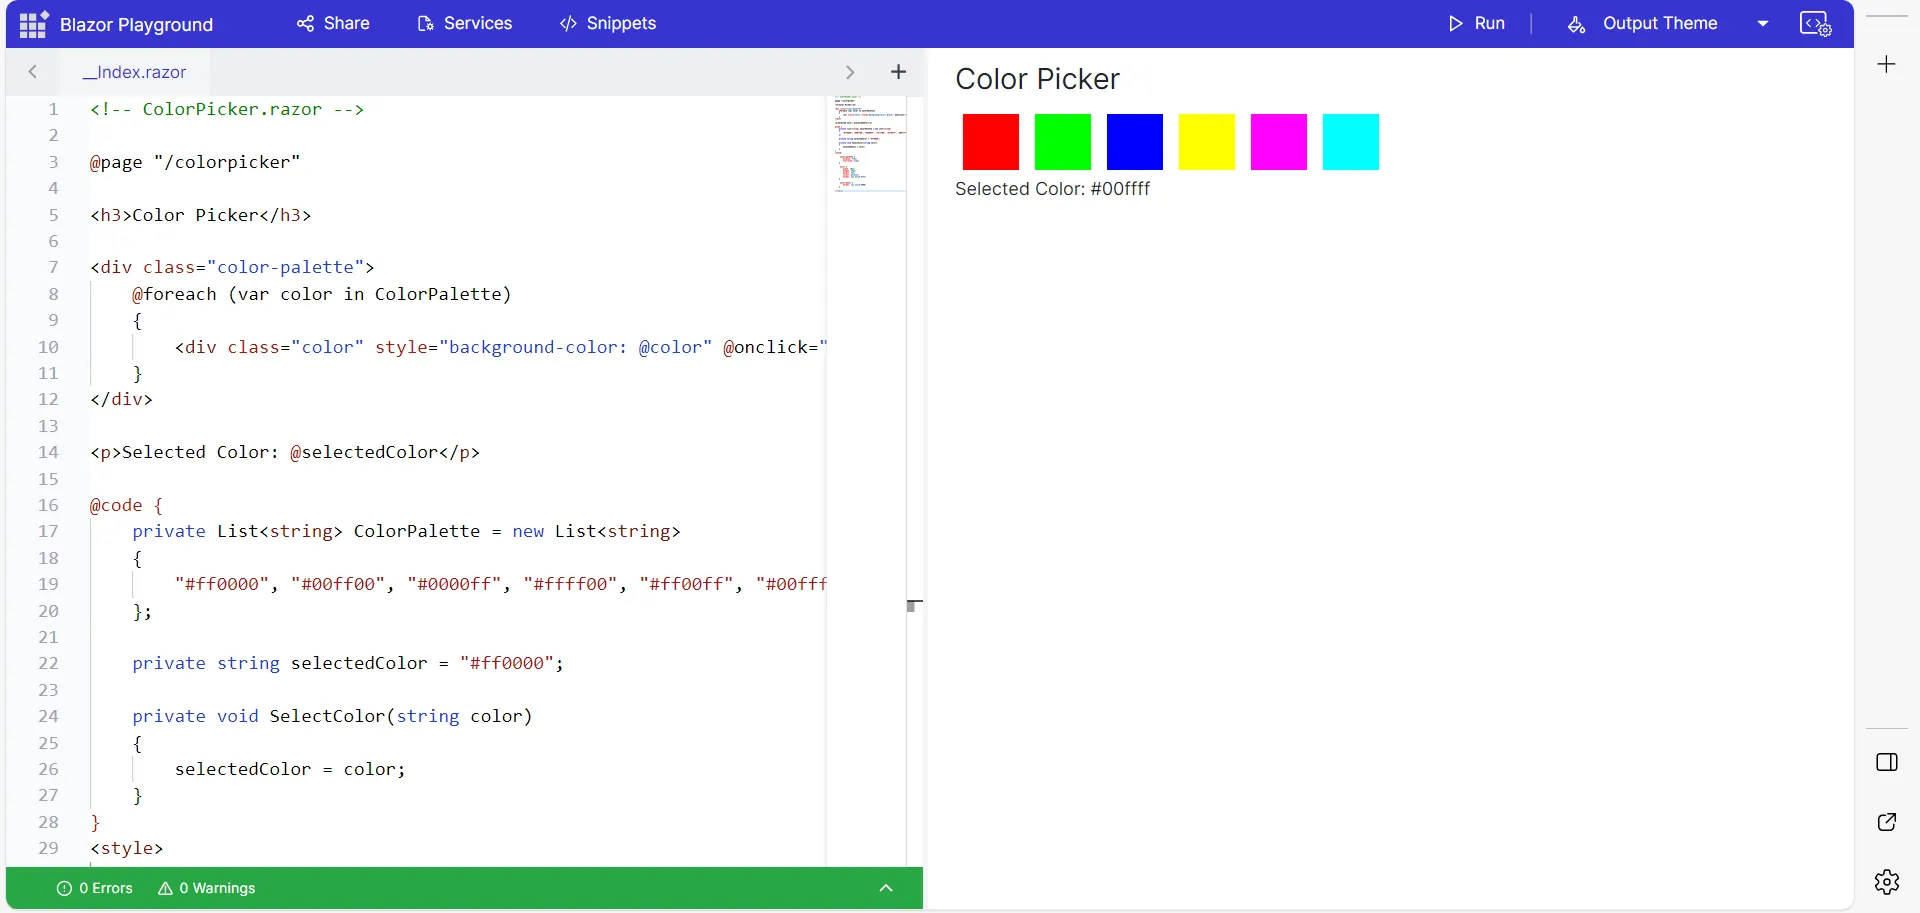
You can create a Blazor component in Blazor Playground by following these steps.
1. Open the Blazor Playground URL in your browser.
2. In the editor, add the following code:
<h3>Color Picker</h3>

<div class="color-palette">
    @foreach (var color in ColorPalette)
    {
        <div class="color" style="background-color: @color" @onclick="() => SelectColor(color)"></div>
    }
</div>

<p>Selected Color: @selectedColor</p>

@code {
    private List<string> ColorPalette = new List<string>
    {
        "#ff0000", "#00ff00", "#0000ff", "#ffff00", "#ff00ff", "#00ffff"
    };

    private string selectedColor = "#ff0000";

    private void SelectColor(string color)
    {
        selectedColor = color;
    }
}
<style>

    .color-palette {
        display: flex;
        flex-wrap: wrap;
    }

    .color {
        width: 50px;
        height: 50px;
        margin: 5px;
        cursor: pointer;
        border: 2px solid #fff;
    }

    .color:hover {
        border: 2px solid #000;
    }

</style>
3. Press the Run button or Ctrl+R to execute the code. The output appears in the result view.
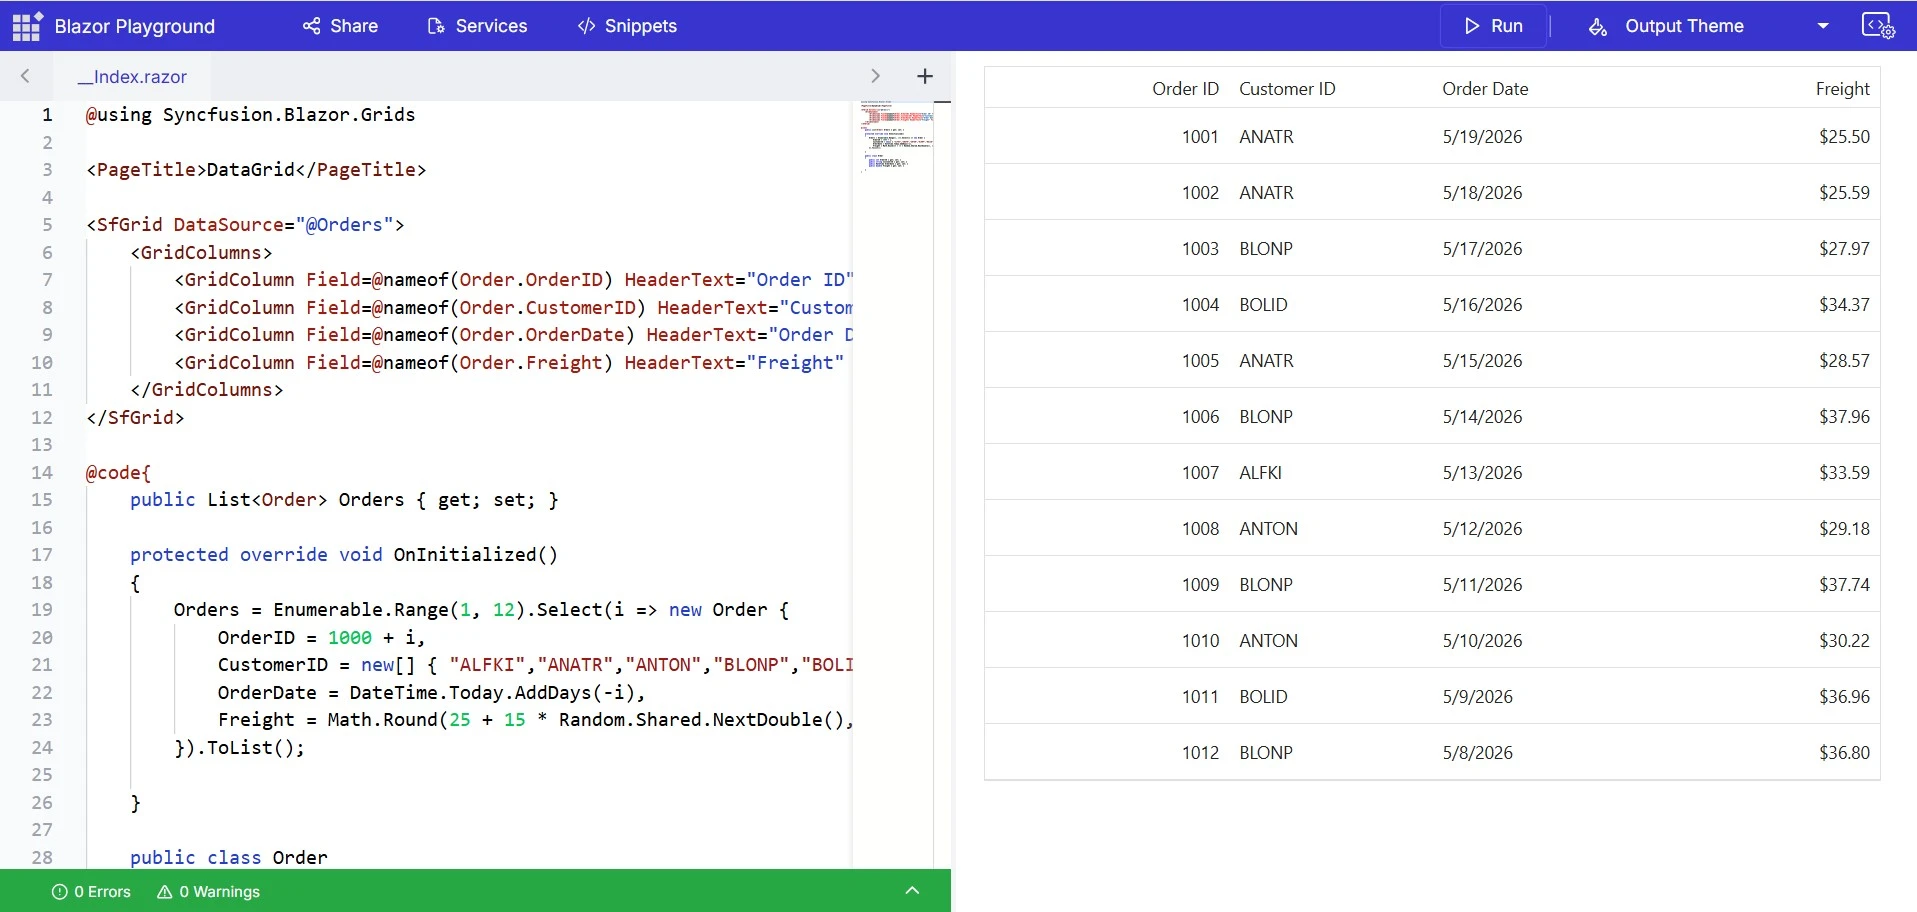
Add a Blazor Component
Blazor Playground is preconfigured with the Blazor package, stylesheets, and scripts. To use Blazor components in the Playground, import the required namespace and add the component as shown below:
1. Add the @using Syncfusion.Blazor.Grids namespace at the top of the editor. This namespace is provided by the Syncfusion.Blazor.Grid NuGet package.
@using Syncfusion.Blazor.Grids2. Add the Blazor DataGrid component in the editor.
@using Syncfusion.Blazor.Grids

<PageTitle>DataGrid</PageTitle>

<SfGrid DataSource="@Orders">
    <GridColumns>
        <GridColumn Field=@nameof(Order.OrderID) HeaderText="Order ID" TextAlign="Syncfusion.Blazor.Grids.TextAlign.Right" Width="120" />
        <GridColumn Field=@nameof(Order.CustomerID) HeaderText="Customer ID" Width="100" />
        <GridColumn Field=@nameof(Order.OrderDate) HeaderText="Order Date" Format="d" Type="Syncfusion.Blazor.Grids.ColumnType.Date" Width="100" />
        <GridColumn Field=@nameof(Order.Freight) HeaderText="Freight" Format="C2" TextAlign="Syncfusion.Blazor.Grids.TextAlign.Right" Width="120" />
    </GridColumns>
</SfGrid>

@code {
    public List<Order> Orders { get; set; }

    protected override void OnInitialized()
    {
        Orders = Enumerable.Range(1, 12).Select(i => new Order {
            OrderID = 1000 + i,
            CustomerID = new[] { "ALFKI","ANATR","ANTON","BLONP","BOLID" }[Random.Shared.Next(5)],
            OrderDate = DateTime.Today.AddDays(-i),
            Freight = Math.Round(25 + 15 * Random.Shared.NextDouble(), 2)
        }).ToList();

    }

    public class Order
    {
        public int OrderID { get; set; }
        public string CustomerID { get; set; }
        public DateTime OrderDate { get; set; }
        public double Freight { get; set; }

    }
}
3. Press the Run button or Ctrl+R to execute the code.