Lane in Blazor Diagram Component
14 Nov 202524 minutes to read
A Lane is a functional unit or responsible department in a business process that helps to map a process within the functional unit or between other functional units.
Multiple lanes can be added to a swimlane and rendered in the diagram. Lanes are automatically stacked inside the swimlane in the order they are added.
How to Create an Empty Lane
Note: For a horizontal swimlane, set the Height of the lane. For a vertical swimlane, set the Width of the lane.
The following code example explains how to define a swimlane with lane.
@using Syncfusion.Blazor.Diagram

<SfDiagramComponent Height="600px" Swimlanes="@SwimlaneCollections" NodeCreating="@OnNodeCreating" />

@code
{
    //Define diagram's swimlane collection.
    DiagramObjectCollection<Swimlane> SwimlaneCollections = new DiagramObjectCollection<Swimlane>();

    protected override void OnInitialized()
    {
        // A swimlane is created and stored in the swimlanes collection.
        Swimlane swimlane = new Swimlane()
        {
            Header = new SwimlaneHeader()
            {
                Annotation = new ShapeAnnotation()
                {
                    Content = "SALES PROCESS FLOW CHART"
                },
                Height = 50,
            },
            OffsetX = 400, OffsetY = 200, Height = 120, Width = 450,
            Lanes = new DiagramObjectCollection<Lane>()
            {
                new Lane(){Height = 100},
            }
        };
        // Add swimlane.
        SwimlaneCollections.Add(swimlane);
    }
    private void OnNodeCreating(IDiagramObject obj)
    {
       if (obj is Swimlane swimlane)
       {
         swimlane.Header.Style = new TextStyle()
             {
                 Fill = "#5b9bd5",
                 StrokeColor = "#5b9bd5"
             };
         foreach (Phase phase in swimlane.Phases)
         {
             phase.Style = new ShapeStyle() { Fill = "#5b9bd5", StrokeColor = "#5b9bd5" };
         }
         foreach (Lane lane in swimlane.Lanes)
         {
             lane.Header.Style = new TextStyle() { Fill = "#5b9bd5", StrokeColor = "#5b9bd5" };
         }
       }
    }
}
A complete working sample can be downloaded from GitHub.
How to Create and Customize Lane Header
- Use the Header property to describe the lane and customize the header appearance.
- Control the size of the lane header using the header Width and Height properties.
- Set the header appearance using the Style property.
The following code example shows how to define and customize a lane header.
@using Syncfusion.Blazor.Diagram

<SfDiagramComponent Height="600px" Swimlanes="@SwimlaneCollections"  NodeCreating="@OnNodeCreating"/>

@code
{
    //Define diagram's swimlane collection.
    DiagramObjectCollection<Swimlane> SwimlaneCollections = new DiagramObjectCollection<Swimlane>();

    protected override void OnInitialized()
    {
        // A swimlane is created and stored in the swimlanes collection.
        Swimlane swimlane = new Swimlane()
            {
                Header = new SwimlaneHeader()
                {
                    Annotation = new ShapeAnnotation()
                    {
                        Content = "SALES PROCESS FLOW CHART"
                    },
                    Height = 50,
                },
                OffsetX = 400,
                OffsetY = 200,
                Height = 120,
                Width = 450,
                Lanes = new DiagramObjectCollection<Lane>()
                {
                    new Lane(){Height = 100,
                    Header = new SwimlaneHeader(){
                        Width = 30,
                        Style = new TextStyle(){ Fill = "Teal"},
                        Annotation = new ShapeAnnotation(){ Content = "Consumer", Style = new TextStyle(){ Color = "White", TextDecoration = TextDecoration.Underline, Italic = true, Bold = true} }
                    } },
                }
            };
    // Add swimlane.
    SwimlaneCollections.Add(swimlane);
    }
    private void OnNodeCreating(IDiagramObject obj)
    {
       if (obj is Swimlane swimlane)
       {
           swimlane.Header.Style = new TextStyle()
           {
                Fill = "#5b9bd5",
                StrokeColor = "#5b9bd5"
           };
           foreach (Phase phase in swimlane.Phases)
           {
                phase.Style = new ShapeStyle() { Fill = "#5b9bd5", StrokeColor = "#5b9bd5" };
           }
        }
    }
}
A complete working sample can be downloaded from GitHub.
Lane header annotations also support templates. Define HTML content at the tag level and enable template with the UseTemplate property. To assign different templates per lane, differentiate annotations by the ID property.
The following code example explains how to define a lane header annotation template:
@using Syncfusion.Blazor.Diagram

<SfDiagramComponent Height="600px" Swimlanes="@SwimlaneCollections">
    <DiagramTemplates>
        <AnnotationTemplate>
            @if (context is Annotation annotation)
            {
                if (annotation.ID == "Lane 1")
                {
                    string ID = annotation.ID + "TemplateContent";
                    <div id="@ID" class="profile-card" style="width:100%;height:100%;display:flex;align-items:center; gap:10px">
                        <svg xmlns="http://www.w3.org/2000/svg" height="24" width="24" viewBox="0 0 24 24">
                            <g>
                                <ellipse cy="12" cx="12" ry="12" rx="12" fill="#000000" />
                                <path id="path1" transform="rotate(0,12,12) translate(6.06543695926666,6) scale(0.375,0.375)  " fill="#FFFFFF" d="M15.827007,0C20.406003,0 24.346007,3.1960449 24.346007,9.2930298 24.346007,13.259033 22.542005,17.289001 20.180997,19.791992L20.193005,19.791992C19.287,22.627014 20.736997,23.299011 20.966,23.376038 25.997008,25.090027 31.651002,28.317993 31.651002,31.626038L31.651002,32 0,32 0,31.626038C8.034749E-08,28.414001 5.6260008,25.161011 10.421,23.376038 10.766993,23.244995 12.422999,22.317017 11.497004,19.817993 9.1220035,17.321045 7.3279971,13.275024 7.3279971,9.2930298 7.3279971,3.1960449 11.245006,0 15.827007,0z" />
                            </g>
                        </svg>
                        <div class="profile-name" style="font-size:12px;font-weight:bold;">Users</div>
                    </div>
                }
            }
        </AnnotationTemplate>
    </DiagramTemplates>
</SfDiagramComponent>

@code
{
    //Define diagram's swimlane collection.
    DiagramObjectCollection<Swimlane> SwimlaneCollections = new DiagramObjectCollection<Swimlane>();

    protected override void OnInitialized()
    {
        // A swimlane is created and stored in the swimlanes collection.
        Swimlane swimlane = new Swimlane()
        {
            Header = new SwimlaneHeader()
            {
                Annotation = new ShapeAnnotation()
                {
                    Content = "SALES PROCESS FLOW CHART"
                },
                Height = 50,
            },
            OffsetX = 400,
            OffsetY = 200,
            Height = 120,
            Width = 450,
            Lanes = new DiagramObjectCollection<Lane>()
            {
                new Lane(){Height = 100,
                Header = new SwimlaneHeader(){
                    Width = 30,
                    Style = new TextStyle(){ Fill = "Teal"},
                    Annotation = new ShapeAnnotation(){
                        ID="Lane 1",
                        Content = "Lane 1",
                        UseTemplate = true,
                        Height = 50,
                        Width = 75,
                    },
                } },
            }
        };
        // Add swimlane.
        SwimlaneCollections.Add(swimlane);
    }
}
A complete working sample can be downloaded from GitHub
How to Add and Remove the Lane at Runtime
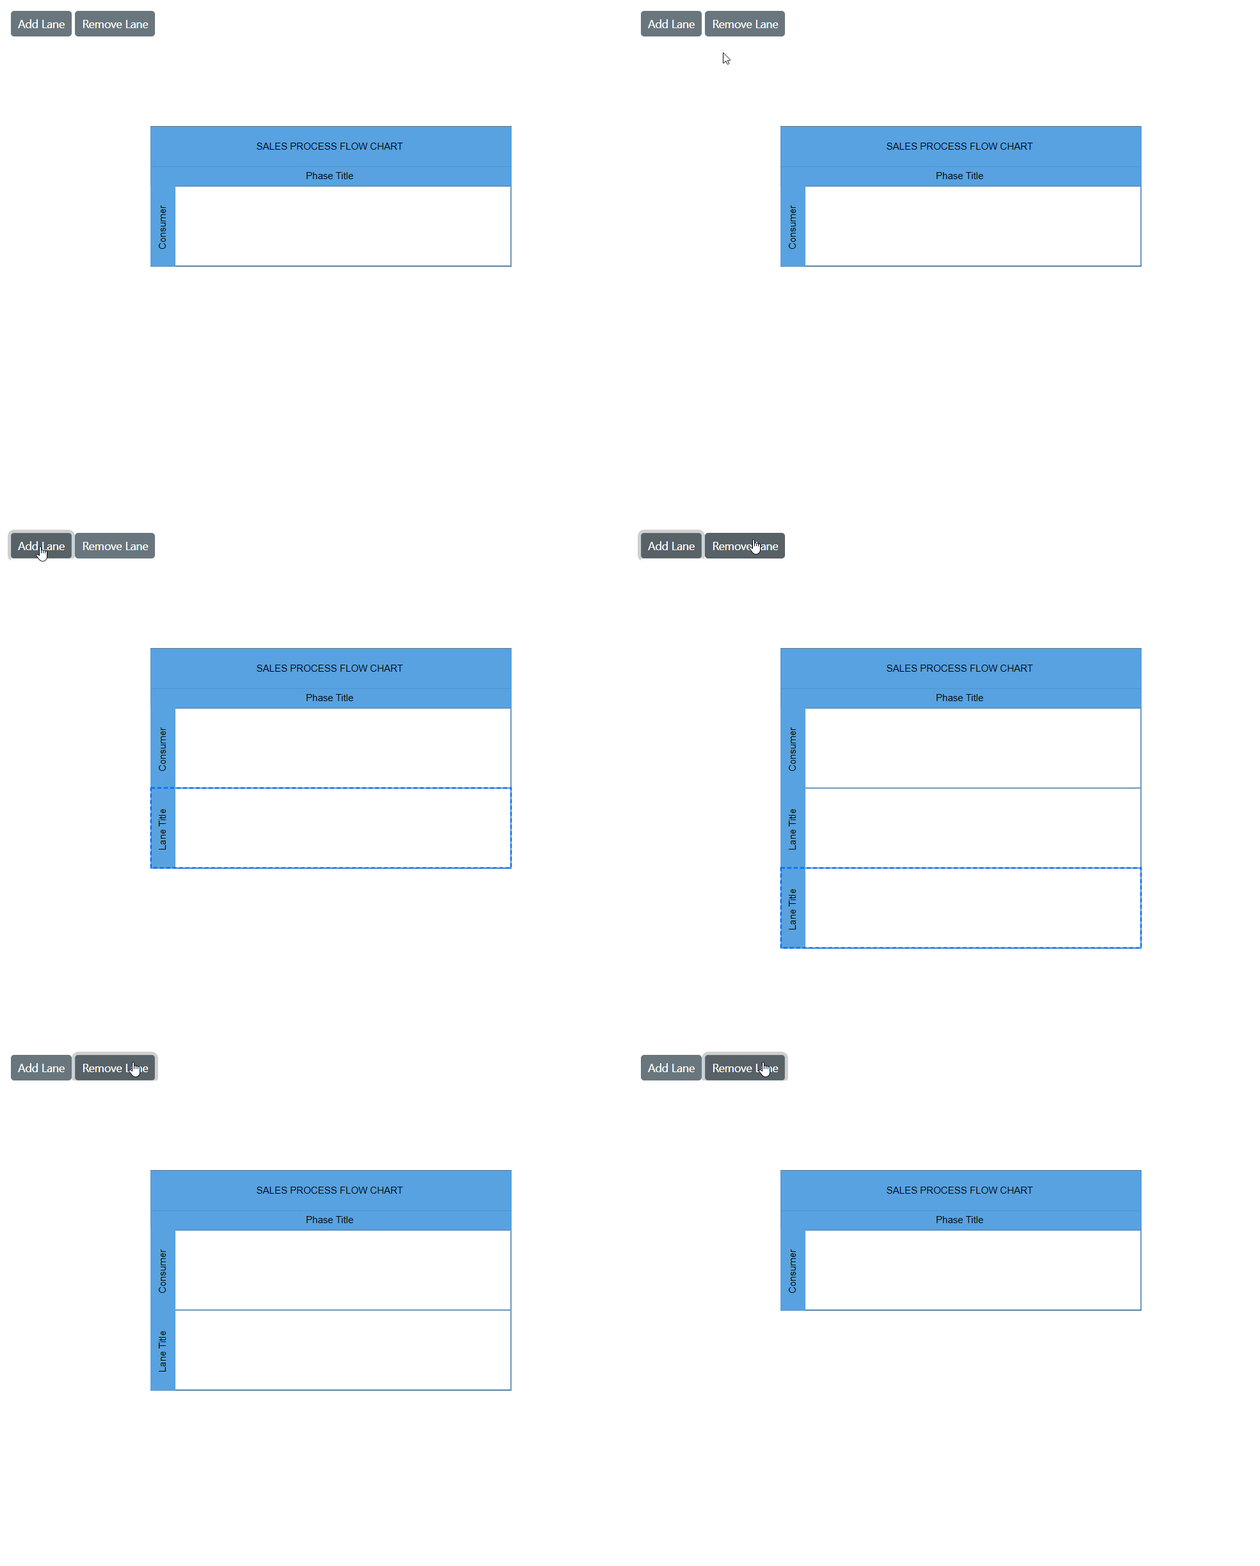
Add and remove a lane at runtime by using the Add and Remove methods of the Swimlane.Lanes Collection. The following code shows how to dynamically add and remove a lane in a swimlane.
@using Syncfusion.Blazor.Diagram
@using Syncfusion.Blazor.Buttons

<SfButton Content="Add Lane" OnClick="@AddLane" />
<SfButton Content="Remove Lane" OnClick="@RemoveLane" />
<SfDiagramComponent Height="600px" Swimlanes="@SwimlaneCollections" NodeCreating="@OnNodeCreating"/>

@code
{
    //Define diagram's swimlane collection.
    DiagramObjectCollection<Swimlane> SwimlaneCollections = new DiagramObjectCollection<Swimlane>();

        protected override void OnInitialized()
    {
        // A swimlane is created and stored in the swimlanes collection.
        Swimlane swimlane = new Swimlane()
            {
                Header = new SwimlaneHeader()
                {
                    Annotation = new ShapeAnnotation()
                    {
                        Content = "SALES PROCESS FLOW CHART"
                    },
                    Height = 50,
                },
                OffsetX = 400,
                OffsetY = 200,
                Height = 120,
                Width = 450,
                Lanes = new DiagramObjectCollection<Lane>()
                {
                    new Lane(){Height = 100,
                    Header = new SwimlaneHeader(){
                        Width = 30,
                        Annotation = new ShapeAnnotation(){ Content = "Consumer" }
                    } },
                }
            };
        // Add swimlane.
        SwimlaneCollections.Add(swimlane);
    }

    private void AddLane()
    {
        Lane newLane = new Lane() { Height = 100,
            Header = new SwimlaneHeader()
            {
                 Annotation = new ShapeAnnotation() { Content = "Lane title" }, Width = 30,
                  Style = new TextStyle() { Fill = "#5b9bd5", StrokeColor = "#5b9bd5" }
            }
        };
        SwimlaneCollections[0].Lanes.Add(newLane);
    }

    private void RemoveLane()
    {
        Lane lane = SwimlaneCollections[0].Lanes[^1];
        SwimlaneCollections[0].Lanes.Remove(lane);
    }
    private void OnNodeCreating(IDiagramObject obj)
    {
        if (obj is Swimlane swimlane)
        {
            swimlane.Header.Style = new TextStyle()
             {
                 Fill = "#5b9bd5",
                 StrokeColor = "#5b9bd5"
             };
             foreach (Phase phase in swimlane.Phases)
             {
                 phase.Style = new ShapeStyle() { Fill = "#5b9bd5", StrokeColor = "#5b9bd5" };
             }
             foreach (Lane lane in swimlane.Lanes)
             {
                 lane.Header.Style = new TextStyle() { Fill = "#5b9bd5", StrokeColor = "#5b9bd5" };
             }
        }
    }
}
A complete working sample can be downloaded from GitHub.

How to Add Children to Lane
Add nodes to the lane by adding a node collection to the Children collection of the lane.
The node LaneOffsetX and LaneOffsetY properties position the element within the lane canvas.
Note: By default, lane children maintain a 20 pixels padding from the lane canvas.
The following code example shows how to add nodes to a lane.
@using Syncfusion.Blazor.Diagram

<SfDiagramComponent Height="600px" Swimlanes="@SwimlaneCollections" NodeCreating="@OnNodeCreating"/>

@code
{
    //Define diagram's swimlane collection.
    DiagramObjectCollection<Swimlane> SwimlaneCollections = new DiagramObjectCollection<Swimlane>();

    protected override void OnInitialized()
    {
        // A swimlane is created and stored in the swimlanes collection.
        Swimlane swimlane = new Swimlane()
            {
                Header = new SwimlaneHeader()
                {
                    Annotation = new ShapeAnnotation()
                    {
                        Content = "SALES PROCESS FLOW CHART"
                    },
                    Height = 50,
                },
                OffsetX = 400,
                OffsetY = 200,
                Height = 120,
                Width = 450,
                Lanes = new DiagramObjectCollection<Lane>()
                {
                    new Lane(){Height = 100,
                    Header = new SwimlaneHeader(){
                        Width = 30,
                        Annotation = new ShapeAnnotation(){ Content = "Consumer" }
                    },
                    Children = new DiagramObjectCollection<Node>()
                    {
                        new Node(){Height = 50, Width = 50, LaneOffsetX = 100, LaneOffsetY = 30},
                        new Node(){Height = 50, Width = 50, LaneOffsetX = 250, LaneOffsetY = 30},
                    }
                    },
                }
            };
        // Add swimlane.
        SwimlaneCollections.Add(swimlane);
    }
    private void OnNodeCreating(IDiagramObject obj)
    {
        if (obj is Swimlane swimlane)
        {
             swimlane.Header.Style = new TextStyle()
             {
                 Fill = "#5b9bd5",
                 StrokeColor = "#5b9bd5"
             };
             foreach (Phase phase in swimlane.Phases)
             {
                 phase.Style = new ShapeStyle() { Fill = "#5b9bd5", StrokeColor = "#5b9bd5" };
             }
             foreach (Lane lane in swimlane.Lanes)
             {
                 lane.Header.Style = new TextStyle() { Fill = "#5b9bd5", StrokeColor = "#5b9bd5" };
             }
        }
        else if (obj is Node node)
        {
             node.Style = new ShapeStyle()
             {
                 Fill = "#5b9bd5",
                 StrokeColor = "#5b9bd5"
             };
        }
    }
}
A complete working sample can be downloaded from GitHub.
How to Set the Orientation of a Lane
The Orientation property in the symbol palette defines whether a lane is displayed horizontally or vertically. This property is particularly relevant when the lane is part of a symbol palette.
- Horizontal orientation: The lane is aligned horizontally.
- Vertical orientation: The lane is aligned vertically.
Below is an example demonstrating how to set the orientation for lanes in an SfSymbolPaletteComponent:
   @using Syncfusion.Blazor.Diagram
   @using Syncfusion.Blazor.Diagram.SymbolPalette
<div class="control-section">
    <div style="width:80%;">
        <div id="palette-space" class="sb-mobile-palette" style="border: 2px solid #b200ff">
            <SfSymbolPaletteComponent @ref="@symbolpalette" Height="300px" Width="200px"
                                      Palettes="@Palettes" SymbolHeight="60" SymbolWidth="60" SymbolMargin="@SymbolMargin">
            </SfSymbolPaletteComponent>
        </div>
    </div>
</div>
@code
{
    //Reference the symbolpreview.
    DiagramSize SymbolPreview;
    //Define symbol margin.
    SymbolMargin SymbolMargin = new SymbolMargin { Left = 15, Right = 15, Top = 15, Bottom = 15 };
    SfSymbolPaletteComponent symbolpalette;
    //Define palattes collection.
    DiagramObjectCollection<Palette> Palettes = new DiagramObjectCollection<Palette>();
    // Defines palette's swimlane-shape collection.
    DiagramObjectCollection<NodeBase> SwimlaneNodes = new DiagramObjectCollection<NodeBase>();
    protected override void OnInitialized()
    {
        InitPaletteModel();
    }
    private void InitPaletteModel()
    {
        Palettes = new DiagramObjectCollection<Palette>();
        SwimlaneNodes = new DiagramObjectCollection<NodeBase>();
        //create a horizontal lane.
        Lane horizontalLane = new Lane()
            {
                ID = "HorizontalSwimlane",
                Orientation = Orientation.Horizontal,
                Height = 100,
                Width = 150,
                // Style = new TextStyle() { Fill = "orange", StrokeColor = "black" },
                Header = new SwimlaneHeader()
                {
                    Annotation = new ShapeAnnotation() { Content = "Lane Title" },
                    Style = new TextStyle() { Fill = "lightblue", StrokeColor = "black" },
                    Width = 25,
                    Height = 100
                },
            };
        //create a vertical lane.
        Lane verticalLane = new Lane()
            {
                ID = "VerticalSwimlane",
                Orientation = Orientation.Vertical,
                Height = 150,
                Width = 100,
                // Style = new TextStyle() { Fill = "orange", StrokeColor = "black" },
                Header = new SwimlaneHeader()
                {
                    Annotation = new ShapeAnnotation() { Content = "Lane Title" },
                    Style = new TextStyle() { Fill = "lightblue", StrokeColor = "black" },
                    Width = 100,
                    Height = 25
                },
            };
        SwimlaneNodes = new DiagramObjectCollection<NodeBase>()
        {
            horizontalLane,
            verticalLane,
        };
        Palettes = new DiagramObjectCollection<Palette>()
        {
            new Palette(){Symbols =SwimlaneNodes,Title="Swimlane Shapes",ID="SwimlaneShapes" },
        };
      }
    }
A complete working sample can be downloaded from GitHub.
Header Selection and Resize
-
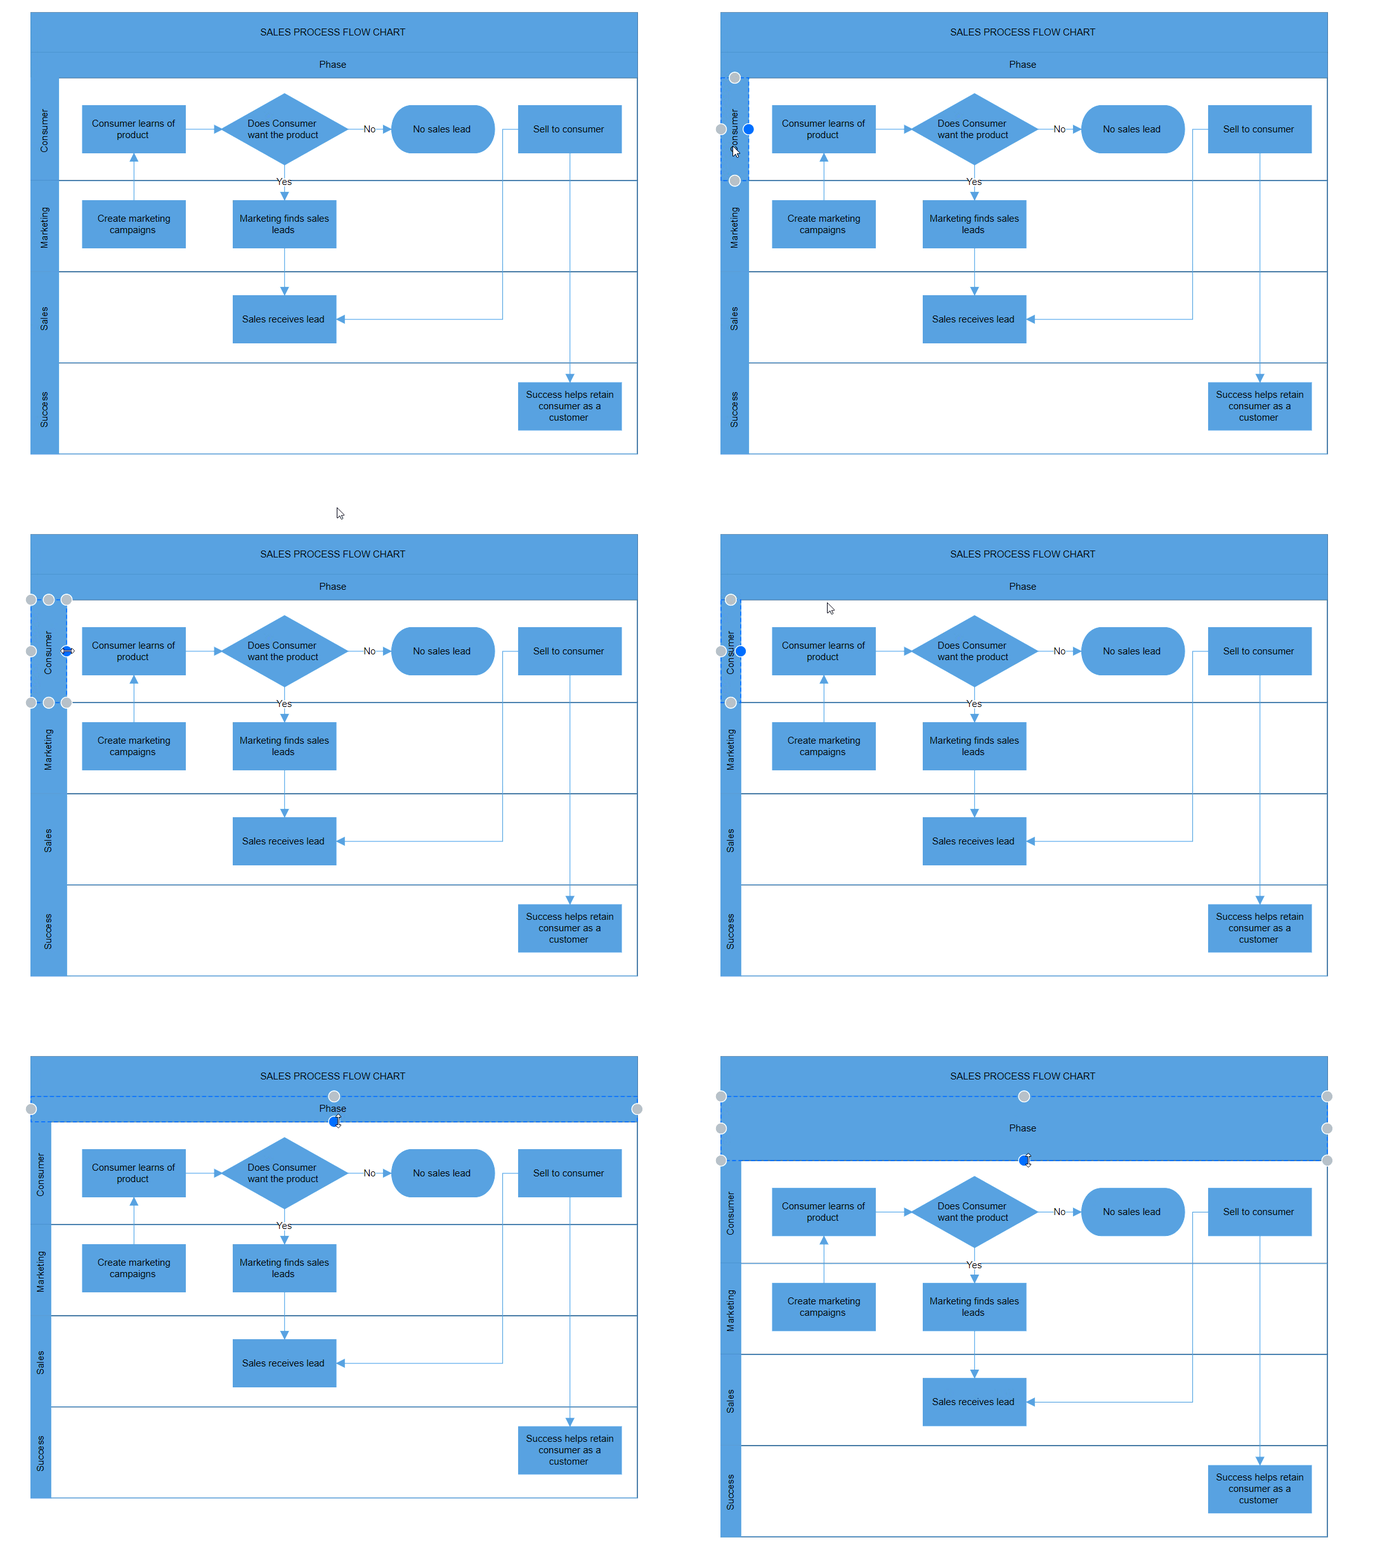
Select an individual lane header by clicking the header twice. The first click selects the lane, and the second click selects the header.
-
Resize an individual lane header. While resizing a lane, a 20 pixels distance is maintained from the lane children.
-
When an element is resized, the SizeChanging and SizeChanged events are triggered.
The following image shows how to select and resize the lane header.

How to Edit Lane Header
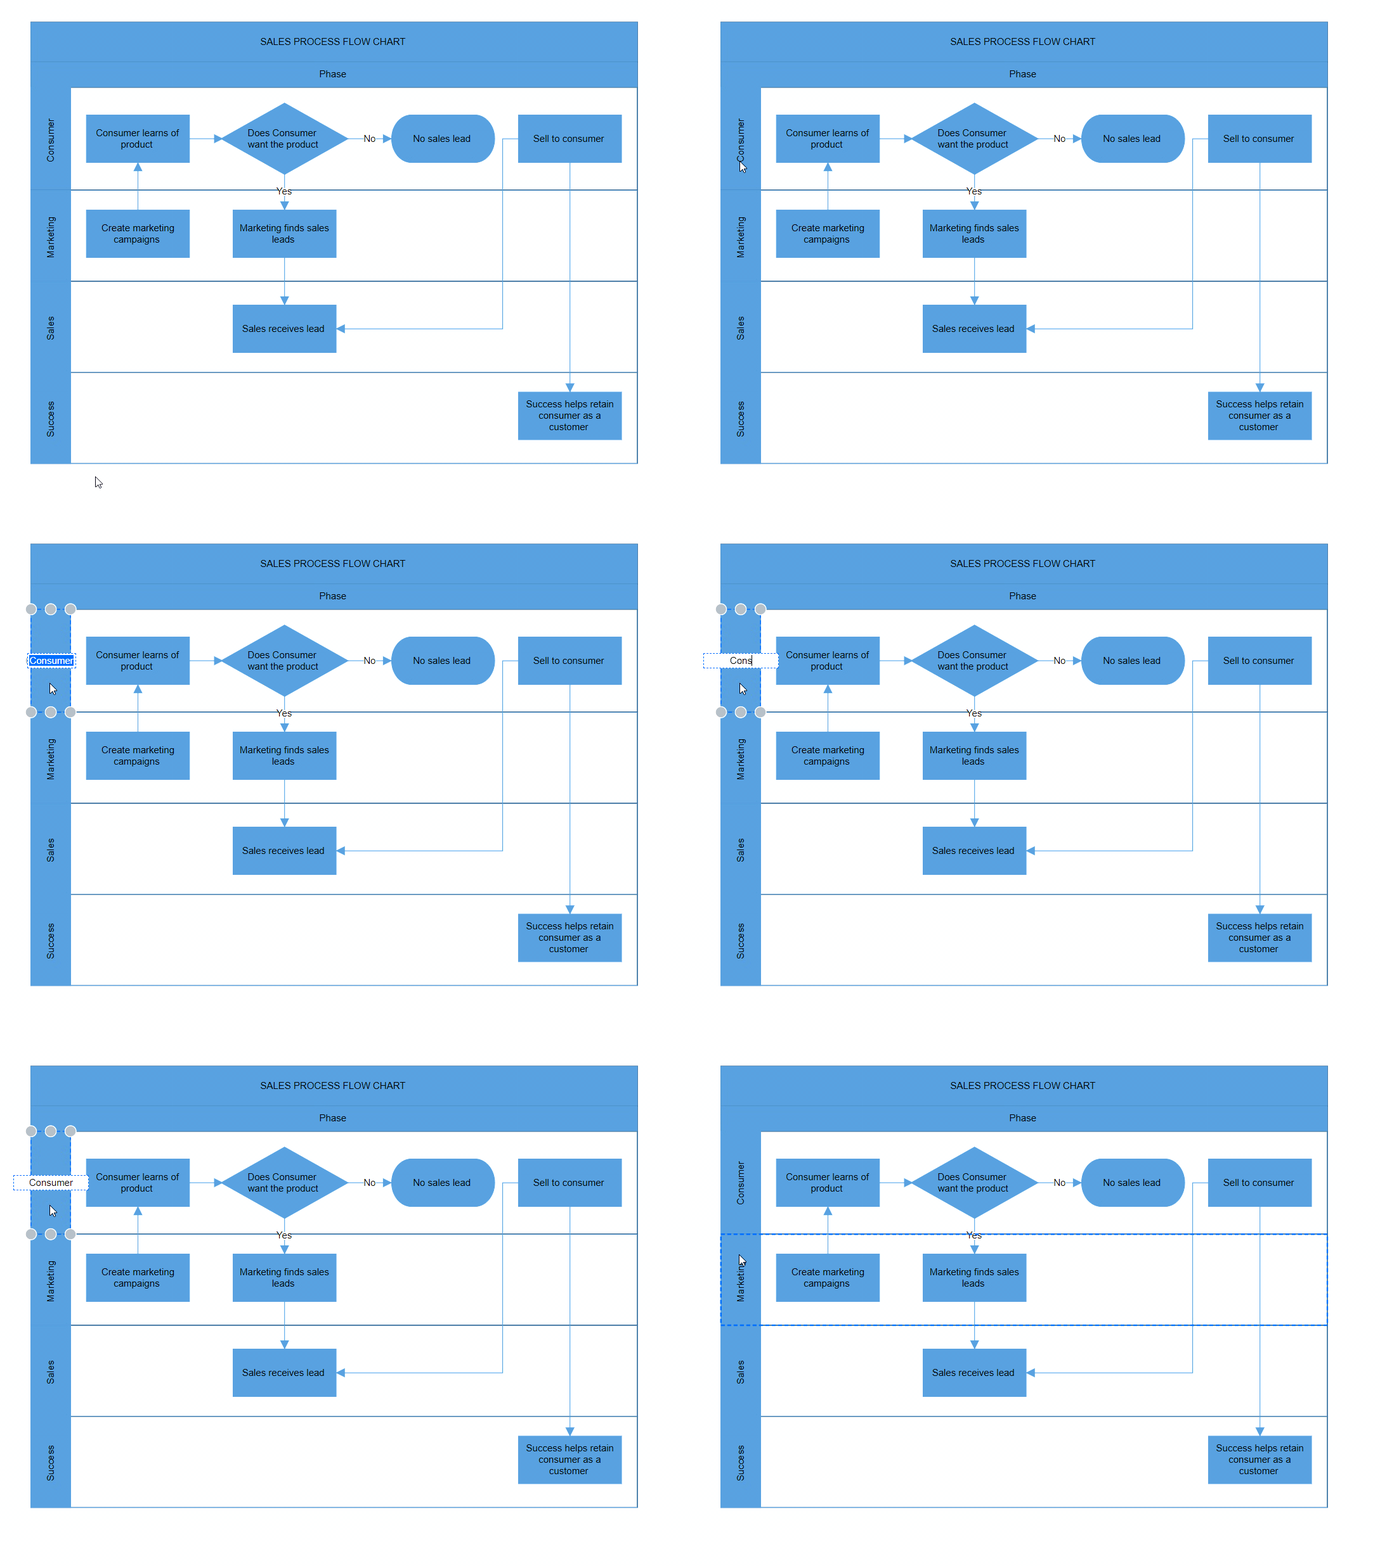
Lane headers can be edited at runtime. Double-click the header label to enable in-place editing of that specific header.
The following image demonstrates how to edit the lane header.
