Install Syncfusion® Blazor NuGet packages
23 Jul 20266 minutes to read
Syncfusion® publishes all Blazor components as NuGet packages on nuget.org. You can use the Syncfusion® Blazor NuGet packages in your Blazor application without installing the Syncfusion® installer. The sections below describe three ways to add the packages to your project: Package Manager UI, .NET CLI, and Package Manager Console.
Prerequisites
Before you begin, confirm the following:
- Visual Studio 2019 or later, or the .NET SDK, is installed and available on
PATH. - A Blazor project is created. See Get started with ASP.NET Core Blazor for details.
- The
nuget.orgfeed is configured in your environment. See Microsoft package sources documentation for details. - A valid Syncfusion® license key is available for development. See the licensing overview for details.
Overview
NuGet is a package management system for Visual Studio and the .NET SDK. It makes it easy to add, update, and remove external libraries in your application.
The Syncfusion® Blazor NuGet package, which contains all Syncfusion® Blazor components in a single package, is available beginning with v17.4.0.39 (Essential Studio® 2019 Volume 4).
The Syncfusion® Blazor UI components are also available separately as Individual NuGet packages beginning with v18.4.0.30 (Essential Studio® 2020 Volume 4). The NuGet packages are segregated based on the component usage and its namespace.
Installation using Package Manager UI
The NuGet Package Manager UI allows you to search, install, uninstall, and update Syncfusion® Blazor NuGet packages in your applications and solutions.
Follow the steps below to locate and install the Syncfusion® Blazor NuGet packages into a Blazor application:
-
Right-click on the Blazor application or solution in Solution Explorer and select Manage NuGet Packages… from the context menu.
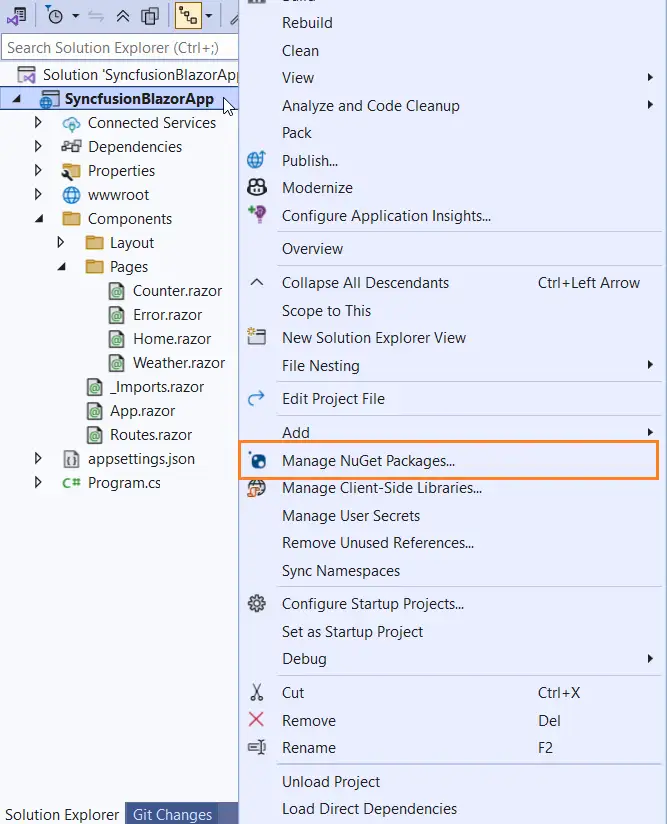
Alternatively, open the NuGet package manager in Visual Studio by selecting Tools → NuGet Package Manager → Manage NuGet Packages for Solution….
-
In the Manage NuGet Packages window, go to the Browse tab and type Syncfusion.Blazor in the search field. The window displays all Syncfusion® Blazor NuGet package options. Select the appropriate package based on the component requirements.
By default, the nuget.org package source is configured in Visual Studio. If
nuget.orgis not available, see the Microsoft package sources documentation to configure thenuget.orgfeed URL.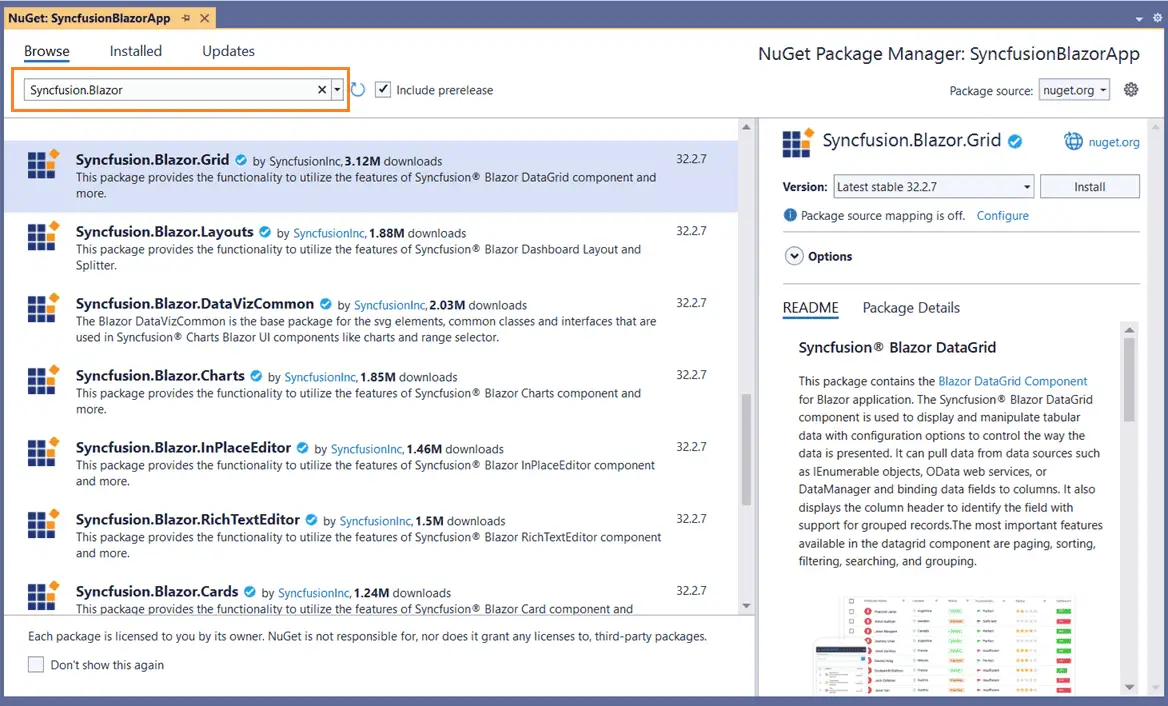
-
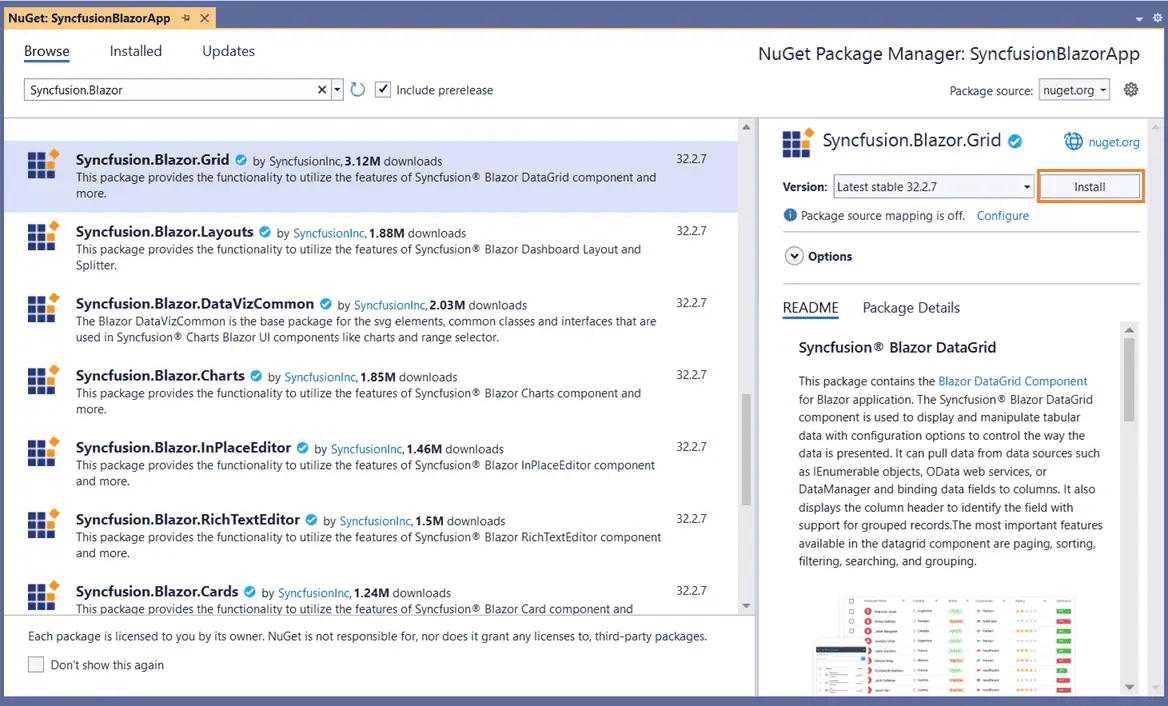
When a Blazor package is selected, the right side panel displays detailed information about that package.
-
By default, the latest version is selected. To install a specific release, select the required version from the available options, select Install, and accept the license terms. The package is added to the Blazor application.
-
After installation, the required Syncfusion® assemblies are available in your application. Build and run the application to start developing with the Syncfusion® Blazor components. See the Blazor documentation for further development assistance.
Installation using the .NET CLI
The .NET CLI provides functionality to add, restore, pack, publish, and manage packages without modifying project files. Use dotnet add package to add a package reference, and dotnet restore to install it.
Follow the steps below to install Syncfusion® Blazor NuGet packages using the .NET CLI.
- Open a command prompt and navigate to the directory that contains the Blazor application file.
-
Run the following command to install the NuGet package.
dotnet add package <PackageName>For example:
dotnet add package Syncfusion.Blazor.GridBy default, the command installs the latest version when no version flag is provided. Add the
-vparameter to specify a version:dotnet add package Syncfusion.Blazor.Grid -v 35.1.37. -
After the installation command completes, check the
.csprojfile to verify that the Syncfusion® Blazor package reference has been added to the Blazor application.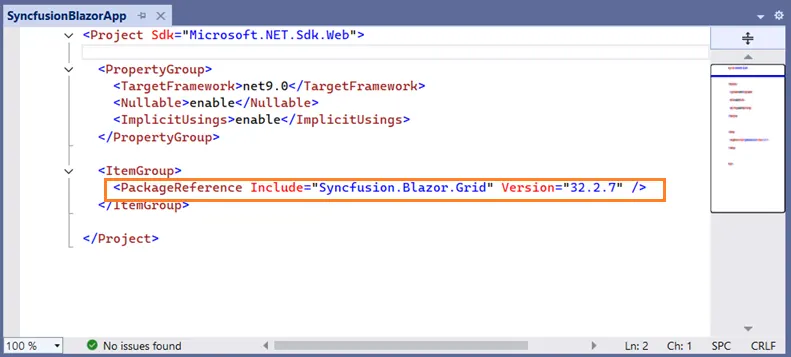
-
Run the dotnet restore command to restore all required packages to the application file.
- After installation, the required Syncfusion® assemblies are available in your application. Build and run the application to start developing with the Syncfusion® Blazor components. See the Blazor documentation for further development assistance.
Installation using Package Manager Console
The Package Manager Console lets you install NuGet packages by typing a command instead of searching for them in the UI. Follow the steps below to use the Package Manager Console to install Syncfusion® Blazor components as NuGet packages in a Blazor application.
-
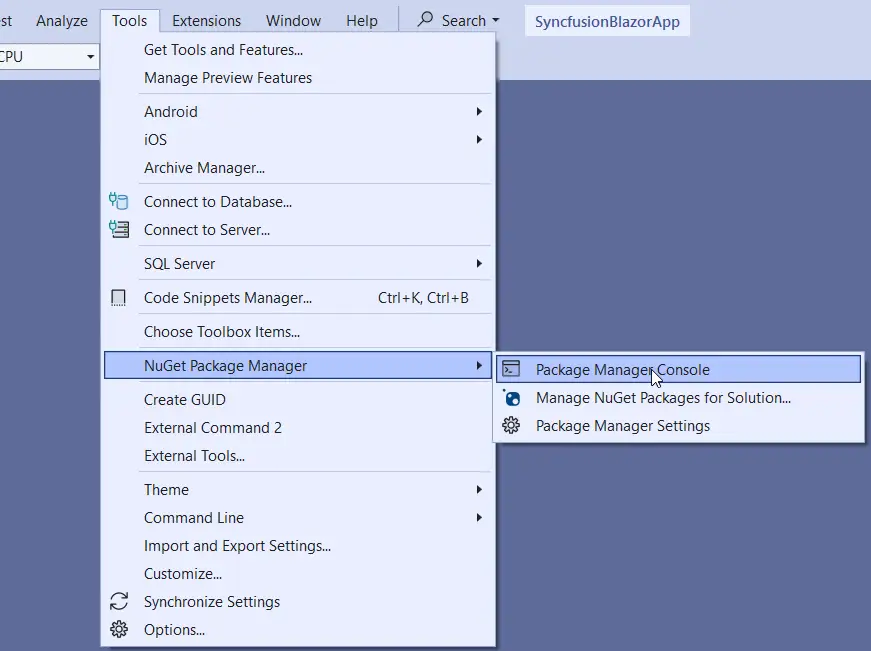
Open the Blazor application in Visual Studio, then go to Tools → NuGet Package Manager → Package Manager Console.
-
The Package Manager Console appears at the bottom of Visual Studio. Enter one of the following NuGet commands to install the Syncfusion® Blazor NuGet package.
Install the Syncfusion® Blazor NuGet package in the default project
Install-Package <PackageName>For example:
Install-Package Syncfusion.Blazor.GridBrowse Syncfusion® Blazor NuGet packages on NuGet.org.
Install the Syncfusion® Blazor NuGet package in a specific project
Install-Package <PackageName> -ProjectName <ProjectName>For example:
Install-Package Syncfusion.Blazor.Grid -ProjectName SyncfusionBlazorApp -
By default, the package is installed at the latest version. To install a specific Syncfusion® Blazor release, specify the
-Versionparameter with the Package Manager Console command.Install-Package Syncfusion.Blazor.Grid -Version 35.1.37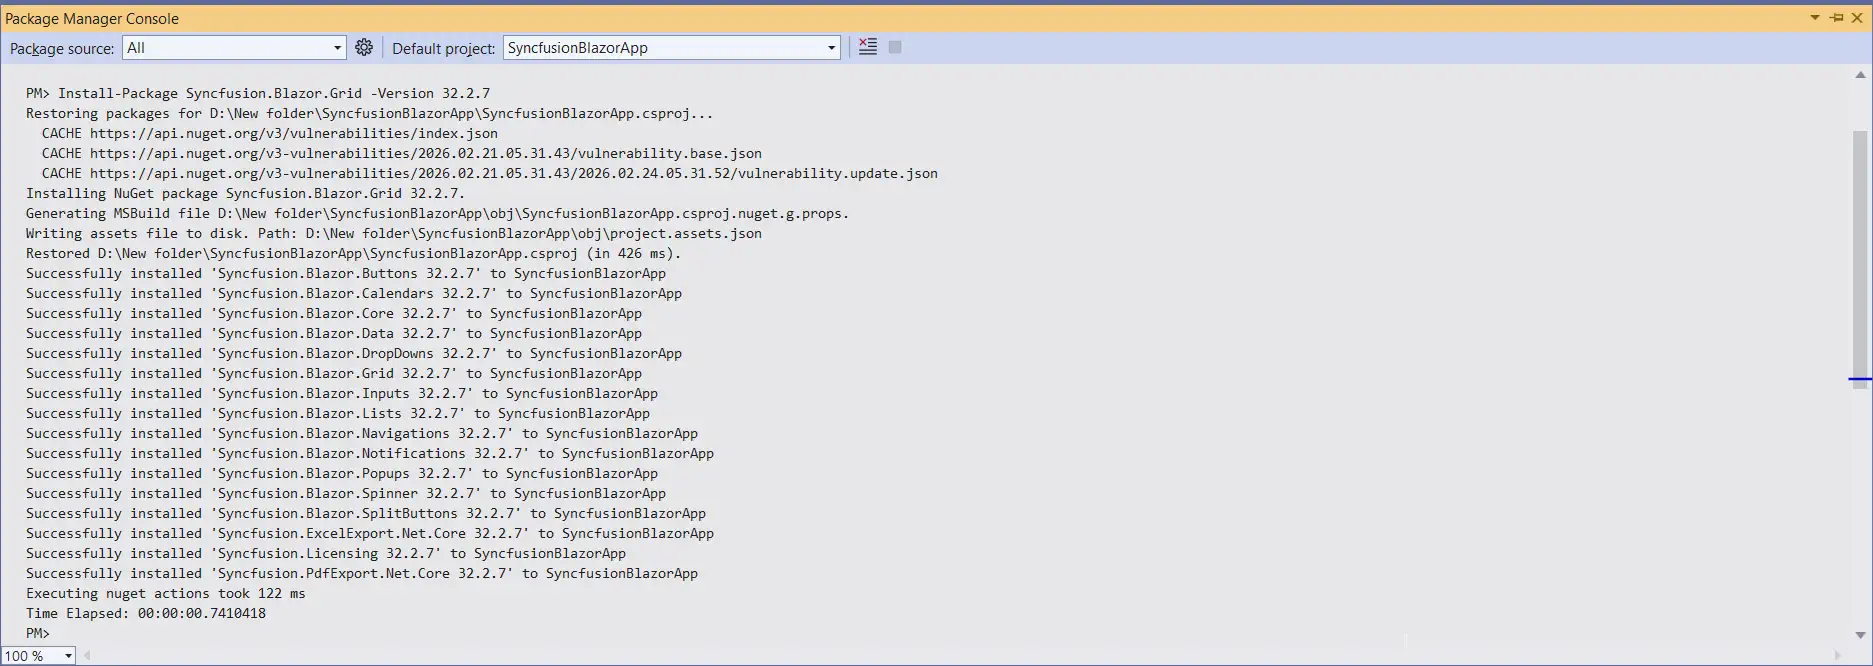
-
The Package Manager Console installs the Syncfusion® Blazor NuGet package and its dependencies. After installation finishes, check the console output for a confirmation message indicating the Syncfusion® Blazor package was added to the application.
-
After installation, the required Syncfusion® assemblies are available in your application. Build and run the application to start developing with the Syncfusion® Blazor components. See the Blazor documentation for further development assistance.