How can I help you?
Configuring options in Blazor Toast Component
17 Dec 202216 minutes to read
This section explains the steps required to customize the appearance of the toast using built-in APIs.
Title and content template
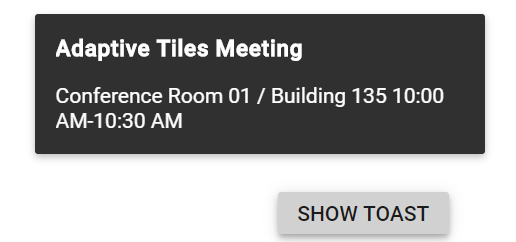
Toast can be created with the notification message. The message contains Title and content of the toasts. The title and contents are adaptable in any resolution.
NOTE
The Title or
Contentproperty can be given as HTML Element/element ID to a string that can be displayed as a toast.
@using Syncfusion.Blazor.Buttons
@using Syncfusion.Blazor.Notifications

<SfToast ID="toast_default" @ref="ToastObj" Title="Adaptive Tiles Meeting" Content="@ToastContent">
    <ToastPosition X="Center"></ToastPosition>
</SfToast>

<div class="col-lg-12 col-sm-12 col-md-12 center">
    <div id="toastBtnDefault" style="margin: auto;text-align: center">
        <SfButton @onclick="@ShowToast"> Show Toast </SfButton>
    </div>
</div>

<style>
    #toast_default .e-meeting::before {
        content: "\e705";
        font-size: 17px;
    }
</style>

@code {
    SfToast ToastObj;

    private string ToastContent = "Conference Room 01 / Building 135 10:00 AM-10:30 AM";

    private async Task ShowToast()
    {
       await this.ToastObj.ShowAsync();
    }
}
Specifying custom target
By default, the toast can be rendered in the document body. The target position can be changed for the toast rendering using the Target property. Based on the target, the Position will be updated.
Close button
By default, the ShowCloseButton is not enabled. It can be enabled by setting the true value. Before expiring the toast, use this button to close or destroy toasts manually.
Progress bar
By default, the ShowProgressBar is not enabled. If it is enabled, it can visually indicate how long it gets for the toast to expire. Based on the Timeout property, progress bar will appear.
Progress bar direction
By default, the ProgressDirection is set to “Rtl” and it will appear from right to left direction. The progressDirection can be changed to “Ltr” to make it appear from left to right direction.
Newest on top
By default, the newly created toasts will append next with existing toasts. The sequence can be changed like inserting before the toast by enabling the NewestOnTop.
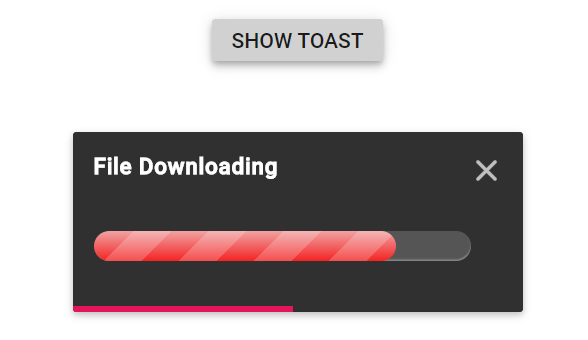
Here, the following sample demonstrates the combination of the Target, ShowCloseButton, ShowProgressBar and NewestOnTop properties in toast.
@using Syncfusion.Blazor.Buttons
@using Syncfusion.Blazor.Notifications

<div class="control-section toast-default-section">
    <SfToast ID="toast_default" @ref="ToastObj" Title="File Downloading" Content="@ToastContent"
             ShowCloseButton="true" ProgressDirection="Ltr" Target="#toast_target" NewestOnTop="true" ShowProgressBar="true">
        <ToastPosition X="Center"></ToastPosition>
    </SfToast>

    <div class="col-lg-12 col-sm-12 col-md-12 center">
        <div id="toastBtnDefault" style="margin: auto; text-align: center">
            <SfButton @onclick="@ShowToast"> Show Toast </SfButton>
        </div>
    </div>
    <br /><br />
    <div id='toast_target'></div>
</div>

@code {
    SfToast ToastObj;

    private string ToastContent = "<div class='progress'><span style='width: 80%'></span></div>";

    private async Task ShowToast()
    {
       await this.ToastObj.ShowAsync();
    }
}

<style>
    #toast_default .e-meeting::before {
        content: "\e705";
        font-size: 17px;
    }

    .progress {
        height: 20px;
        position: relative;
        margin: 20px 0 20px 0;
        background: #555;
        -moz-border-radius: 25px;
        -webkit-border-radius: 25px;
        border-radius: 25px;
        box-shadow: inset 0 -1px 1px rgba(255, 255, 255, 0.3);
    }

    .progress span {
        background-color: #f0a3a3;
        background-image: -webkit-gradient(linear, left top, left bottom, color-stop(0, #f0a3a3), color-stop(1, #f42323));
        display: block;
        height: 100%;
        border-radius: 10px;
        width: 50%;
        position: relative;
        overflow: hidden;
    }

    .progress span::after {
        background-image: -webkit-gradient(linear, 0 0, 100% 100%, color-stop(.25, rgba(255, 255, 255, .2)), color-stop(.25, transparent), color-stop(.5, transparent), color-stop(.5, rgba(255, 255, 255, .2)), color-stop(.75, rgba(255, 255, 255, .2)), color-stop(.75, transparent), to(transparent));
        content: "";
        position: absolute;
        top: 0;
        left: 0;
        bottom: 0;
        right: 0;
        background-size: 50px 50px;
        -webkit-animation: moveAnimate 2s linear infinite;
        overflow: hidden;
    }

    @@-webkit-keyframes moveAnimate {
        0% {
            background-position: 0 0;
        }

        100% {
            background-position: 50px 50px;
        }
    }
</style>
Width and height
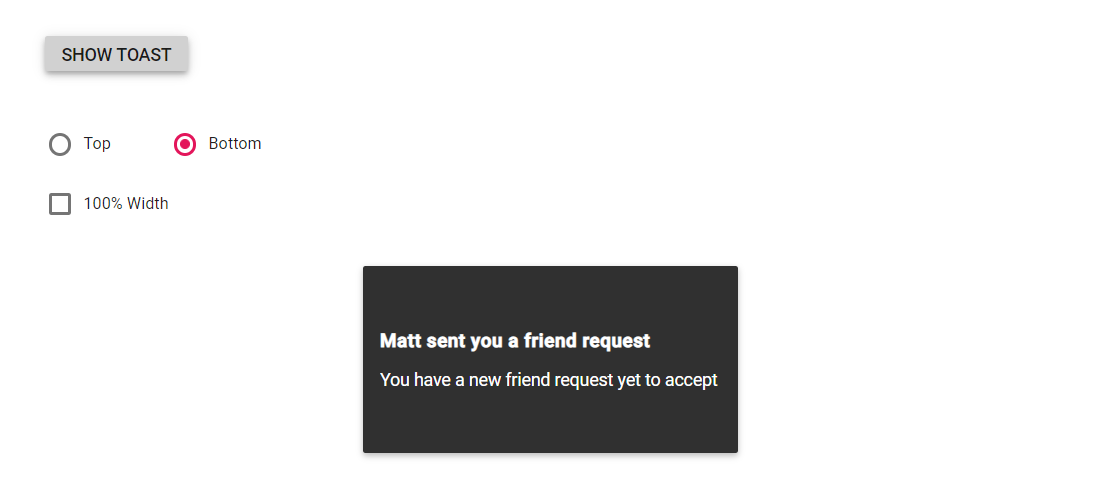
The dimensions of the toast can be set using the Width and Height properties. This will individually set all toasts. Different custom dimension toasts can be created.
By default, the toast can be rendered with 300px width with auto height.
NOTE
In mobile devices, the default width of the toast gets ‘100%’ width of the page. When the toast width is set as ‘100%’, the toast occupies full width and will be displayed at the top or bottom based on the position
Yproperty.
Both the width and height properties allow setting pixels/numbers/percentage. The number value is considered as pixels.
@using Syncfusion.Blazor.Buttons
@using Syncfusion.Blazor.Notifications

<div class="control-section toast-default-section">
    <SfToast @ref="ToastObj" Title="@Title" Width="@Width" Height="@Height" Content="@ToastContent">
        <ToastPosition X="Center" Y="@PositionY"></ToastPosition>
    </SfToast>

    <div class="col-lg-12 col-sm-12 col-md-12 center">
        <div id="toastBtnDefault" style="margin: auto; text-align: center">
            <SfButton @onclick="@ShowToast"> Show Toast </SfButton>
        </div>
    </div>

    <div class='row' style="padding-top: 20px" id="toast_pos_target">
        <table style="margin-left: 200px">
            <tr>
                <td>
                    <div style='padding:25px 0 0 0;'>
                        <SfRadioButton Name="toast" Label="Top" Value="Target"  TChecked="string" @bind-Checked="@RadioTopChecked" ValueChange="@RadioButtonChange"></SfRadioButton>
                    </div>
                </td>
                <td>
                    <div style='padding:25px 0 0 0;'>
                        <SfRadioButton Name="toast" Label="Bottom" Value="Global" TChecked="string" ValueChange="@RadioButtonChange" @bind-Checked="@RadioBottomChecked"></SfRadioButton>
                    </div>
                </td>
            </tr>
            <tr>
                <td>
                    <div style='padding:25px 0 0 0;'>
                        <SfCheckBox Label="100% Width" TChecked="bool" ValueChange="@CheckBoxChange"></SfCheckBox>
                    </div>
                </td>
            </tr>
        </table>
    </div>
    <br /><br />
    <div id='result'></div>
</div>

@code {
    SfToast ToastObj;

    private string Width { get; set; } = "400";
    private string Height { get; set; } = "120";
    private string PositionY { get; set; } = "Bottom";
    private string RadioBottomChecked { get; set; } = "Global";
    private string RadioTopChecked { get; set; } = "Target";

    private string Title { get; set; } = "Matt sent you a friend request";
    private string ToastContent { get; set; } = "You have a new friend request yet to accept";

    private async Task ShowToast()
    {
        await this.ToastObj.ShowAsync();
    }

    private async Task CheckBoxChange(Syncfusion.Blazor.Buttons.ChangeEventArgs<bool> e)
    {
        if (e.Checked)
        {
            await ToastObj.HideAsync();
            this.Width = "100%";
            this.Title = "";
            this.ToastContent = "<div class='e-custom'>Take a look at our next generation <b>Javascript</b> <a href='https://blazor.syncfusion.com/home/index.html' target='_blank'>LEARN MORE</a></div>";
            StateHasChanged();
        }
        else
        {
            await ToastObj.HideAsync();
            this.Width = "300";
            this.Title = "Matt sent you a friend request";
            this.ToastContent = "You have a new friend request yet to accept";
            StateHasChanged();
        }
    }

    private async Task RadioButtonChange(Syncfusion.Blazor.Buttons.ChangeArgs<string> e)
    {
        if (e.Value == "Target")
        {
            this.PositionY = "Top";
            await ToastObj.HideAsync();
            StateHasChanged();
        }
        else if (e.Value == "Global")
        {
            this.PositionY = "Bottom";
            await ToastObj.HideAsync();
            StateHasChanged();
        }
    }
}
Show or hide toast using service
You can initialize single toast instance and use it all over application by creating server. Refer below steps to create service to show toast from any page.
Step 1: Create a toast service to inject in pages to show toast messages from anywhere. Here, title and content can be passed to show the toast message.
public class ToastOption
{
    public string Title { get; set; }
    public string Content { get; set; }
}

public class ToastService
{
    public event Action<ToastOption> ShowToastTrigger;
    public void ShowToast(ToastOption options)
    {
        //Invoke ToastComponent to update and show the toast with messages
        this.ShowToastTrigger.Invoke(options);
    }
}
Step 2: Add the ToastService to services collection in Program.cs.
using BlazorApp.Data;
using Microsoft.AspNetCore.Components;
using Microsoft.AspNetCore.Components.Web;
using Syncfusion.Blazor;
using BlazorApp.Components;

var builder = WebApplication.CreateBuilder(args);

// Add services to the container.
builder.Services.AddRazorPages();
builder.Services.AddServerSideBlazor();
builder.Services.AddSingleton<WeatherForecastService>();
builder.Services.AddSingleton<ToastService>();
builder.Services.AddSyncfusionBlazor();

var app = builder.Build();

// Configure the HTTP request pipeline.
if (!app.Environment.IsDevelopment())
{
    app.UseExceptionHandler("/Error");
    // The default HSTS value is 30 days. You may want to change this for production scenarios, see https://aka.ms/aspnetcore-hsts.
    app.UseHsts();
}

app.UseHttpsRedirection();

app.UseStaticFiles();

app.UseRouting();

app.MapBlazorHub();
app.MapFallbackToPage("/_Host");

app.Run();
Step 3: Create ToastComponent which shows SfToast based on ToastService notification.
@using Syncfusion.Blazor.Notifications;
@inject ToastService ToastService

<SfToast @ref="Toast" Timeout=2000>
    <ToastTemplates>
        <Title>
            @Options.Title
        </Title>
        <Content>
            @Options.Content
        </Content>
    </ToastTemplates>
    <ToastPosition X="Right"></ToastPosition>
</SfToast>

@code{

    SfToast Toast;

    private bool IsToastVisible { get; set; } = false;

    private ToastOption Options = new ToastOption();

    protected override void OnInitialized()
    {
        ToastService.ShowToastTrigger += (ToastOption options) =>
        {
            InvokeAsync(() =>
            {
                this.Options.Title = options.Title;
                this.Options.Content = options.Content;
                this.IsToastVisible = true;
                this.StateHasChanged();
                this.Toast.ShowAsync();
            });
        };
        base.OnInitialized();
    }
}
Step 4: Add ToastComponent create in above step in MainLayout.razor.
@inherits LayoutComponentBase
@using BlazorApp.Components;

<PageTitle>BlazorApp</PageTitle>

<div class="page">
    <div class="sidebar">
        <NavMenu />
    </div>

    <main>
        <div class="top-row px-4">
            <a href="https://docs.microsoft.com/aspnet/" target="_blank">About</a>
        </div>

        <article class="content px-4">
            @Body
        </article>
    </main>
</div>
<ToastComponent />
Step 5: Now, you can inject ToastService in any page and call ToastService.ShowToast() method to show toast notifications.
@page "/"
@using BlazorApp.Components
@inject ToastService ToastService

<button class="e-btn" @onclick="@ShowToast"> Show Toast</button>

@code {
    private void ShowToast()
    {
        this.ToastService.ShowToast(new ToastOption()
        {
            Title = "Toast Title",
            Content = "Toast content"
        });
    }
}
NOTE