How can I help you?
Getting Started with WPF Blazor Application
23 Mar 20264 minutes to read
This section describes how to create and run a WPF Blazor application (.NET WPF Blazor) that integrates Syncfusion® Blazor components.
To get started quickly with a WPF Blazor app, watch the following video.
What is WPF Blazor App?
A WPF Blazor App hosts a Blazor Web App inside a WPF Application using the BlazorWebView control. This enables the Blazor Web App to integrate with desktop platform features and WPF UI. The BlazorWebView can be added on any WPF page and pointed to the Blazor app’s root component. Blazor components execute in the .NET process and render their web UI into the embedded web-view control. WPF Blazor Apps run on platforms supported by WPF.
Visual Studio provides the WPF Application template to create WPF Blazor Apps.
Prerequisites
Create a new WPF Blazor App in Visual Studio
To create a WPF Blazor App using Visual Studio, follow the comprehensive steps in the Microsoft Templates documentation. Ensuring and understanding each step in the official guide establishes the foundation required to continue with this documentation.
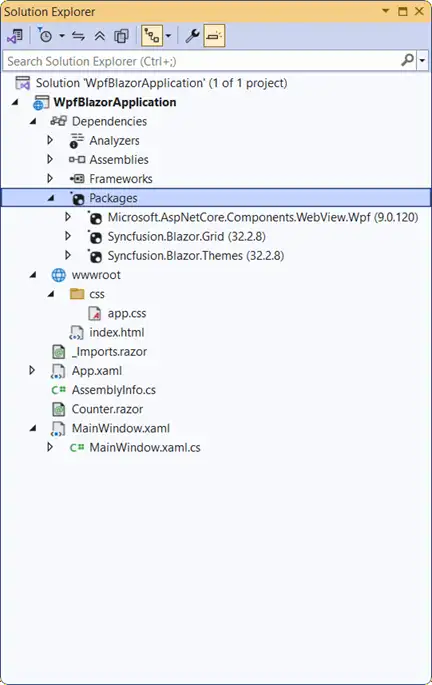
Install Syncfusion® Blazor Grid and Themes NuGet in the App
To add the Blazor DataGrid component in the app, open the NuGet Package Manager in Visual Studio (Tools → NuGet Package Manager → Manage NuGet Packages for Solution), then search and install Syncfusion.Blazor.Grid and Syncfusion.Blazor.Themes. Alternatively, run the following commands in the Package Manager Console to achieve the same.
Install-Package Syncfusion.Blazor.Grid -Version 33.2.3
Install-Package Syncfusion.Blazor.Themes -Version 33.2.3
NOTE
Ensure the package Microsoft.AspNetCore.Components.WebView.Wpf is installed at version
8.0.16or later. For details, see the package page in NuGet.
NOTE
Syncfusion® Blazor components are available in nuget.org. Refer to the NuGet packages topic for the available NuGet package list with component details.
Add Import Namespaces
Open the ~/_Imports.razor file and import the Syncfusion.Blazor and Syncfusion.Blazor.Grids namespaces:
@using Syncfusion.Blazor
@using Syncfusion.Blazor.Grids
Register Syncfusion Blazor Service
Register the Syncfusion Blazor service in the MainWindow.xaml.cs file of the WPF Blazor App.
using Syncfusion.Blazor;
....
serviceCollection.AddSyncfusionBlazor();
....
Add stylesheet and script resources
The theme stylesheet and script can be accessed from NuGet through Static Web Assets. Include the stylesheet in the <head> and the script at the end of the <body> in the ~wwwroot/index.html file as shown below:
<head>
    ....
    <link href="_content/Syncfusion.Blazor.Themes/bootstrap5.css" rel="stylesheet" />
</head>

<body>
    ....
    <script src="_content/Syncfusion.Blazor.Core/scripts/syncfusion-blazor.min.js" type="text/javascript"></script>
</body>
NOTE
Check out the Blazor Themes topic to discover various methods (Static Web Assets, CDN, and CRG) for referencing themes in the Blazor application. Also, see Adding Script Reference topic to learn different approaches for adding script references in the Blazor application.
Add Syncfusion Blazor component
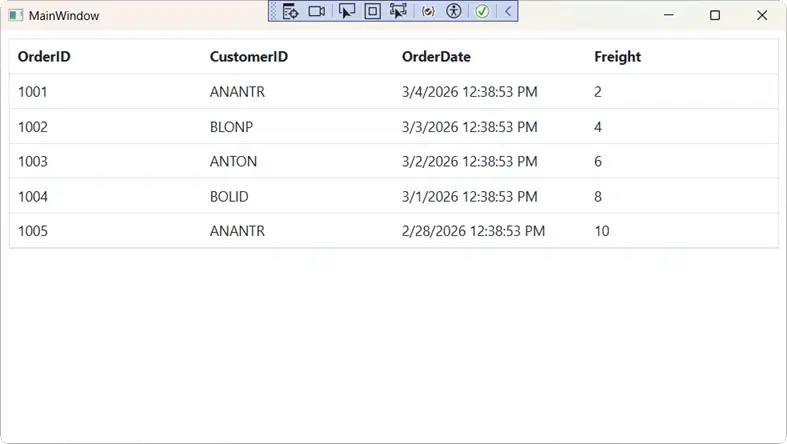
Add a Syncfusion Blazor component to any Razor file in the Blazor project. The example below adds the Blazor Grid component into ~/Counter.razor file.
<SfGrid DataSource="@Orders" />

@code {
    public List<Order> Orders { get; set; }

    protected override void OnInitialized()
    {
        Orders = Enumerable.Range(1, 5).Select(x => new Order()
        {
            OrderID = 1000 + x,
            CustomerID = (new string[] { "ALFKI", "ANANTR", "ANTON", "BLONP", "BOLID" })[new Random().Next(5)],
            Freight = 2 * x,
            OrderDate = DateTime.Now.AddDays(-x),
        }).ToList();
    }

    public class Order
    {
        public int? OrderID { get; set; }
        public string CustomerID { get; set; }
        public DateTime? OrderDate { get; set; }
        public double? Freight { get; set; }
    }
}
In the Visual Studio toolbar, click the Start button (or press F5) to build and run the application.

NOTE
View Sample in GitHub