Data Binding in Blazor ListView Component
23 Jun 202613 minutes to read
ListView provides an option to load the data either from local dataSource or remote data services. This can be done through the DataSource property that supports the data type of array or DataManager. ListView supports different kind of data services such as OData, OData V4, and Web API, and data formats like XML, JSON, and, JSONP with the help of DataManager Adaptors.
| Fields | Type | Description |
|---|---|---|
| Id | string | Specifies ID attribute of list item, mapped in dataSource. |
| Text | string | Specifies list item display text field. |
| IsChecked | string | Specifies checked status of list item. |
| Enabled | string | Specifies enabled state of list item. |
| IconCss | string | Specifies the icon class of each list item that will be added before to the list item text. |
| Child | string | Specifies child dataSource fields. |
| Tooltip | string | Specifies tooltip title text field. |
| GroupBy | string | Specifies category of each list item. |
| HtmlAttributes | string | Specifies list item html attributes field. |
NOTE
When complex data bind to ListView, you should map the
ListViewFieldSettingsproperly. Otherwise, the ListView properties remains as undefined or null.
Bind to local data
Local data can be represented in Array of JSON data:
Array of JSON data
ListView can generate its list items through an array of complex data. To get it work properly, you should map the appropriate columns to the ListViewFieldSettings property.
@using Syncfusion.Blazor.Lists
<SfListView DataSource="@Data">
    <ListViewFieldSettings TValue="DataModel" Id="Id" Text="Text"></ListViewFieldSettings>
</SfListView>

@code {
   public string HeaderTitle = "Listview";

    List<DataModel> Data = new List<DataModel>();

    protected override void OnInitialized()
    {
        base.OnInitialized();
        Data.Add(new DataModel { Text = "Hennessey Venom", Id = "list-01" });
        Data.Add(new DataModel { Text = "Bugatti Chiron", Id = "list-02" });
        Data.Add(new DataModel { Text = "Bugatti Veyron Super Sport", Id = "list-03" });
        Data.Add(new DataModel { Text = "SSC Ultimate Aero", Id = "list-04" });
        Data.Add(new DataModel { Text = "Koenigsegg CCR", Id = "list-05" });
        Data.Add(new DataModel { Text = "McLaren F1", Id = "list-06" });
        Data.Add(new DataModel { Text = "Aston Martin One- 77", Id = "list-07" });
        Data.Add(new DataModel { Text = "Jaguar XJ220", Id = "list-08" });
        Data.Add(new DataModel { Text = "McLaren P1", Id = "list-09" });
        Data.Add(new DataModel { Text = "Ferrari LaFerrari", Id = "list-10" });
    }

    public class DataModel
    {
        public string Id { get; set; }
        public string Text { get; set; }
    }

}
Bind to remote data
The ListView supports to retrieve the data from remote data services with the help of DataManager component. The Query property allows to fetch data and return it to the ListView from the database.
In the following sample, first 6 products from the Product table of NorthWind data service are displayed.
@using Syncfusion.Blazor.Lists
@using Syncfusion.Blazor.Data

<SfListView HeaderTitle="Products" ShowHeader="true" TValue="Data" Query="@query">
    <ListViewFieldSettings TValue="Data" Id="ProductID" Text="ProductName"></ListViewFieldSettings>
    <SfDataManager Url="https://services.odata.org/V4/Northwind/Northwind.svc/" Adaptor="Adaptors.ODataV4Adaptor"></SfDataManager>
</SfListView>

@code {

    public static List<string> column = new List<string>()
    {
        "ProductID","ProductName"
    };
    Query query = new Query().From("Products").Select(column).Take(6);
    public class Data
    {
        public int ProductID { get; set; }
        public string ProductName { get; set; }
    }
}
Entity Framework
You need to follow the steps below to consume data from the Entity Framework in the ListView component.
To easily bind data in the Blazor ListView component using Entity Framework, you can check out this video.
Handle CRUD in data access layer class
Now, add methods AddProduct and DeleteProduct in the DataAccessLayer.cs to handle the insert and remove operations, respectively. The CRUD list items are bound to the Products parameter.
using EFListView.Shared.Models;
using Microsoft.EntityFrameworkCore;

namespace EFListView.Shared.DataAccess
{
    public class DataAccessLayer
    {

        DataContext db = new DataContext();

        public DbSet<Products> GetAllProducts()
        {
            try
            {
                return db.Products;
            }
            catch
            {
                throw;
            }
        }

        public void AddProduct(Products products)
        {
            try
            {
                db.Products.Add(products);
                db.SaveChanges();
            }
            catch
            {
                throw;
            }
        }

        public void DeleteProduct(Products products)
        {
            try
            {
                db.Products.Remove(products);
                db.SaveChanges();
            }
            catch
            {
                throw;
            }
        }
    }
}
Enable CRUD in Web API
Now you need to create new Post and Delete methods in the Web API controller, which will perform the CRUD operations and return the appropriate result. The SfDataManager will make requests to these actions based on the route name.
using EFListView.Shared.DataAccess;
using EFListView.Shared.Models;
using Microsoft.AspNetCore.Mvc;
using Microsoft.EntityFrameworkCore;

namespace EFListView.Server.Controllers
{
    [Route("api/[controller]")]
    [ApiController]
    public class ProductsController : ControllerBase
    {
        DataAccessLayer db = new DataAccessLayer();
        [HttpGet]
        public object Get()
        {
            return db.GetAllProducts().ToList();
        }

        [HttpPost]
        public async Task<IActionResult> Post([FromBody] Products product)
        {
            if (product == null || string.IsNullOrWhiteSpace(product.ProductName))
            {
                return BadRequest("Invalid product data.");
            }

            db.AddProduct(product);
            return Ok(await db.GetAllProducts().ToListAsync());
        }


        [HttpDelete("{id}")]
        public async Task<IActionResult> Delete(int id)
        {

            var product = await db.GetAllProducts().FirstOrDefaultAsync(p => p.ProductID == id);
            if (product == null)
            {
                return NotFound("Product not found.");
            }

            db.DeleteProduct(product);
            return Ok(await db.GetAllProducts().ToListAsync());
        }

    }
}
Configure the ListView to perform CRUD operations
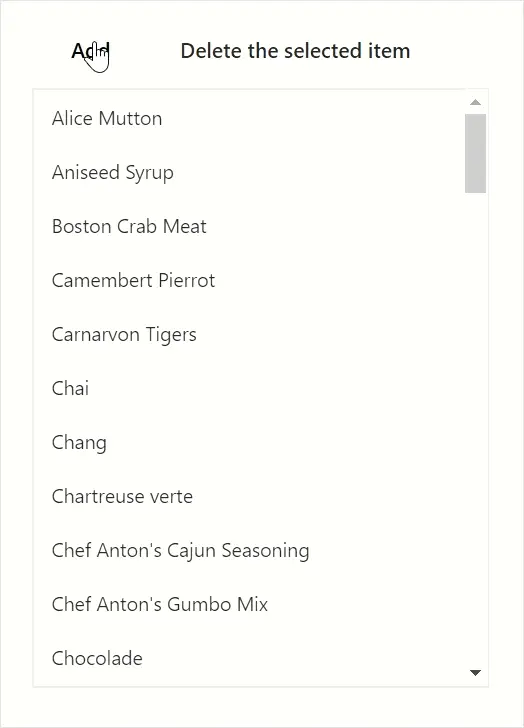
You can perform CRUD operations like Add and Delete using the Add and Delete the selected item buttons.
-
Add button– Adds a new list item to the ListView using the ListView component’s DataSource property. -
Delete the selected item button- Deletes a selected list item in the ListView using the ListView component’s RemoveItems method.
@using Syncfusion.Blazor
@using Syncfusion.Blazor.Data
@using Syncfusion.Blazor.Lists
@using Syncfusion.Blazor.Buttons
@using EFListView.Shared.Models
@inject HttpClient Http

<div class="btn-cls">
    <SfButton @onclick="Add">Add</SfButton>
    <SfButton @onclick="Delete">Delete the selected item</SfButton>
</div>

<div class="row">
    <div class="col-md-4">
        <SfListView CssClass="listview" TValue="Products" Width="400px" Height="400px" @ref="List" @bind-DataSource="@datasource">
            <ListViewFieldSettings TValue="Products" Text="ProductName" Id="ProductID"></ListViewFieldSettings>
            <SfDataManager Url="api/Products" Adaptor="Adaptors.WebApiAdaptor" CrossDomain="true"></SfDataManager>
            <ListViewEvents TValue="Products" Clicked="OnClicked"></ListViewEvents>
        </SfListView>
    </div>
</div>

@code {
    private SfListView<Products> List;
    private List<Products> datasource;
    private List<Products> selectedItems = new List<Products>();
    private int carCounter = 1;

    private async Task Add()
    {
        var newProduct = new Products { ProductName = $"Zenvo Automotive {carCounter}" };
        var response = await Http.PostAsJsonAsync("api/Products", newProduct);
        if (response.IsSuccessStatusCode)
        {
            datasource = await response.Content.ReadFromJsonAsync<List<Products>>();
            carCounter++;
        }
    }

    private async Task Delete()
    {
        if (selectedItems.Count == 0)
        {
            return;
        }

        var productId = selectedItems[0].ProductID;
        var response = await Http.DeleteAsync($"api/Products/{productId}");
        if (response.IsSuccessStatusCode)
        {
            List.RemoveItems(selectedItems);
        }
    }

    private void OnClicked(ClickEventArgs<Products> args)
    {
        selectedItems.Clear();
        selectedItems.Add(args.ItemData);
    }
}

<style>
    .listview {
        border: 1px solid #dddddd;
    }

    .btn-cls {
        margin: 0px 5px 10px 5px;
    }
</style>
NOTE
You can find the fully working sample here.
The following GIF represents the ListView with Add and Delete the list items.