Oracle Data Binding in Blazor Pivot Table Component
28 Jul 202613 minutes to read
This guide explains how to connect an Oracle database to the Blazor Pivot Table using the Oracle.ManagedDataAccess library. It covers two methods: directly retrieving and binding data to the Pivot Table and using a Web API service to fetch and display Oracle data.
Connecting an Oracle database to a Blazor Pivot Table
This section describes how to connect the Blazor Pivot Table to an Oracle database by directly retrieving data using the Oracle.ManagedDataAccess library.
Step 1: Set up a Blazor Pivot Table
- Create a Blazor Pivot Table by following the Getting Started guide.
Step 2: Install the Oracle.ManagedDataAccess NuGet package
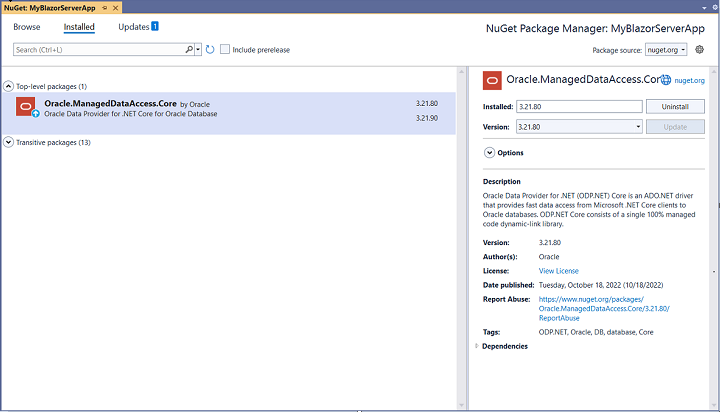
- Open the NuGet Package Manager in your project solution and search for Oracle.ManagedDataAccess.Core.
- Install the Oracle.ManagedDataAccess.Core package to add Oracle support.
Step 3: Connect to the Oracle database
In the Index.razor file, under the OnInitialized method, use the Oracle.ManagedDataAccess library to connect to an Oracle database and retrieve data for the Pivot Table.
-
Establish connection: Use OracleConnection with a valid connection string, for example,
Data Source=localhost;User Id=myuser;Password=mypassword;, to connect to the Oracle database. -
Query and fetch data: Execute a SQL query, such as
SELECT * FROM EMPLOYEES, using OracleCommand to retrieve data for the Pivot Table. - Structure the data: Use OracleDataAdapter’s Fill method to populate the query results into a DataTable, which is then converted to a list for binding to the Pivot Table.
Step 4: Bind data to the Pivot Table
- Assign the retrieved list to the DataSource property of the PivotViewDataSourceSettings.
- Configure the Pivot Table by defining fields in the PivotViewColumns, PivotViewRows, PivotViewValues, and PivotViewFormatSettings to organize and format the data.
@using System.Data
@using Oracle.ManagedDataAccess.Client
@using Syncfusion.Blazor.PivotView

<SfPivotView TValue="EmployeeDetails" Width="1000" Height="300" ShowFieldList="true">
    <PivotViewDataSourceSettings TValue="EmployeeDetails" DataSource="@dataSource" ExpandAll=false EnableSorting=true>
        <PivotViewColumns>
            <PivotViewColumn Name="JOB" Caption="Designation"></PivotViewColumn>
        </PivotViewColumns>
        <PivotViewRows>
            <PivotViewRow Name="EMPLOYEE_NAME" Caption="Employee Name"></PivotViewRow>
        </PivotViewRows>
        <PivotViewValues>
            <PivotViewValue Name="SALARY" Caption="Salary"></PivotViewValue>
            <PivotViewValue Name="COMMISSION" Caption="Commission"></PivotViewValue>
        </PivotViewValues>
        <PivotViewFormatSettings>
            <PivotViewFormatSetting Name="SALARY" Format="C0"></PivotViewFormatSetting>
            <PivotViewFormatSetting Name="COMMISSION" Format="C0"></PivotViewFormatSetting>
        </PivotViewFormatSettings>
    </PivotViewDataSourceSettings>
    <PivotViewGridSettings ColumnWidth="120"></PivotViewGridSettings>
</SfPivotView>

@code {
    private List<EmployeeDetails> dataSource { get; set; }

    protected override void OnInitialized()
    {
        List<EmployeeDetails> employeeData = new List<EmployeeDetails>();
        // Replace with your own connection string.
        string connectionString = "<Enter your valid connection string here>";
        OracleConnection connection = new OracleConnection(connectionString);
        connection.Open();
        OracleCommand command = new OracleCommand("SELECT * FROM EMPLOYEES", connection);
        using (OracleDataReader reader = command.ExecuteReader())
        {
            while (reader.Read())
            {
                employeeData.Add(new EmployeeDetails()
                {
                    DEPARTMENT_ID = Convert.ToInt32(reader["DEPARTMENT_ID"]),
                    EMPLOYEE_ID = Convert.ToInt32(reader["EMPLOYEE_ID"]),
                    EMPLOYEE_NAME = reader["EMPLOYEE_NAME"].ToString(),
                    JOB = reader["JOB"].ToString(),
                    MANAGER_ID = Convert.IsDBNull(reader["MANAGER_ID"]) ? null : Convert.ToInt32(reader["MANAGER_ID"]),
                    SALARY = Convert.ToSingle(reader["SALARY"]),
                    COMMISSION = Convert.IsDBNull(reader["COMMISSION"]) ? null : Convert.ToSingle(reader["COMMISSION"]),
                    HIREDATE = Convert.ToDateTime(reader["HIREDATE"])
                });
            }
        }
        connection.Close();
        this.dataSource = employeeData;
    }

    public class EmployeeDetails
    {
        public int EMPLOYEE_ID { get; set; }
        public string EMPLOYEE_NAME { get; set; }
        public string JOB { get; set; }
        public int? MANAGER_ID { get; set; }
        public Single SALARY { get; set; }
        public Single? COMMISSION { get; set; }
        public int DEPARTMENT_ID { get; set; }
        public DateTime HIREDATE { get; set; }
    }
}
Step 5: Run and verify the Pivot Table
- Run the Blazor application.
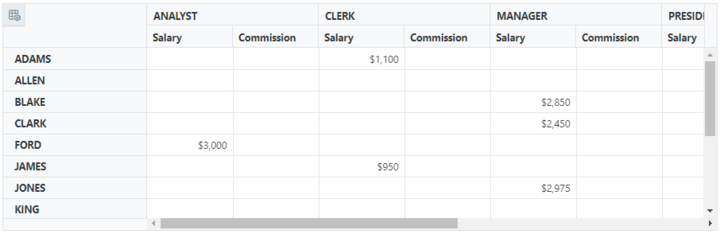
- The Pivot Table will display the Oracle data, organized according to the defined configuration.
- The resulting Pivot Table will look like this:
Connecting an Oracle database to a Blazor Pivot Table via Web API service
This section explains how to create a Web API service to fetch data from an Oracle database and connect it to the Blazor Pivot Table.
Create a Web API service to fetch Oracle data
Follow these steps to set up a Web API service that retrieves Oracle data for the Pivot Table.
Step 1: Create an ASP.NET Core Web application
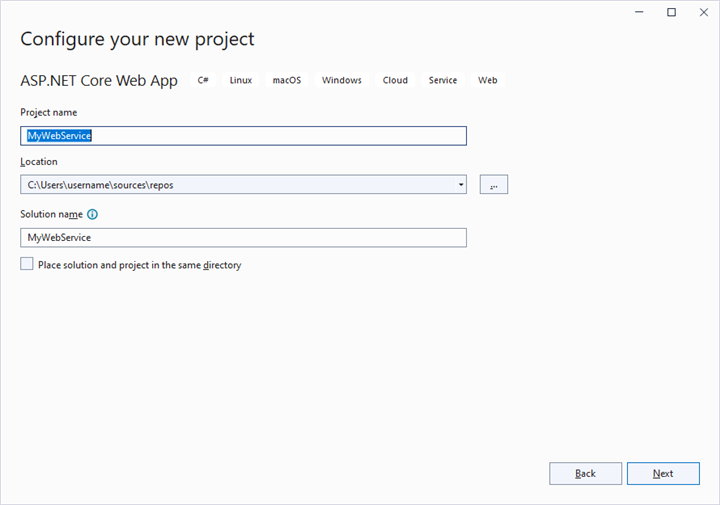
- Open Visual Studio and create a new ASP.NET Core Web App project named MyWebService.
- Refer to the Microsoft documentation for detailed setup instructions.
Step 2: Install the Oracle NuGet package
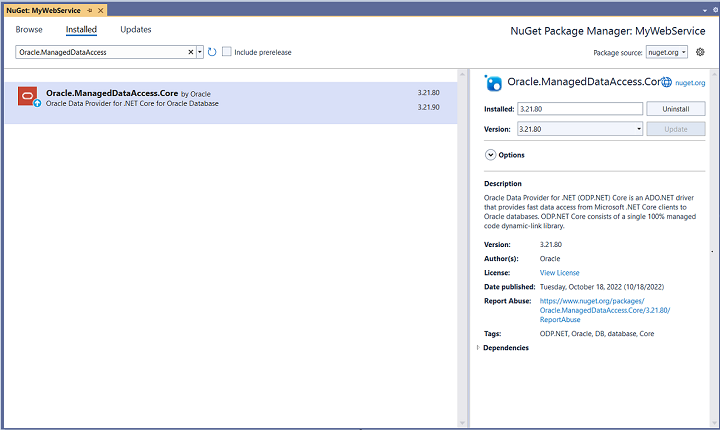
- Install the Oracle.ManagedDataAccess.Core package using the NuGet Package Manager to enable Oracle connectivity.
Step 3: Create a Web API controller
- In the Controllers folder, create a new Web API controller named PivotController.cs.
- This controller manages data communication between the Oracle database and the Pivot Table.
Step 4: Connect to Oracle and retrieve data
In the PivotController.cs file, use the Oracle.ManagedDataAccess library to connect to an Oracle database and fetch data for the Pivot Table.
- Establish connection: Use OracleConnection with a valid connection string to access the Oracle database.
-
Fetch data: Run a SQL query, such as
SELECT * FROM EMPLOYEES, using OracleCommand to retrieve data. - Prepare data: Use OracleDataAdapter’s Fill method to store the query results in a DataTable for JSON serialization.
using Microsoft.AspNetCore.Mvc;
using Newtonsoft.Json;
using Oracle.ManagedDataAccess.Client;
using System.Data;

namespace MyWebService.Controllers
{
    [ApiController]
    [Route("[controller]")]
    public class PivotController : ControllerBase
    {
        private static DataTable FetchOracleResult()
        {
            // Replace with your own connection string.
            string connectionString = "<Enter your valid connection string here>";
            OracleConnection oracleConnection = new OracleConnection(connectionString);
            oracleConnection.Open();
            OracleCommand command = new OracleCommand("SELECT * FROM EMPLOYEES", oracleConnection);
            OracleDataAdapter dataAdapter = new OracleDataAdapter(command);
            DataTable dataTable = new DataTable();
            dataAdapter.Fill(dataTable);
            oracleConnection.Close();
            return dataTable;
        }
    }
}
Step 5: Serialize data to JSON
- In the PivotController.cs file, create a Get method that calls FetchOracleResult to retrieve Oracle data.
- Use JsonConvert.SerializeObject from the Newtonsoft.Json library to serialize the DataTable into JSON format.
Ensure the Newtonsoft.Json NuGet package is installed in your project.
using Microsoft.AspNetCore.Mvc;
using Newtonsoft.Json;
using Oracle.ManagedDataAccess.Client;
using System.Data;

namespace MyWebService.Controllers
{
    [ApiController]
    [Route("[controller]")]
    public class PivotController : ControllerBase
    {
        [HttpGet(Name = "GetOracleResult")]
        public object Get()
        {
            return JsonConvert.SerializeObject(FetchOracleResult());
        }

        private static DataTable FetchOracleResult()
        {
            // Replace with your own connection string.
            string connectionString = "<Enter your valid connection string here>";
            OracleConnection oracleConnection = new OracleConnection(connectionString);
            oracleConnection.Open();
            OracleCommand command = new OracleCommand("SELECT * FROM EMPLOYEES", oracleConnection);
            OracleDataAdapter dataAdapter = new OracleDataAdapter(command);
            DataTable dataTable = new DataTable();
            dataAdapter.Fill(dataTable);
            oracleConnection.Close();
            return dataTable;
        }
    }
}
Step 6: Run the Web API service
- Build and run the application.
- The application will be hosted at
https://localhost:44346/(the port number may vary).
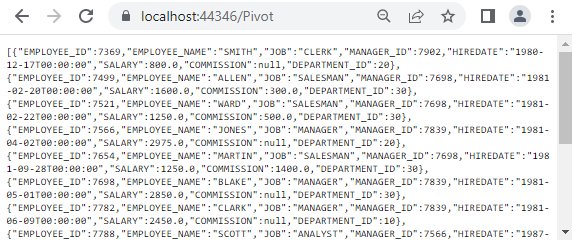
Step 7: Verify the JSON data
- Access the Web API endpoint at
https://localhost:44346/Pivotto view the JSON data retrieved from Oracle. - The browser will display the JSON data, as shown below.
Connecting the Pivot Table to a Oracle database using the Web API service
This section explains how to connect the Blazor Pivot Table to Oracle data retrieved via the Web API service.
Step 1: Set up a Blazor Pivot Table
- Create a Blazor Pivot Table by following the Getting Started guide.
Step 2: Configure the Web API URL
- In the Index.razor file, map the Web API URL (
https://localhost:44346/Pivot) to the Pivot Table using the Url property of PivotViewDataSourceSettings. - The Url property deserialize Oracle data into instances of your model data class (e.g., TValue=”EmployeeDetails”) for binding to the Pivot Table.
Step 3: Define the Pivot Table report
- Configure the Pivot Table by defining fields in the PivotViewColumns, PivotViewRows, PivotViewValues, and PivotViewFormatSettings properties.
- Enable the field list by setting ShowFieldList to true for interactive field management.
@using Syncfusion.Blazor.PivotView

<SfPivotView TValue="EmployeeDetails" Width="1000" Height="300" ShowFieldList="true">
    <PivotViewDataSourceSettings TValue="EmployeeDetails" Url="https://localhost:44346/Pivot" ExpandAll=false EnableSorting=true>
        <PivotViewColumns>
            <PivotViewColumn Name="JOB" Caption="Designation"></PivotViewColumn>
        </PivotViewColumns>
        <PivotViewRows>
            <PivotViewRow Name="EMPLOYEE_NAME" Caption="Employee Name"></PivotViewRow>
        </PivotViewRows>
        <PivotViewValues>
            <PivotViewValue Name="SALARY" Caption="Salary"></PivotViewValue>
            <PivotViewValue Name="COMMISSION" Caption="Commission"></PivotViewValue>
        </PivotViewValues>
        <PivotViewFormatSettings>
            <PivotViewFormatSetting Name="SALARY" Format="C0"></PivotViewFormatSetting>
            <PivotViewFormatSetting Name="COMMISSION" Format="C0"></PivotViewFormatSetting>
        </PivotViewFormatSettings>
    </PivotViewDataSourceSettings>
    <PivotViewGridSettings ColumnWidth="120"></PivotViewGridSettings>
</SfPivotView>

@code {
    public class EmployeeDetails
    {
        public int EMPLOYEE_ID { get; set; }
        public string EMPLOYEE_NAME { get; set; }
        public string JOB { get; set; }
        public int? MANAGER_ID { get; set; }
        public Single SALARY { get; set; }
        public Single? COMMISSION { get; set; }
        public int DEPARTMENT_ID { get; set; }
        public DateTime HIREDATE { get; set; }
    }
}
Step 4: Run and verify the Pivot Table
- Run the Blazor application.
- The Pivot Table will display the Oracle data fetched via the Web API, structured according to the defined configuration.
- The resulting Pivot Table will look like this:
Additional resources
Explore a complete example of the Blazor Pivot Table integrated with an ASP.NET Core Web application to fetch data from an Oracle database in this GitHub repository.