Snowflake Data Binding in Blazor Pivot Table Component
29 Jun 202613 minutes to read
This guide explains how to connect a Snowflake database to the Blazor Pivot Table using the Snowflake.Data NuGet package. It covers two methods: directly retrieving and binding Snowflake data to the Pivot Table and using a Web API service to fetch and display Snowflake data.
Connecting a Snowflake to a Blazor Pivot Table
This section describes how to connect the Blazor Pivot Table to a Snowflake database by directly retrieving data using the Snowflake.Data library.
Step 1: Set up a Blazor Pivot Table
- Create a Blazor Pivot Table by following the Getting Started guide.
Step 2: Install the Snowflake.Data NuGet Package
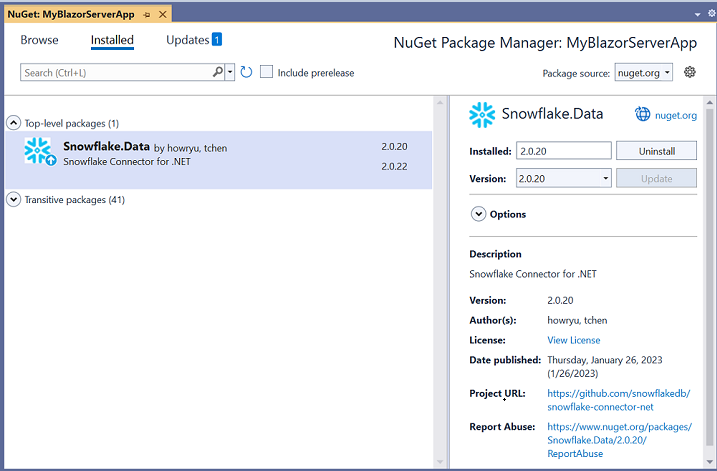
- Open the NuGet Package Manager in your project solution and search for Snowflake.Data.
- Install the Snowflake.Data package to add Snowflake support.
Step 3: Connect to the Snowflake Database
In the Index.razor file, under the OnInitialized method, use the Snowflake.Data library to connect to the Snowflake database and retrieve data for the Pivot Table.
-
Establish connection: Use
SnowflakeDbConnectionwith a valid connection string, such asaccount=myaccount;user=myuser;password=mypassword;db=mydb;schema=myschema;, to connect to the Snowflake database. -
Query and fetch data: Execute a SQL query, such as
SELECT * FROM CALL_CENTER, usingSnowflakeDbDataAdapterto retrieve data. -
Structure the data: Use the
Fillmethod ofSnowflakeDbDataAdapterto populate the query results into aDataTable, which is then converted to a list for binding to the Pivot Table.
Step 4: Bind Data to the Pivot Table
- Assign the retrieved list to the DataSource property of the PivotViewDataSourceSettings.
- Configure the Pivot Table by defining fields in the PivotViewColumns, PivotViewRows, PivotViewValues, and PivotViewFormatSettings to organize and format the data.
@using Syncfusion.Blazor.PivotView
@using Snowflake.Data.Client
@using System.Data

<SfPivotView TValue="SnowflakeService" Width="1000" Height="300" ShowFieldList="true">
    <PivotViewDataSourceSettings TValue="SnowflakeService" DataSource="@dataSource" ExpandAll=false EnableSorting=true>
        <PivotViewColumns>
            <PivotViewColumn Name="CC_CALL_CENTER_SK"></PivotViewColumn>
            <PivotViewColumn Name="CC_SQ_FT"></PivotViewColumn>
        </PivotViewColumns>
        <PivotViewRows>
            <PivotViewRow Name="CC_REC_START_DATE"></PivotViewRow>
        </PivotViewRows>
        <PivotViewValues>
            <PivotViewValue Name="CC_EMPLOYEES"></PivotViewValue>
        </PivotViewValues>
        <PivotViewFormatSettings>
            <PivotViewFormatSetting Name="CC_EMPLOYEES" Format="N0"></PivotViewFormatSetting>
        </PivotViewFormatSettings>
    </PivotViewDataSourceSettings>
    <PivotViewGridSettings ColumnWidth="120"></PivotViewGridSettings>
</SfPivotView>

@code {
    private List<SnowflakeService> dataSource;

    protected override void OnInitialized()
    {
        using (SnowflakeDbConnection snowflakeConnection = new SnowflakeDbConnection())
        {
            List<SnowflakeService> snowflakeList = new List<SnowflakeService>();
            // Replace with your own connection string.
            snowflakeConnection.ConnectionString = "<Enter your valid connection string here>";
            snowflakeConnection.Open();
            SnowflakeDbDataAdapter adapter = new SnowflakeDbDataAdapter("select * from CALL_CENTER", snowflakeConnection);
            DataTable dataTable = new DataTable();
            adapter.Fill(dataTable);
            snowflakeConnection.Close();
            snowflakeList = dataTable.AsEnumerable().Select(r => new SnowflakeService
            {
                CC_CALL_CENTER_SK = r.Field<int>("CC_CALL_CENTER_SK"),
                CC_CALL_CENTER_ID = r.Field<string>("CC_CALL_CENTER_ID"),
                CC_EMPLOYEES = r.Field<int?>("CC_EMPLOYEES"),
                CC_SQ_FT = r.Field<int>("CC_SQ_FT"),
                CC_REC_END_DATE = r.Field<DateTime?>("CC_REC_END_DATE"),
                CC_REC_START_DATE = r.Field<DateTime?>("CC_REC_START_DATE"),
            }).ToList();
            this.dataSource = snowflakeList;
        }
    }

    public class SnowflakeService
    {
        public int CC_CALL_CENTER_SK { get; set; }
        public string CC_CALL_CENTER_ID { get; set; }
        public int? CC_EMPLOYEES { get; set; }
        public int CC_SQ_FT { get; set; }
        public DateTime? CC_REC_END_DATE { get; set; }
        public DateTime? CC_REC_START_DATE { get; set; }
    }
}
Step 5: Run and Verify the Pivot Table
- Run the Blazor application.
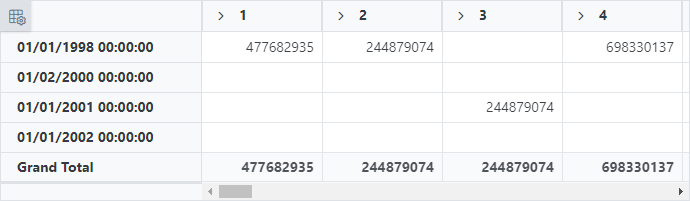
- The Pivot Table displays the Snowflake data, organized according to the defined configuration.
- The resulting Pivot Table will look like this:
Connecting a Snowflake database to a Blazor Pivot Table via Web API service
This section explains how to create a Web API service to fetch data from a Snowflake database and connect it to the Blazor Pivot Table.
Create a Web API Service to Fetch Snowflake Data
Follow these steps to set up a Web API service that retrieves Snowflake data for the Pivot Table.
Step 1: Create an ASP.NET Core Web Application
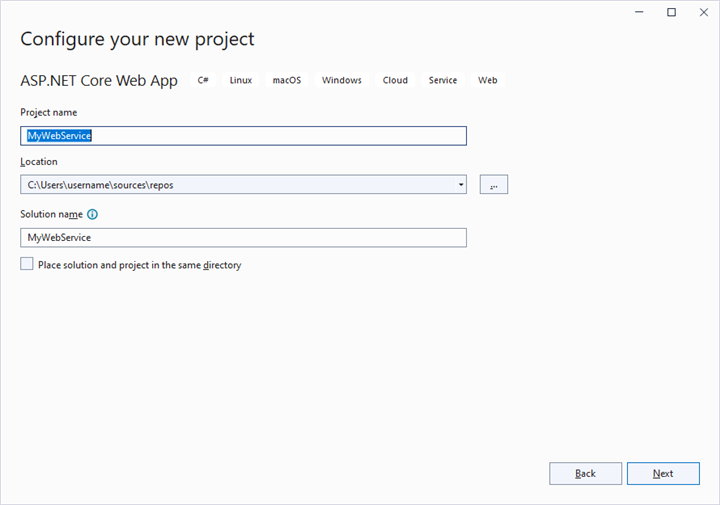
- Open Visual Studio and create a new ASP.NET Core Web App project named MyWebService.
- Refer to the Microsoft documentation for detailed setup instructions.
Step 2: Install the Snowflake.Data NuGet Package
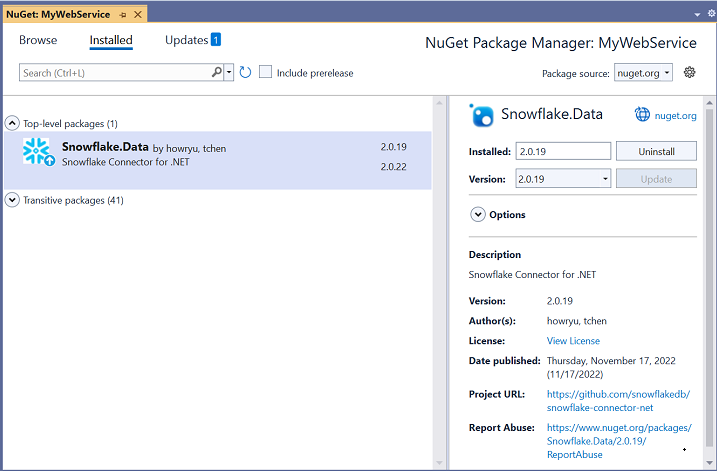
- Open the NuGet Package Manager in your project solution.
- Search for and install the Snowflake.Data package to enable Snowflake connectivity.
Step 3: Create a Web API Controller
- In the Controllers folder, create a new Web API controller named PivotController.cs.
- This controller manages data communication between the Snowflake database and the Pivot Table.
Step 4: Connect to Snowflake and Retrieve Data
In the PivotController.cs file, use the Snowflake.Data library to connect to the Snowflake database and fetch data.
-
Establish connection: Use
SnowflakeDbConnectionwith a valid connection string to access the Snowflake database. -
Fetch data: Run a SQL query, such as
SELECT * FROM CALL_CENTER, usingSnowflakeDbDataAdapterto retrieve data. -
Prepare data: Use the
Fillmethod ofSnowflakeDbDataAdapterto store the query results in aDataTablefor JSON serialization.
using Microsoft.AspNetCore.Mvc;
using Snowflake.Data.Client;
using Newtonsoft.Json;
using System.Data;

namespace MyWebService.Controllers
{
    [ApiController]
    [Route("[controller]")]
    public class PivotController : ControllerBase
    {
        public static DataTable FetchSnowflakeResult()
        {
            using (SnowflakeDbConnection snowflakeConnection = new SnowflakeDbConnection())
            {
                // Replace with your own connection string.
                snowflakeConnection.ConnectionString = "<Enter your valid connection string here>";
                snowflakeConnection.Open();
                SnowflakeDbDataAdapter adapter = new SnowflakeDbDataAdapter("select * from CALL_CENTER", snowflakeConnection);
                DataTable dataTable = new DataTable();
                adapter.Fill(dataTable);
                snowflakeConnection.Close();
                return dataTable;
            }
        }
    }
}
Step 5: Serialize Data to JSON
- In the PivotController.cs file, create a
Getmethod that callsFetchSnowflakeResultto retrieve Snowflake data. - Use
JsonConvert.SerializeObjectfrom the Newtonsoft.Json library to serialize theDataTableinto JSON format.
Ensure the Newtonsoft.Json NuGet package is installed in your project.
using Microsoft.AspNetCore.Mvc;
using Snowflake.Data.Client;
using Newtonsoft.Json;
using System.Data;

namespace MyWebService.Controllers
{
    [ApiController]
    [Route("[controller]")]
    public class PivotController : ControllerBase
    {
        [HttpGet(Name = "GetSnowflakeResult")]
        public object Get()
        {
            return JsonConvert.SerializeObject(FetchSnowflakeResult());
        }

        public static DataTable FetchSnowflakeResult()
        {
            using (SnowflakeDbConnection snowflakeConnection = new SnowflakeDbConnection())
            {
                // Replace with your own connection string.
                snowflakeConnection.ConnectionString = "<Enter your valid connection string here>";
                snowflakeConnection.Open();
                SnowflakeDbDataAdapter adapter = new SnowflakeDbDataAdapter("select * from CALL_CENTER", snowflakeConnection);
                DataTable dataTable = new DataTable();
                adapter.Fill(dataTable);
                snowflakeConnection.Close();
                return dataTable;
            }
        }
    }
}
Step 6: Run the Web API Service
- Build and run the application.
- The application will be hosted at
https://localhost:44378/(the port number may vary).
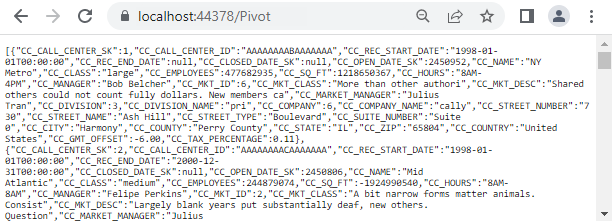
Step 7: Verify the JSON Data
- Access the Web API endpoint at
https://localhost:44378/Pivotto view the JSON data retrieved from the Snowflake database. - The browser will display the JSON data, as shown below.
Connecting the Pivot Table to a Snowflake Database Using the Web API Service
This section explains how to connect the Blazor Pivot Table to Snowflake data retrieved via the Web API service.
Step 1: Set up a Blazor Pivot Table
- Create a Blazor Pivot Table by following the Getting Started guide.
Step 2: Configure the Web API URL
- In the Index.razor file, map the Web API URL (
https://localhost:44378/Pivot) to the Pivot Table using the Url property of PivotViewDataSourceSettings. - The Url property deserialize Snowflake data into instances of your model data class (e.g.,
TValue="SnowflakeService") for binding to the Pivot Table.
Step 3: Define the Pivot Table Report
- Configure the Pivot Table by defining fields in the PivotViewColumns, PivotViewRows, PivotViewValues, and PivotViewFormatSettings properties.
- Enable the field list by setting ShowFieldList to
truefor interactive field management.
@using Syncfusion.Blazor.PivotView

<SfPivotView TValue="SnowflakeService" Width="1000" Height="300" ShowFieldList="true">
    <PivotViewDataSourceSettings TValue="SnowflakeService" Url="https://localhost:44378/Pivot" ExpandAll=false EnableSorting=true>
        <PivotViewColumns>
            <PivotViewColumn Name="CC_CALL_CENTER_SK"></PivotViewColumn>
            <PivotViewColumn Name="CC_SQ_FT"></PivotViewColumn>
        </PivotViewColumns>
        <PivotViewRows>
            <PivotViewRow Name="CC_REC_START_DATE"></PivotViewRow>
        </PivotViewRows>
        <PivotViewValues>
            <PivotViewValue Name="CC_EMPLOYEES"></PivotViewValue>
        </PivotViewValues>
        <PivotViewFormatSettings>
            <PivotViewFormatSetting Name="CC_EMPLOYEES" Format="N0"></PivotViewFormatSetting>
        </PivotViewFormatSettings>
    </PivotViewDataSourceSettings>
    <PivotViewGridSettings ColumnWidth="120"></PivotViewGridSettings>
</SfPivotView>

@code {
    public class SnowflakeService
    {
        public int CC_CALL_CENTER_SK { get; set; }
        public string CC_CALL_CENTER_ID { get; set; }
        public int? CC_EMPLOYEES { get; set; }
        public int CC_SQ_FT { get; set; }
        public DateTime? CC_REC_END_DATE { get; set; }
        public DateTime? CC_REC_START_DATE { get; set; }
    }
}
Step 4: Run and Verify the Pivot Table
- Run the Blazor application.
- The Pivot Table displays the Snowflake data fetched via the Web API, structured according to the defined configuration.
- The resulting Pivot Table will look like this:
Additional Resources
Explore a complete example of the Blazor Pivot Table integrated with an ASP.NET Core Web application to fetch data from a Snowflake database in this GitHub repository.