Insert image in Rich Text Editor
30 Jun 202624 minutes to read
Inserting images from web urls
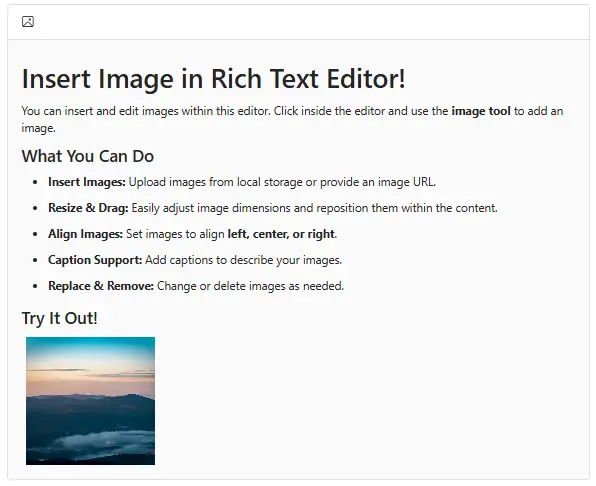
To insert an image from an online source like Google, Bing, and more, enable the images tool on the editor’s toolbar. By default, the images tool opens an image dialog that allows inserting an image from the local or online source.

Uploading and inserting images
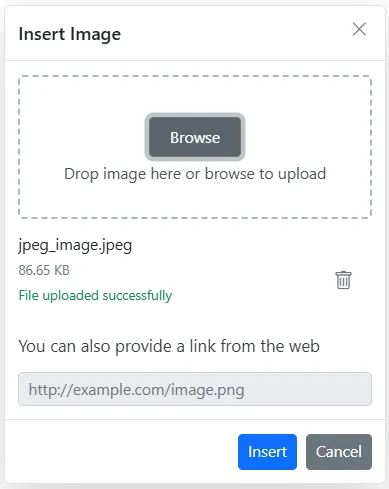
Through the browse option in the image dialog, select the image from the local machine and insert it into the Rich Text Editor content.
If the path field is not specified in RichTextEditorImageSettings, the image will be converted to base64, or a blob URL, and the generated URL will be set as the src property of the <img> tag as follows:
The image selected from the local machine will be uploaded and saved to the specified location.
A generated blob URL is assigned to the <img> tag as shown below:
<img src="blob:http://blazor.syncfusion.com/3ab56a6e-ec0d-490f-85a5-f0aeb0ad8879" >
A generated base64 URL is assigned to the <img> tag as shown below:
<img src="data:image/png;base64,iVBORw0KGgoAAAANSUhEUgAA...">
NOTE
If you want to insert many tiny images in the editor and don’t want a specific physical location for saving images, opt to save the format as
Base64.
Server side action
The selected image can be uploaded to or removed from the required destination using the controller action below. Map the respective method names into RichTextEditorImageSettings.SaveUrl and RichTextEditorImageSettings.RemoveUrl properties. Also, specify the required destination path using the RichTextEditorImageSettings.Path property.
NOTE
@using Syncfusion.Blazor.RichTextEditor

<SfRichTextEditor>
    <RichTextEditorImageSettings SaveUrl="api/Image/Save" RemoveUrl="api/Image/Delete" Path="./Images/" />
</SfRichTextEditor>using System;
using System.IO;
using System.Net.Http.Headers;
using Microsoft.AspNetCore.Mvc;
using Microsoft.AspNetCore.Http;
using System.Collections.Generic;
using Microsoft.AspNetCore.Hosting;
using Microsoft.AspNetCore.Http.Features;
namespace ImageUpload.Controllers
{
[ApiController]
public class ImageController : ControllerBase
{
private readonly IWebHostEnvironment hostingEnv;
public ImageController(IWebHostEnvironment env)
{
this.hostingEnv = env;
}
[HttpPost("[action]")]
[Route("api/Image/Save")]
public void Save(IList<IFormFile> UploadFiles)
{
try
{
foreach (var file in UploadFiles)
{
if (UploadFiles != null)
{
string targetPath = hostingEnv.ContentRootPath + "\\wwwroot\\Images";
string filename = ContentDispositionHeaderValue.Parse(file.ContentDisposition).FileName.Trim('"');
// Create a new directory, if it does not exists
if (!Directory.Exists(targetPath))
{
Directory.CreateDirectory(targetPath);
}
// Name which is used to save the image
filename = targetPath + $@"\{filename}";
if (!System.IO.File.Exists(filename))
{
// Upload a image, if the same file name does not exist in the directory
using (FileStream fs = System.IO.File.Create(filename))
{
file.CopyTo(fs);
fs.Flush();
}
Response.StatusCode = 200;
}
else
{
Response.StatusCode = 204;
}
}
}
}
catch (Exception e)
{
Response.Clear();
Response.ContentType = "application/json; charset=utf-8";
Response.HttpContext.Features.Get<IHttpResponseFeature>().ReasonPhrase = e.Message;
}
}
[HttpPost("[action]")]
[Route("api/Image/Delete")]
public IActionResult Delete(IList<IFormFile> UploadFiles)
{
try
{
foreach (IFormFile uploadFile in UploadFiles)
{
string? fileName = ContentDispositionHeaderValue.Parse(uploadFile.ContentDisposition).FileName?.Trim('"');
string filePath = Path.Combine(hostingEnv.WebRootPath, "Images/", fileName!);
if (System.IO.File.Exists(filePath))
{
System.IO.File.Delete(filePath);
return Ok($"File '{fileName}' has been deleted.");
}
else
{
// Return 404 status if file not found
return NotFound($"File '{fileName}' not found.");
}
}
}
catch (Exception ex)
{
return StatusCode(500, $"An error occurred: {ex.Message}");
}
return StatusCode(500, $"No file processed.");
}
}
}
Save image in application path
Using the RichTextEditorImageSettings.Path property, save the uploaded image in your application path. Also, change the path of the image by creating a folder structure as per your requirements under the folder wwwroot. You can’t create a path outside the wwwroot folder since any files, including HTML files, CSS files, image files, and JavaScript files, sent to the user’s browser should be stored inside the wwwroot folder.
@using Syncfusion.Blazor.RichTextEditor
<SfRichTextEditor>
<RichTextEditorImageSettings SaveUrl="api/Image/Save" Path="./mnt/momfiles/WEB/NoticeBoard/Image/"></RichTextEditorImageSettings>
</SfRichTextEditor>public class ImageController : ControllerBase
{
private readonly IWebHostEnvironment hostingEnv;
public ImageController(IWebHostEnvironment env)
{
this.hostingEnv = env;
}
[HttpPost("[action]")]
[Route("api/Image/Save")]
public void Save(IList<IFormFile> UploadFiles)
{
try
{
foreach (var file in UploadFiles)
{
if (UploadFiles != null)
{
string targetPath = hostingEnv.ContentRootPath + \\wwwroot\\mnt\\momfiles\\WEB\\NoticeBoard\\Image;
string filename = ContentDispositionHeaderValue.Parse(file.ContentDisposition).FileName.Trim('"');
// Create a new directory, if it does not exists
if (!Directory.Exists(targetPath))
{
Directory.CreateDirectory(targetPath);
}
// Name which is used to save the image
filename = targetPath + $@"\{filename}";
if (!System.IO.File.Exists(filename))
{
// Upload a image, if the same file name does not exist in the directory
using (FileStream fs = System.IO.File.Create(filename))
{
file.CopyTo(fs);
fs.Flush();
}
Response.StatusCode = 200;
}
else
{
Response.StatusCode = 204;
}
}
}
}
catch (Exception e)
{
Response.Clear();
Response.ContentType = "application/json; charset=utf-8";
Response.HttpContext.Features.Get<IHttpResponseFeature>().ReasonPhrase = e.Message;
}
}
}Image save format
By default, the Rich Text Editor inserts the images in Blob format, but you can also change the save format by setting the RichTextEditorImageSettings.SaveFormat property as SaveFormat.Base64.
@using Syncfusion.Blazor.RichTextEditor
<SfRichTextEditor>
<RichTextEditorImageSettings SaveFormat="SaveFormat.Base64"></RichTextEditorImageSettings>
</SfRichTextEditor>Restricting maximum image file size
Using the Rich Text Editor’s RichTextEditorImageSettings.MaxFileSize property, you can get the image size before uploading and restrict the image to upload when the given image size is greater than the allowed size.
In the following code, the image size has been validated before uploading and it has been determined whether the image has been uploaded or not.
@using Syncfusion.Blazor.RichTextEditor
<SfRichTextEditor>
<RichTextEditorToolbarSettings Items="Items"/>
<RichTextEditorImageSettings MaxFileSize="30000000" />
<h5>Maximum File Size Restriction</h5>
<p>You can control the size of image files uploaded to the editor to ensure optimal performance and prevent large file uploads.</p>
<ul>
<li>The MaxFileSize property allows you to restrict image uploads by defining the maximum allowed file size. By default, the maximum size is set to 30,000,000 bytes (approximately 30 MB). </li>
<li>Image files exceeding this limit are blocked from being uploaded to ensure better control and performance.</li>
</ul>
</SfRichTextEditor>
@code {
private List<ToolbarItemModel> Items = new List<ToolbarItemModel>()
{
new ToolbarItemModel() { Command = ToolbarCommand.Image }
};
}NOTE
You can’t restrict while uploading an image as a hyperlink in the insert image dialog. When inserting images using the link, the editor does not allow you to limit the image size. You could not identify the image file size when the image was provided as a link.
Delete image
To delete an image from the Rich Text Editor, select the image and click the Remove tool from the quick toolbar. It will delete the image from the Rich Text Editor content.
After selecting the image from the local machine, the URL for the image will be generated. From there also, remove the image from the service location by clicking the delete icon as in the following image.
Deleting images from server using keyboard and quick toolbar actions
In the Rich Text Editor, deleting images using the Delete or Backspace keys, or the Quick Toolbar’s Remove button, removes the image from the editor content not from the server.
This behavior is intentional, allowing undo/redo operations to function properly without breaking references to previously uploaded images.
To explicitly remove images from the server, use the ImageDelete event. This event is triggered after an image is removed from the content and provides the src URL of the image, which can be used to initiate a request to your server for deleting the corresponding file.
The following sample demonstrates how to use the ImageDelete event in Rich Text Editor to delete images from the server after they are removed from the editor content:
@using Syncfusion.Blazor.RichTextEditor
@inject HttpClient Http;
@inject NavigationManager NavManager;
<SfRichTextEditor>
<RichTextEditorEvents ImageDelete="@OnImageDeleteHandler"></RichTextEditorEvents>
<RichTextEditorImageSettings SaveUrl="api/Image/Save" Path="./Images/" RemoveUrl="api/Image/Delete" />
</SfRichTextEditor>
@code {
public async Task OnImageDeleteHandler(AfterImageDeleteEventArgs args)
{
var imageSrc = args.Src;
var fileName = imageSrc.Split('/').Last();
var content = new MultipartFormDataContent();
var dummyFile = new ByteArrayContent(new byte[0]);
content.Add(dummyFile, "UploadFiles", fileName);
try
{
var response = await Http.PostAsync($"{NavManager.BaseUri}api/Image/Delete", content);
if (response.IsSuccessStatusCode)
{
Console.WriteLine($"Image deleted successfully: {fileName}");
}
else
{
Console.WriteLine($"Image deletion failed: {response.StatusCode}");
}
}
catch (Exception ex)
{
Console.WriteLine($"Error deleting image: {ex.Message}");
}
}
}NOTE
If the service is hosted on an external server, the full service-hosted path must be specified in the
SaveUrlandRemoveUrlproperties instead of a relative path.Example:
<RichTextEditorImageSettings SaveUrl="[SERVICE_HOSTED_PATH]/api/Image/Save" Path="./Images/" /> <RichTextEditorImageSettings RemoveUrl="[SERVICE_HOSTED_PATH]/api/Image/Delete" Path="./Images/" />Replace
[SERVICE_HOSTED_PATH]with the appropriate base URL of the hosted service.
using System;
using System.IO;
using System.Net.Http.Headers;
using Microsoft.AspNetCore.Mvc;
using Microsoft.AspNetCore.Http;
using System.Collections.Generic;
using Microsoft.AspNetCore.Hosting;
using Microsoft.AspNetCore.Http.Features;

namespace ImageUpload.Controllers
{
    [ApiController]
    public class ImageController : ControllerBase
    {
        private readonly IWebHostEnvironment hostingEnv;

        public ImageController(IWebHostEnvironment env)
        {
            this.hostingEnv = env;
        }

        [HttpPost("[action]")]
        [Route("api/Image/Save")]
        public void Save(IList<IFormFile> UploadFiles)
        {
            try
            {
                foreach (var file in UploadFiles)
                {
                    if (UploadFiles != null)
                    {
                        string targetPath = hostingEnv.ContentRootPath + "\\wwwroot\\Images";
                        string filename = ContentDispositionHeaderValue.Parse(file.ContentDisposition).FileName.Trim('"');

                        // Create a new directory, if it does not exists
                        if (!Directory.Exists(targetPath))
                        {
                            Directory.CreateDirectory(targetPath);
                        }

                        // Name which is used to save the image
                        filename = targetPath + $@"\{filename}";

                        if (!System.IO.File.Exists(filename))
                        {
                            // Upload a image, if the same file name does not exist in the directory
                            using (FileStream fs = System.IO.File.Create(filename))
                            {
                                file.CopyTo(fs);
                                fs.Flush();
                            }
                            Response.StatusCode = 200;
                        }
                        else
                        {
                            Response.StatusCode = 204;
                        }
                    }
                }
            }
            catch (Exception e)
            {
                Response.Clear();
                Response.ContentType = "application/json; charset=utf-8";
                Response.HttpContext.Features.Get<IHttpResponseFeature>().ReasonPhrase = e.Message;
            }
        }

        [HttpPost("[action]")]
        [Route("api/Image/Delete")]
        public IActionResult Delete(IList<IFormFile> UploadFiles)
        {
            try
            {
                foreach (IFormFile uploadFile in UploadFiles)
                {
                    string? fileName = ContentDispositionHeaderValue.Parse(uploadFile.ContentDisposition).FileName?.Trim('"');
                    string filePath = Path.Combine(hostingEnv.WebRootPath, "Images/", fileName!);
                    if (System.IO.File.Exists(filePath))
                    {
                        System.IO.File.Delete(filePath);
                        return Ok($"File '{fileName}' has been deleted.");
                    }
                    else
                    {
                        // Return 404 status if file not found
                        return NotFound($"File '{fileName}' not found.");
                    }
                }
            }
            catch (Exception ex)
            {
                return StatusCode(500, $"An error occurred: {ex.Message}");
            }
            return StatusCode(500, $"No file processed.");
        }
    }
}Set image dimensions
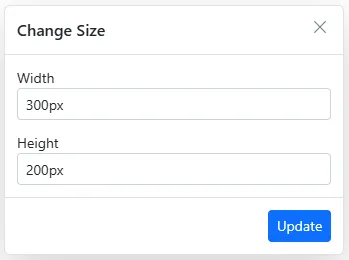
Sets the default width and height of the image when it is inserted in the Rich Text Editor using the RichTextEditorImageSettings.Width and RichTextEditorImageSettings.Height property.
You can also adjust the image dimensions using the Change Size option in the quick toolbar. After clicking the option, the image size will open as follows. In that, specify the width and height of the image in pixels.
Adding captions and alt text to images
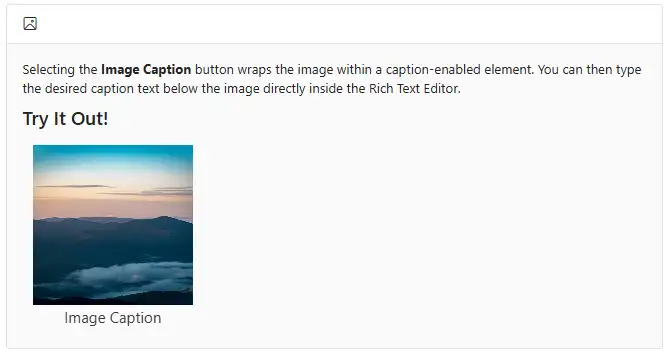
The image caption and alternative text can be specified for the inserted image in the Rich Text Editor using the RichTextEditorQuickToolbarSettings options such as Image Caption and Alternative Text.
Through the Alternative Text option, set the alternative text for the image when the image is not successfully uploaded into the Rich Text Editor.

When you click the Image Caption button, the image is wrapped in an image element with a caption. Then, type the caption content inside the Rich Text Editor.
Setting image display position
Configure the default display behavior for inserted images when it is inserted in the Rich Text Editor using the RichTextEditorImageSettings.Display property.
NOTE
It has two possible options:
InlineandBreak.

@using Syncfusion.Blazor.RichTextEditor

<SfRichTextEditor>
    <RichTextEditorImageSettings Display="ImageDisplay.Inline" />
    <RichTextEditorToolbarSettings Items="Items"/>
    <p>The Rich Text Editor allows you to insert images and control their display behavior. When set to <b>Break</b>, the image appears as a separate block element. When set to <b>Inline</b>, the image appears within the text flow alongside other content.</p><img alt='Logo' style='width: 300px; height: 300px; transform: rotate(0deg);' src='https://cdn.syncfusion.com/ej2/richtexteditor-resources/RTE-Portrait.png'/>
</SfRichTextEditor>

@code {
    private List<ToolbarItemModel> Items = new List<ToolbarItemModel>()
    {
        new ToolbarItemModel() { Command = ToolbarCommand.Image }
    };
}
Adding hyperlinks to images
The hyperlink itself can be an image in the Rich Text Editor. If the image is given as a hyperlink, the remove, edit, and open links will be added to the quick toolbar of the image as follows. For further details about the link, refer to the link documentation.

Resizing images
The Rich Text Editor has built-in image inserting support. The resize points will appear on each corner of the image when focused. So, users can easily resize the image using mouse points or their thumbs through the resize points. Also, the resize calculation will be done based on the aspect ratio.

Renaming images before inserting
By using the RichTextEditorImageSettings property, the server handler can be specified to upload and rename the selected image. Then, the OnImageUploadSuccess event could be bound, to receive the modified file name from the server and update it in the Rich Text Editor’s insert image dialog.
NOTE
@using Syncfusion.Blazor.RichTextEditor

<SfRichTextEditor>
    <RichTextEditorImageSettings SaveUrl="api/Image/Rename" Path="./Images/" />
    <RichTextEditorEvents OnImageUploadSuccess="@ImageUploadSuccess" />
</SfRichTextEditor>

@code {
    public string[] header { get; set; }
    private void ImageUploadSuccess(ImageSuccessEventArgs args)
    {
        var headers = args.Response.Headers.ToString();
        header = headers.Split("name: ");
        header = header[1].Split("\r");
        // Update the modified image name to display a image in the editor.
        args.File.Name = header[0];
    }
}
NOTE
If the service is hosted on an external server, the full service-hosted path must be specified in the
SaveUrlproperty instead of a relative path.Example:
<RichTextEditorImageSettings SaveUrl="[SERVICE_HOSTED_PATH]/api/Image/Rename" Path="./Images/" />Replace
[SERVICE_HOSTED_PATH]with the appropriate base URL of the hosted service.
To configure the server-side handler in the Web API service, refer the below code.
using System;
using System.IO;
using System.Net.Http.Headers;
using Microsoft.AspNetCore.Mvc;
using Microsoft.AspNetCore.Http;
using System.Collections.Generic;
using Microsoft.AspNetCore.Hosting;
using Microsoft.AspNetCore.Http.Features;

namespace RenameImage.Controllers
{
    [ApiController]
    public class ImageController : ControllerBase
    {
        private double x;
        private string imageFileName;
        private readonly IWebHostEnvironment hostingEnv;

        public ImageController(IWebHostEnvironment env)
        {
            this.hostingEnv = env;
        }

        [HttpPost("[action]")]
        [Route("api/Image/Rename")]
        public void Rename(IList<IFormFile> UploadFiles)
        {
            try
            {
                foreach (IFormFile file in UploadFiles)
                {
                    if (UploadFiles != null)
                    {
                        string targetPath = hostingEnv.ContentRootPath + "\\wwwroot\\Images";
                        string filename = ContentDispositionHeaderValue.Parse(file.ContentDisposition).FileName.Trim('"');

                        // Create a new directory, if it does not exists
                        if (!Directory.Exists(targetPath))
                        {
                            Directory.CreateDirectory(targetPath);
                        }

                        imageFileName = filename;
                        string path = hostingEnv.WebRootPath + "\\Images" + $@"\{filename}";

                        // Rename a uploaded image file name
                        while (System.IO.File.Exists(path))
                        {
                            imageFileName = "rteImage" + x + "-" + filename;
                            path = hostingEnv.WebRootPath + "\\Images" + $@"\rteImage{x}-{filename}";
                            x++;
                        }

                        if (!System.IO.File.Exists(path))
                        {
                            using (FileStream fs = System.IO.File.Create(path))
                            {
                                file.CopyTo(fs);
                                fs.Flush();
                                fs.Close();
                            }

                            // Modified file name shared through response header by adding custom header
                            Response.Headers.Add("name", imageFileName);
                            Response.StatusCode = 200;
                            Response.ContentType = "application/json; charset=utf-8";
                        }
                    }
                }
            }
            catch (Exception e)
            {
                Response.Clear();
                Response.ContentType = "application/json; charset=utf-8";
                Response.HttpContext.Features.Get<IHttpResponseFeature>().ReasonPhrase = e.Message;
            }
        }
    }
}
Paste image into the editor
The Rich Text Editor supports pasting images directly into the editor content. You can paste single or multiple images from your file system directly into the editor.