Syncfusion® Blazor Scaffolder for Visual Studio Code
8 Jul 20264 minutes to read
The Syncfusion® Blazor Scaffolder in Visual Studio Code helps you generate Razor pages and controller/service code that interact with your data models. It accelerates common data workflows for controls like controls like DataGrid, TreeGrid, Charts, Scheduler, and Diagram by scaffolding CRUD-ready files and UI markup. The Syncfusion® Blazor Scaffolder is available from v32.2.3 or later.
NOTE
Check that at least one Entity Framework model exists, and the application has been compiled once. If no Entity Framework model exists in your application, refer to this documentation to generate the Entity Framework model. After the model file has been added, check that the required
DbContextand properties are added. Now, build the application, and try scaffolding. If any changes made in the model properties, rebuild the application once before perform scaffolding.
Add a scaffolded item
Before starting, confirm the Syncfusion® Blazor Scaffolder Extension is installed by opening the Extensions view (Ctrl+Shift+X) and searching for it under the Installed tab. If not installed, follow the steps in the download and installation help topic.
-
In the Explorer panel, right-click the project
.csprojfile and choose Syncfusion® Blazor UI Scaffolder.For Blazor Server: right-click the app project
.csproj.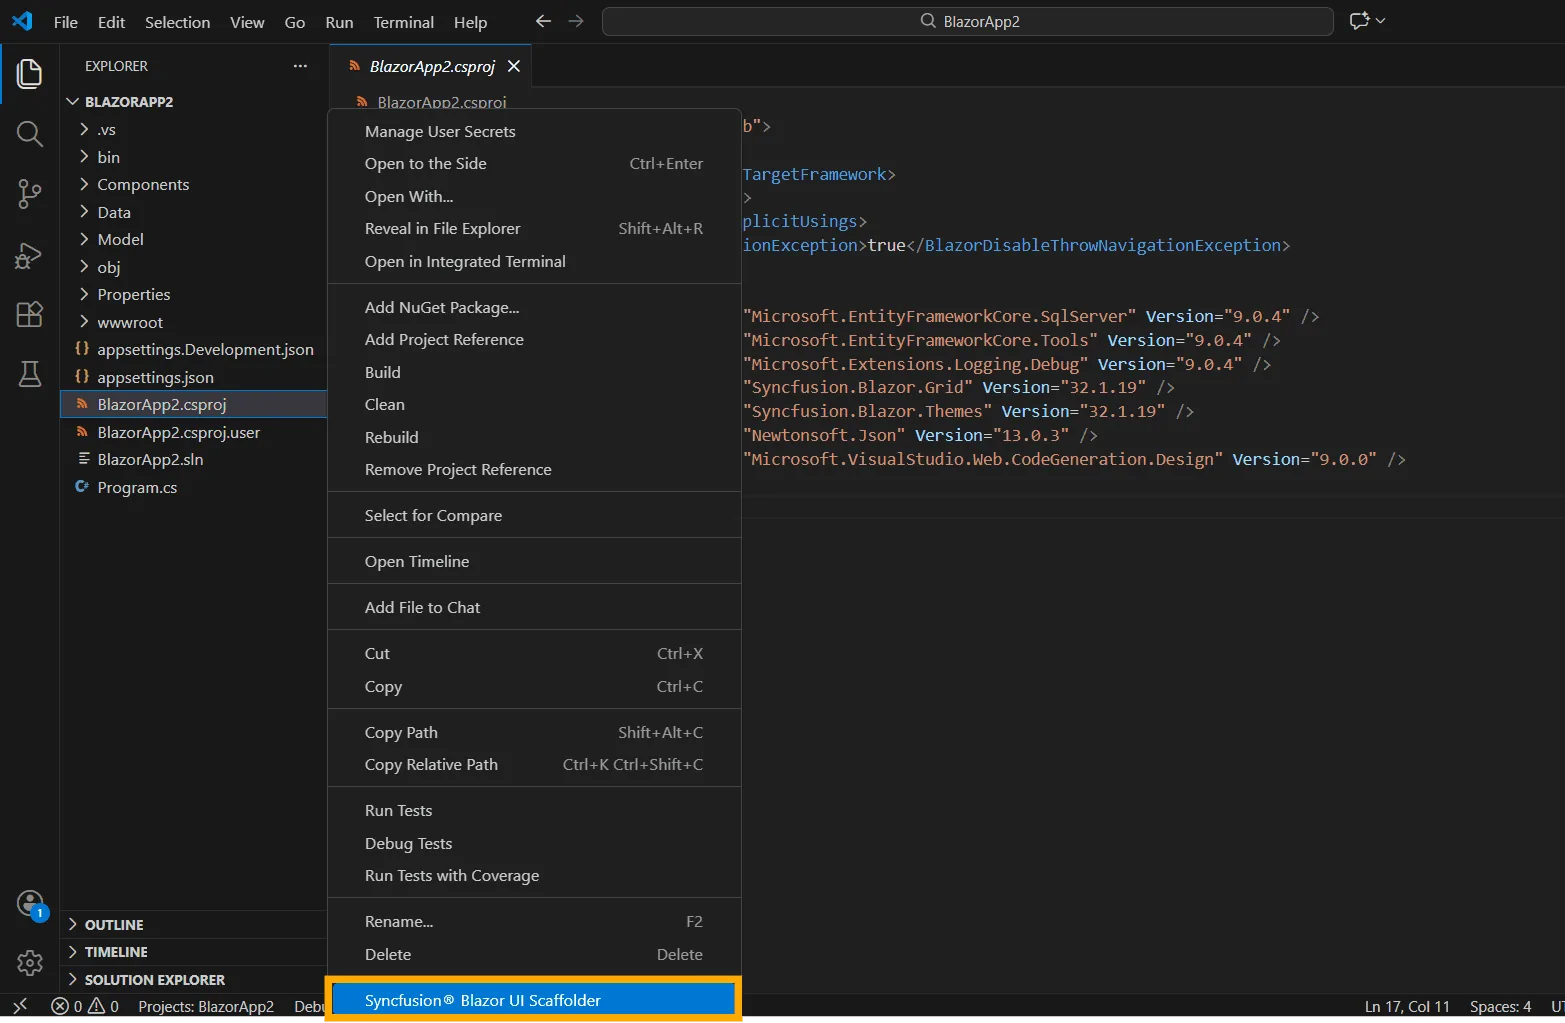
For Blazor Hosted: right-click the
{ProjectName}.Server.csproj.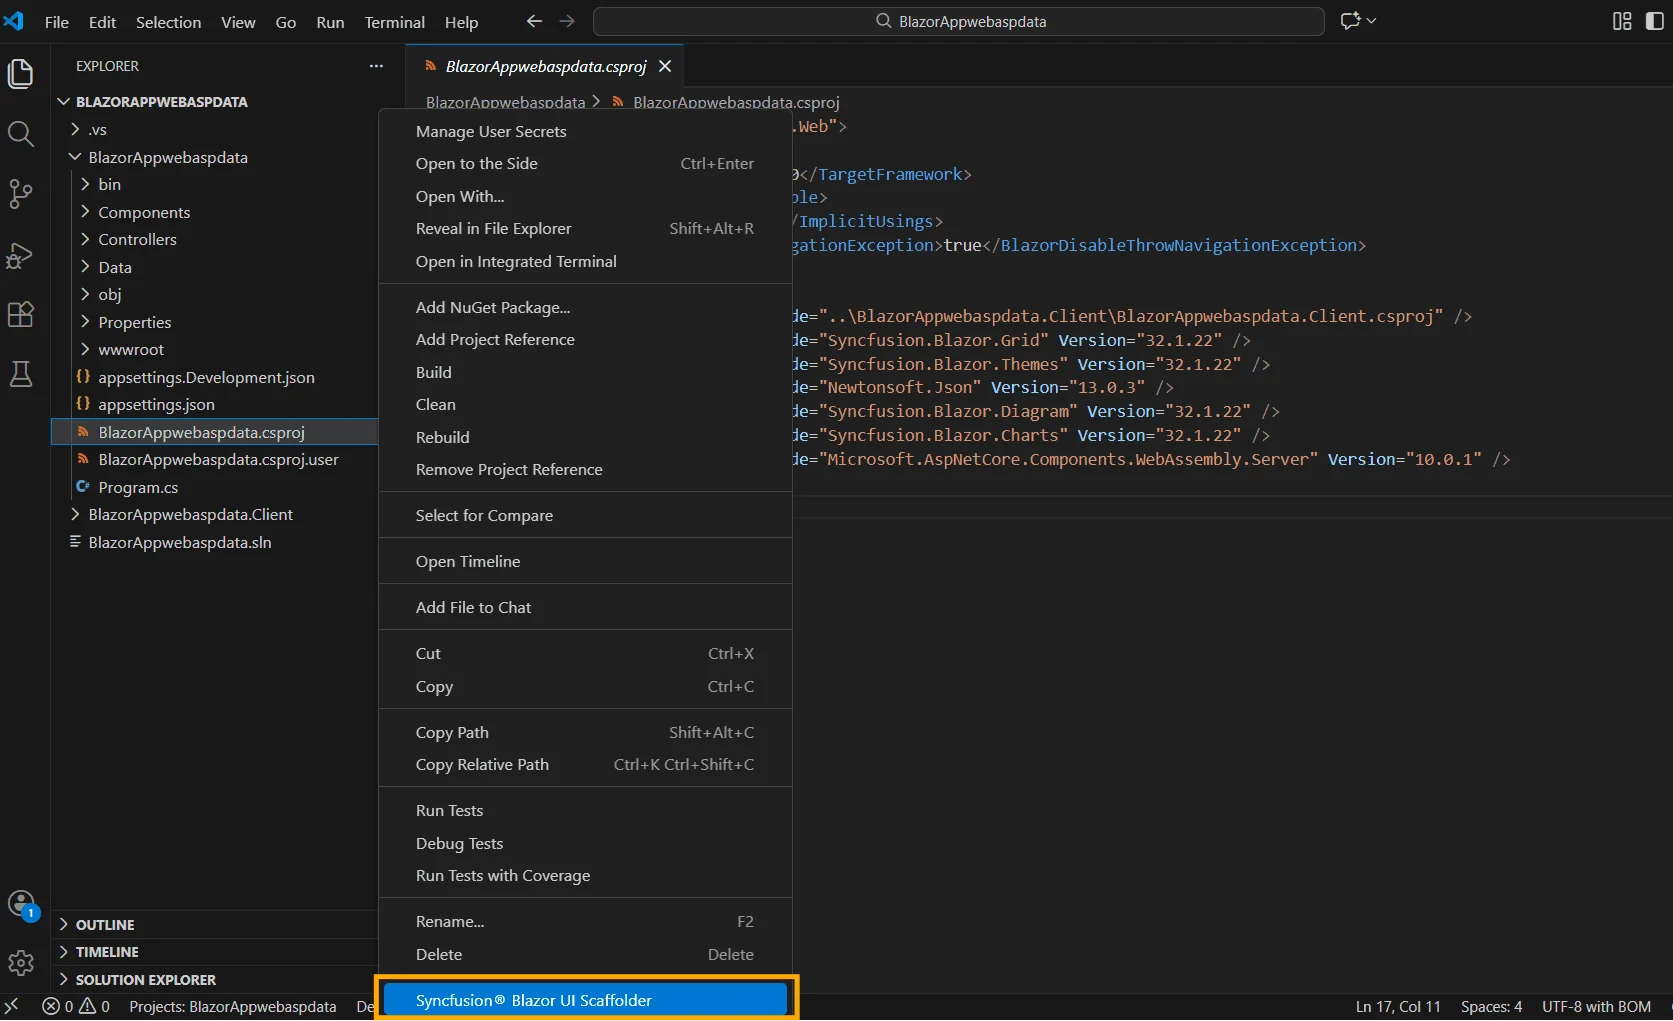
-
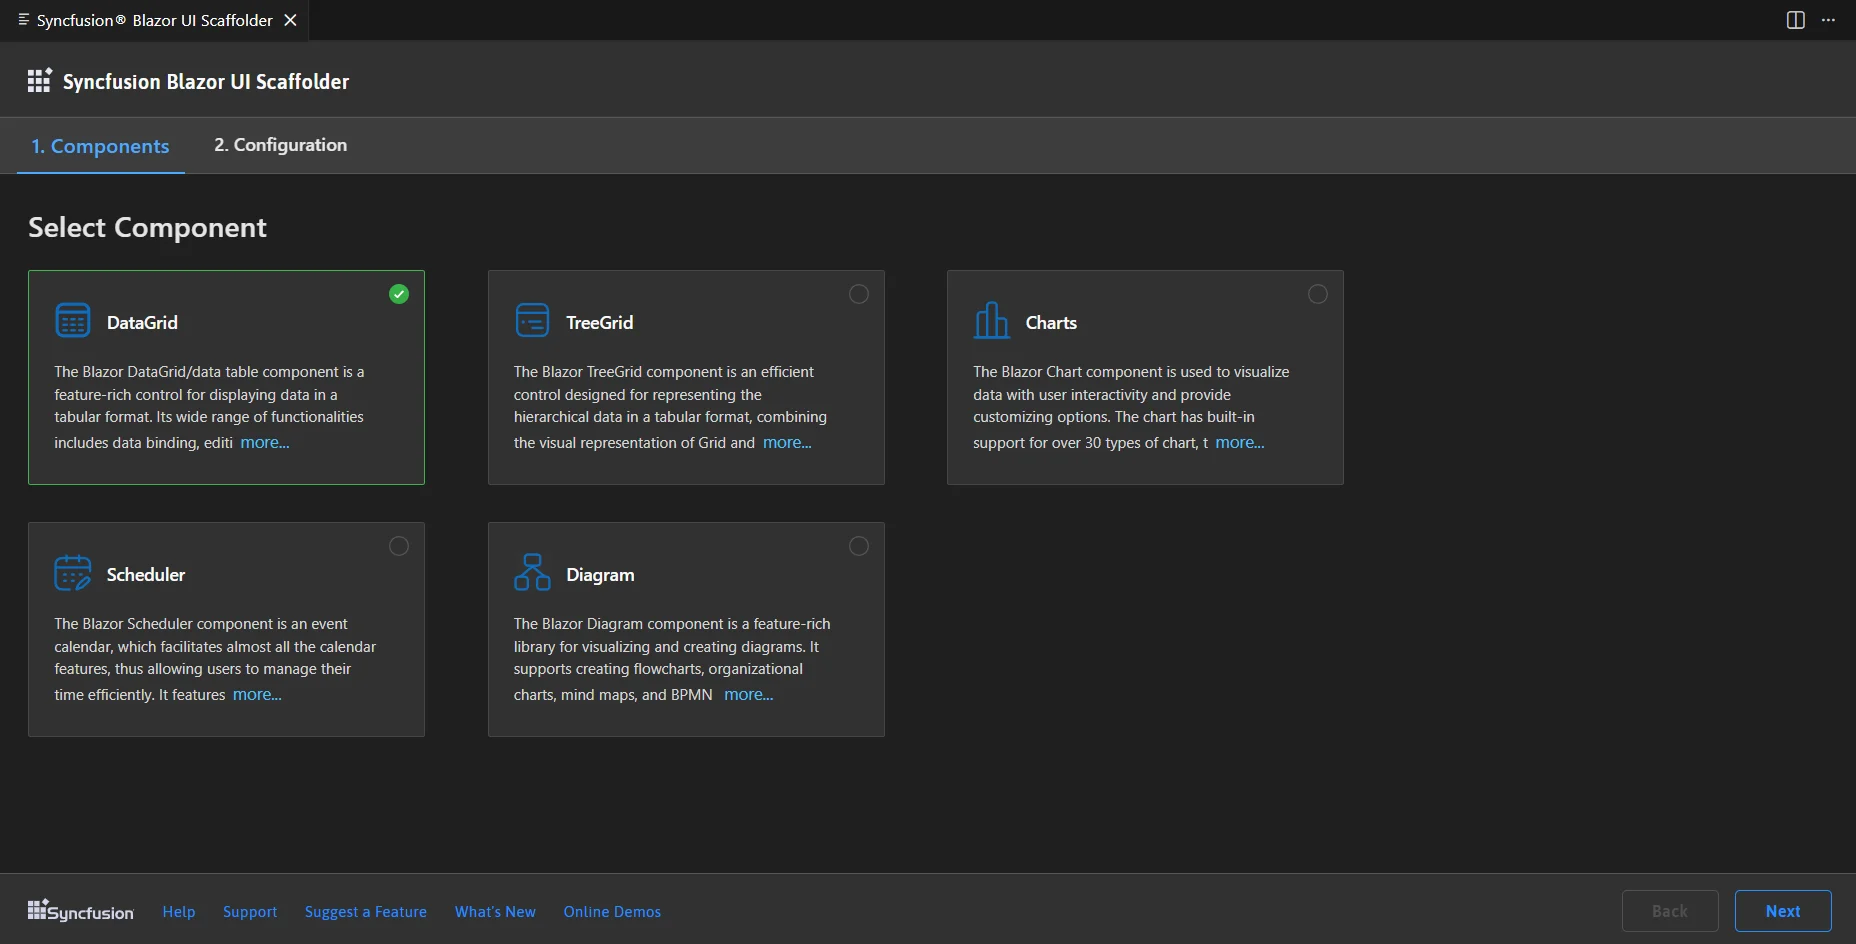
The Scaffolder UI launches. Select the target control and click Next.
-
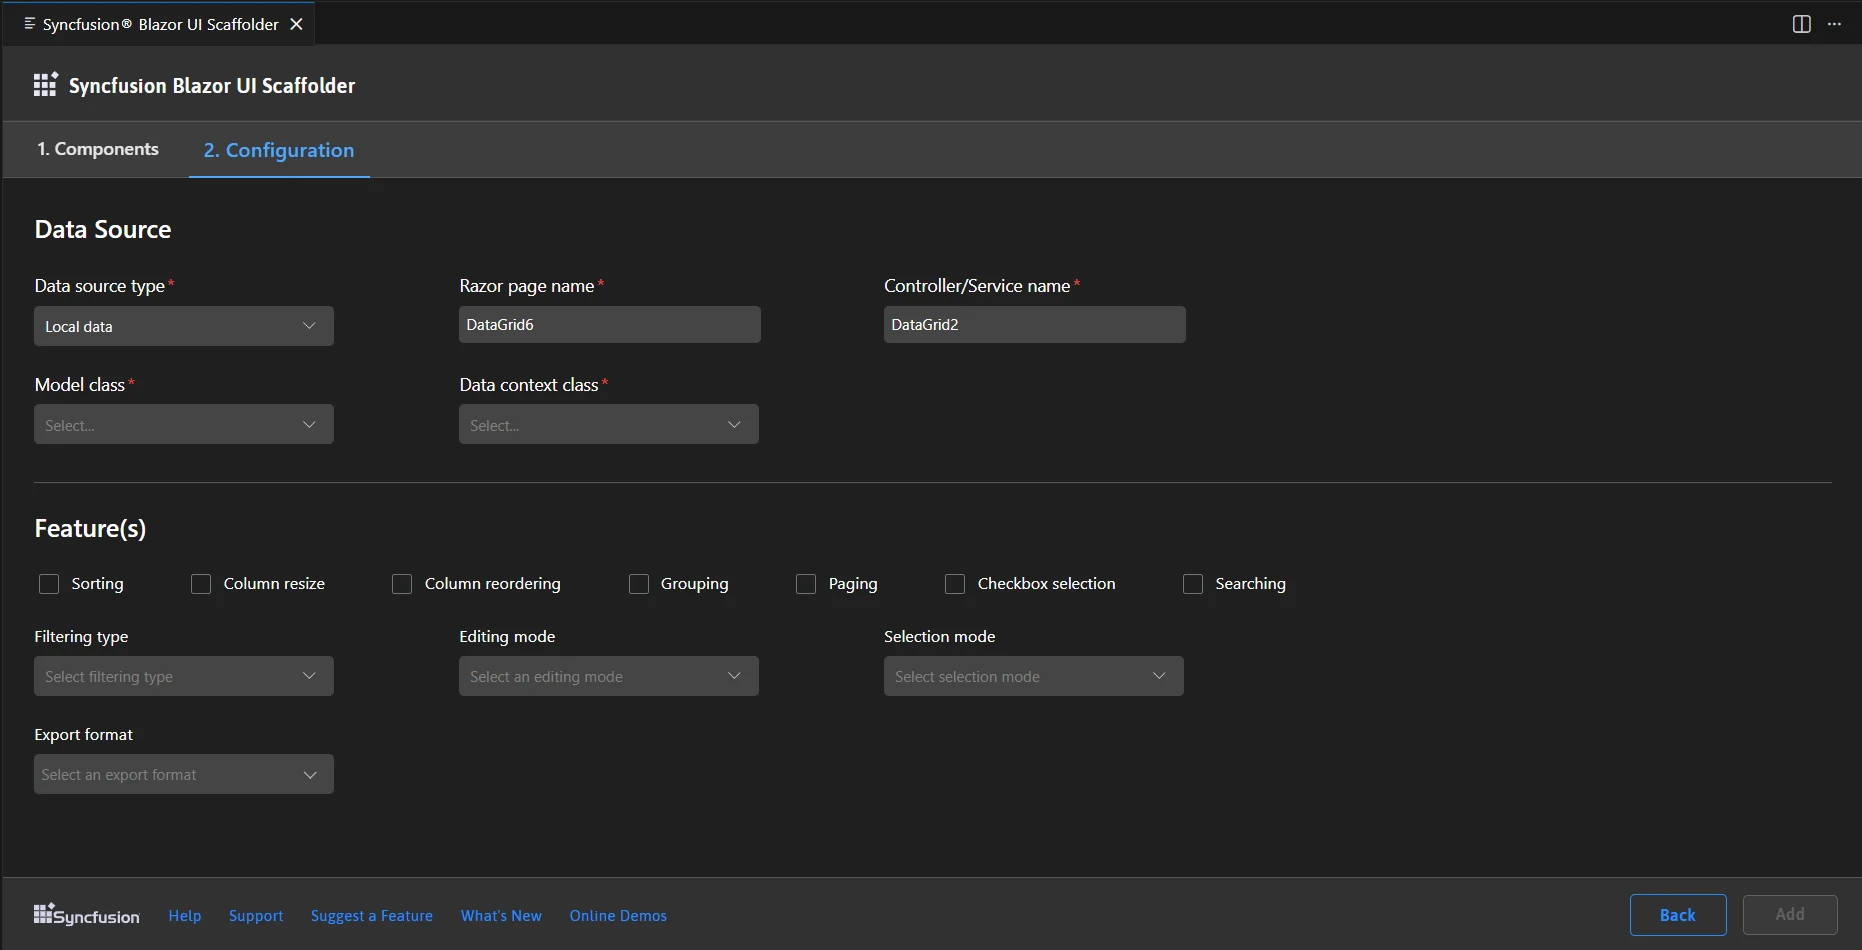
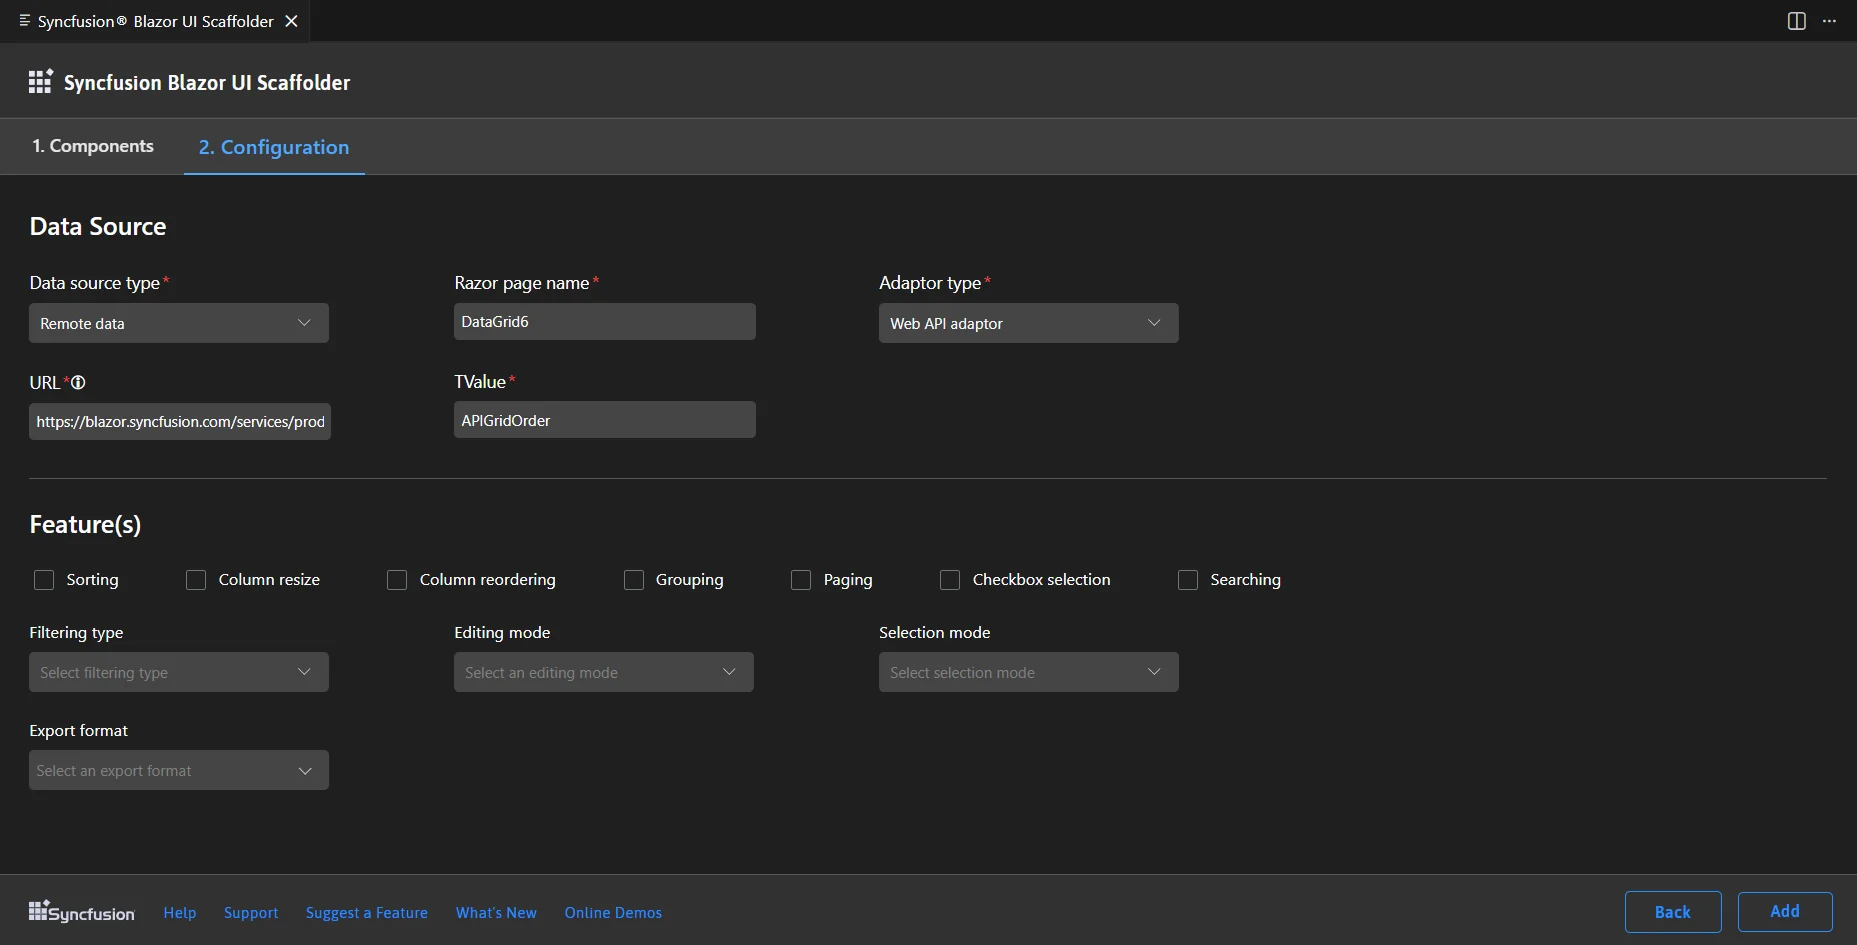
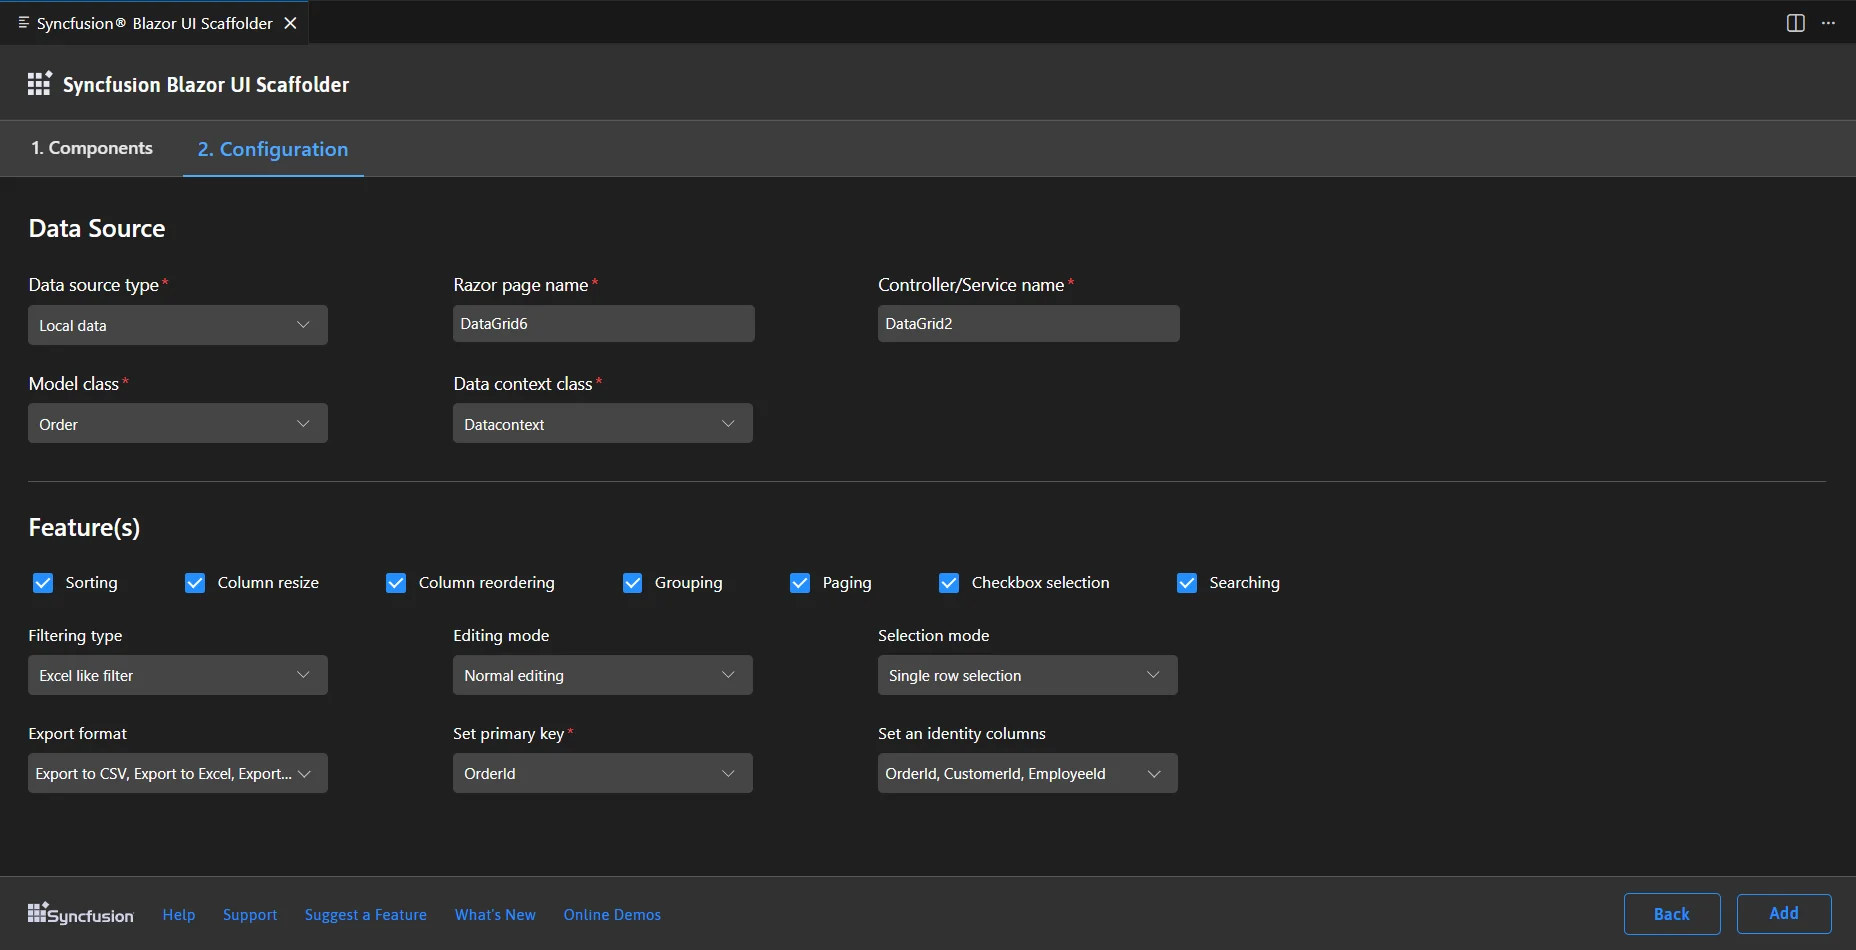
Configure the control and data source.
Select Data Source Type:
-
Local Data (default): Enter the Controller/Service name, Razor page name, pick the Model class, and choose the DbContext.
-
Remote Data: Enter the Razor page name, choose the Adaptor type, provide the URL, and set the
TValue.-
For DataGrid/TreeGrid using the URL adaptor, choose between Localhost URL (requires a Controller/Service name and model/DbContext) or API URL (use a valid API endpoint).
-
Example adaptor links in the UI are placeholders for demonstration and do not perform full CRUD operations. To enable real CRUD, supply a valid back-end endpoint that supports the required operations.
-
-
-
On the features screen, choose the control features and map data fields as needed, then click Add.
-
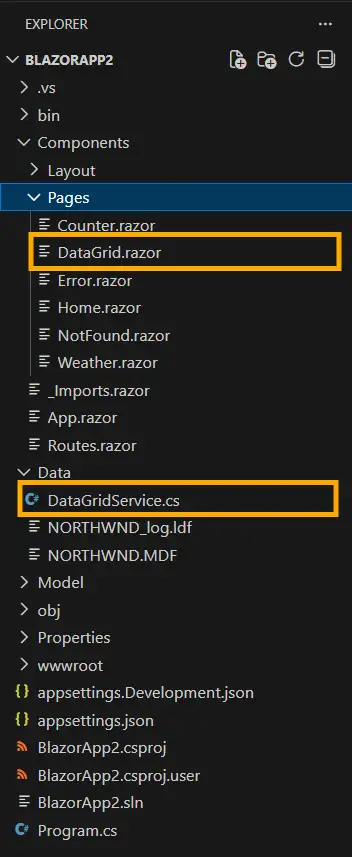
Scaffolding will generate the Controller/Service and Razor files according to your selections:
-
Local Data: Adds service and Razor files.
-
Remote Data (Localhost URL): Adds controller and Razor files.

-
Remote Data (API adaptor): Adds Razor files integrated with the chosen adaptor.

-
-
Add a navigation entry to your app to access the newly created Razor page.
NOTE
If you installed the trial setup or NuGet packages from nuget.org, you must register the license key. Refer to the licensing overview for details on generating and registering your license key.