Syncfusion® Blazor scaffolding
12 Aug 202612 minutes to read
Use the Syncfusion® Scaffolder to quickly create data-driven pages and services for Blazor. The Scaffolder generates controller/service classes and Razor pages wired to your project’s data model and Syncfusion® Blazor components saving time on routine tasks like data binding, CRUD wiring, and component configuration.
Prerequisites
- Visual Studio 2022 or 2026 with the Syncfusion® Blazor Template Studio extension installed. See download and installation if it is not installed.
- .NET 8.0, .NET 9.0, or .NET 10.0 SDK.
- A Blazor project that targets a Syncfusion® Blazor NuGet package version compatible with the current Visual Studio extension.
Ensure your project includes at least one Entity Framework Core model and that the solution builds successfully. If you do not have a model, see Microsoft’s EF Core documentation for creating models. After adding or modifying model properties, rebuild the project before running scaffolding.
The Syncfusion® Blazor Scaffolder requires Essential Studio® v17.4.0.39 or later for Blazor Server projects and v18.4.0.39 or later for Blazor WebAssembly (client) projects.
Add a scaffolded item
Follow these steps to add a scaffolded item to a Blazor application using the Visual Studio extension.
Verify that the Syncfusion® Blazor Template Studio extension is installed in Visual Studio (Extensions → Manage Extensions → Installed). See the download and installation topic if it is not installed.
-
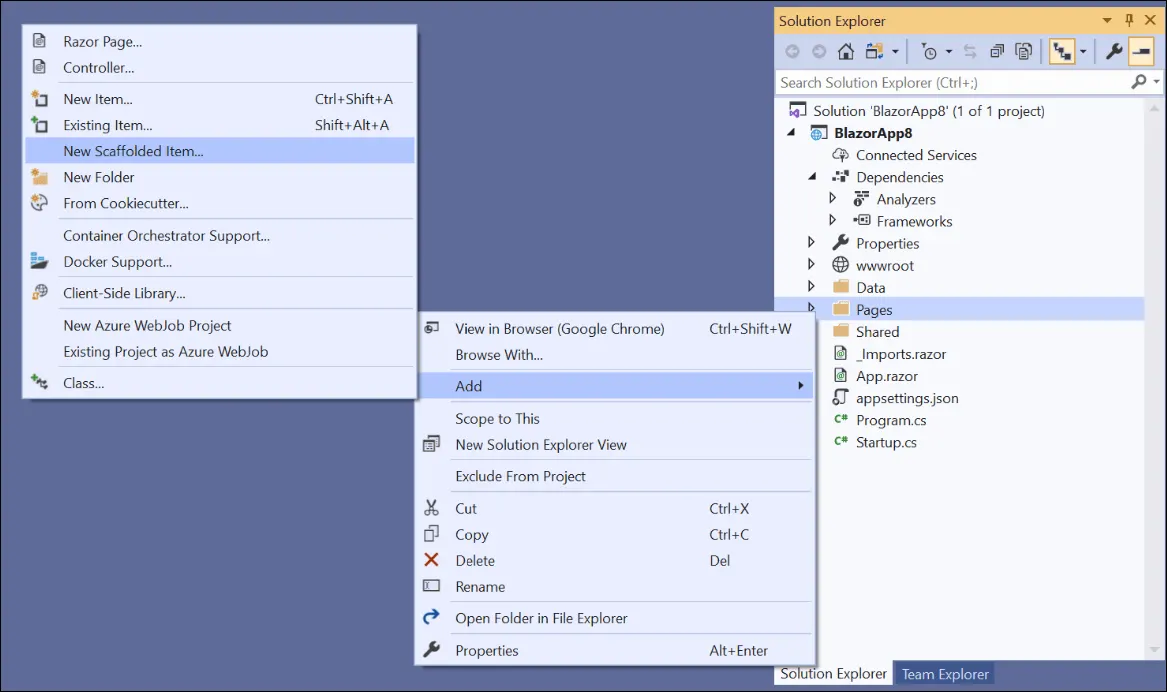
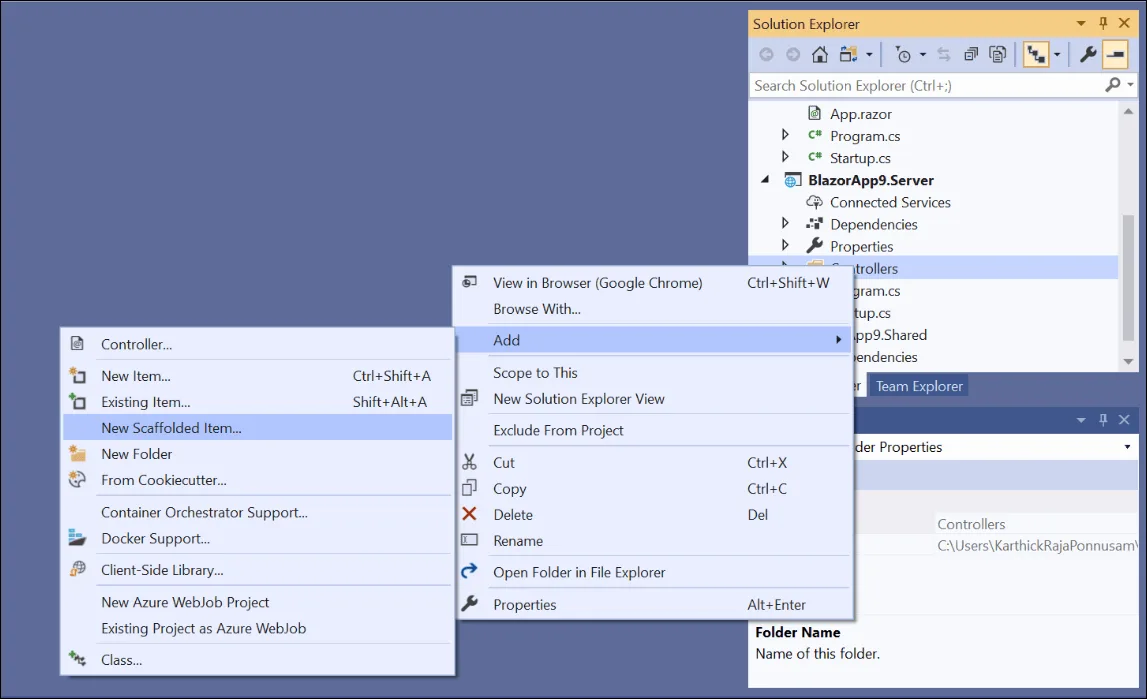
Open the appropriate folder for your project type in Solution Explorer, right-click it, and choose Add → New Scaffolded Item…:
- Blazor Web App: right-click the Components/Pages folder.
- Blazor Server App: right-click the Pages folder.
- Blazor Hosted (ASP.NET Core) WebAssembly App: right-click the Controllers folder under {Project Name}.Server.
-
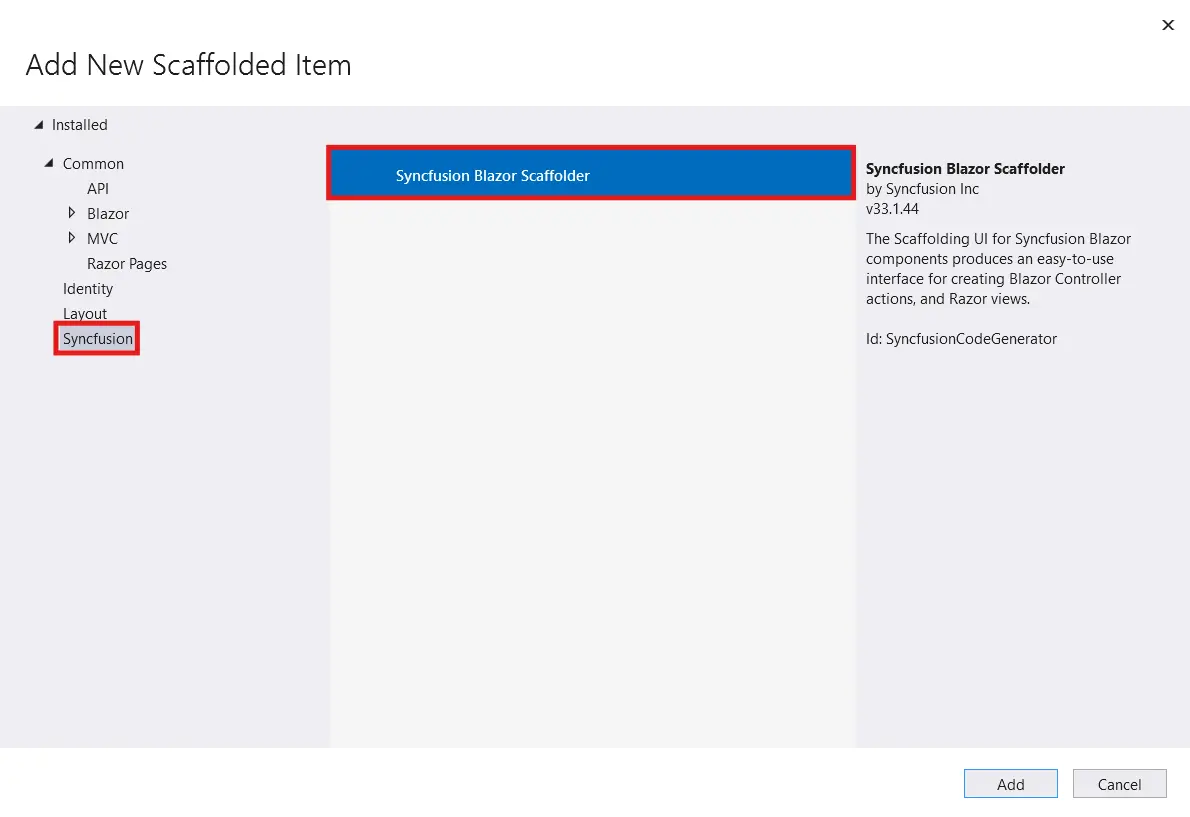
In the Add New Scaffolded Item dialog, choose Syncfusion Blazor Scaffolder and click Add.
-
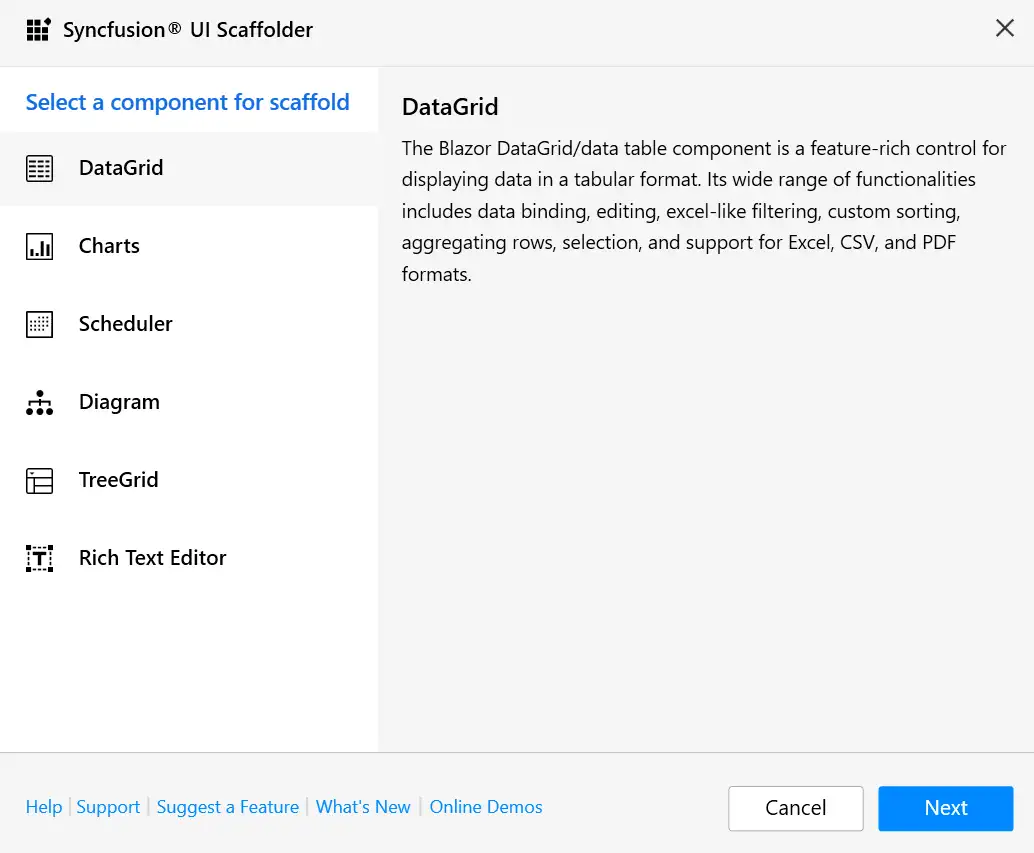
In the Syncfusion® UI Scaffolder dialog, pick the control you want to scaffold and click Next.
-
Configure the data source and code generation options.
Select Data Source Type:
-
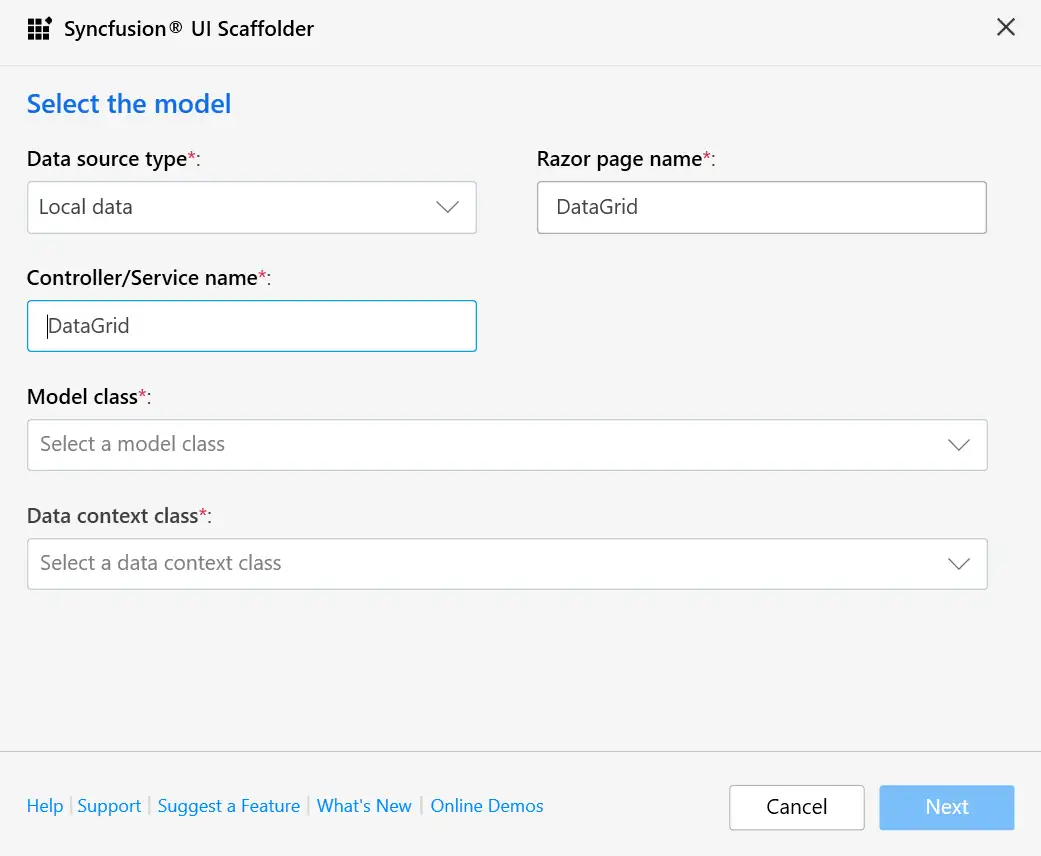
Local data (default)
Enter Controller/Service name and Razor page name, then select the Model class and DbContext. Click Next to continue.
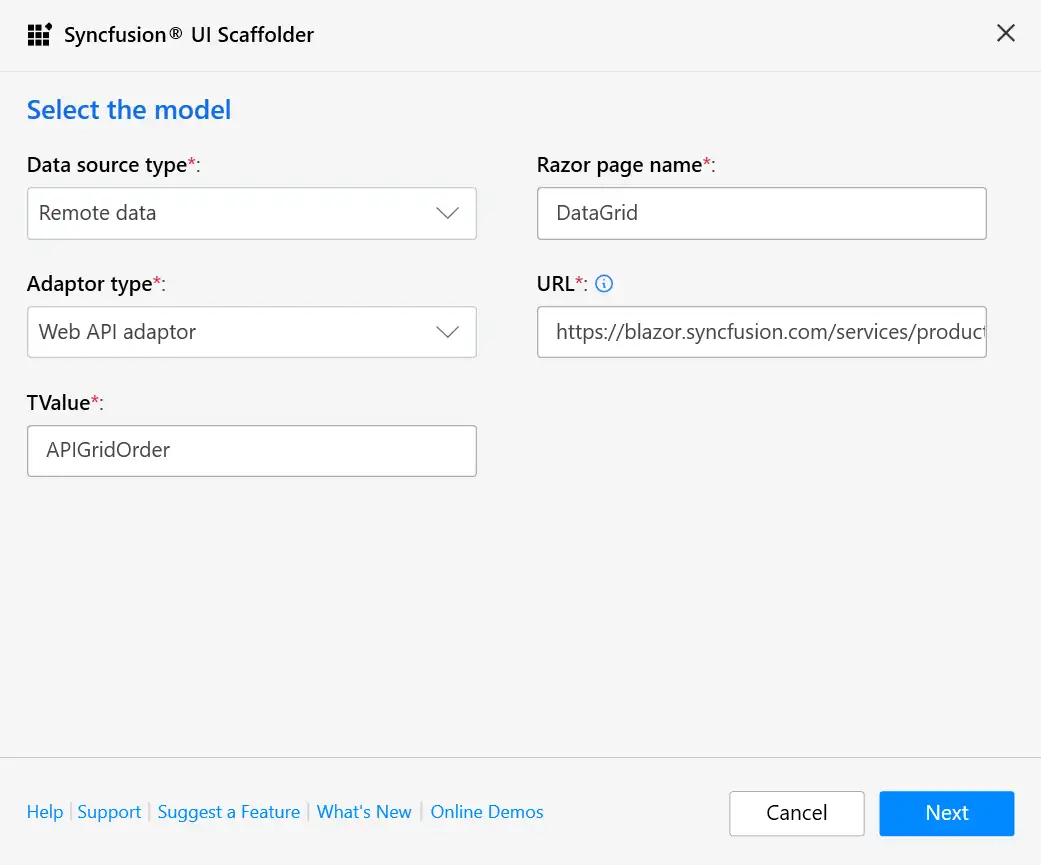
Adaptor types are available in Blazor scaffolding for remote data.
-
Remote data
- Enter the Razor page name.
- Choose an Adaptor type (for example,
UrlAdaptor,WebApiAdaptor,ODataAdaptor). - Provide a valid URL to your data endpoint.
- Specify the TValue (the model type, for example
Order). - Click Next to continue.
When you choose the URL adaptor for DataGrid or TreeGrid, a Remote service option appears. Select either:
- Localhost URL — provide a controller or service name and a model and DbContext.
-
API URL — enter a valid endpoint and
TValue.
The Scaffolder provides sample adaptor links for demonstration only; these placeholders do not perform CRUD operations. To enable real CRUD, supply a working backend endpoint that implements the required operations.
-
-
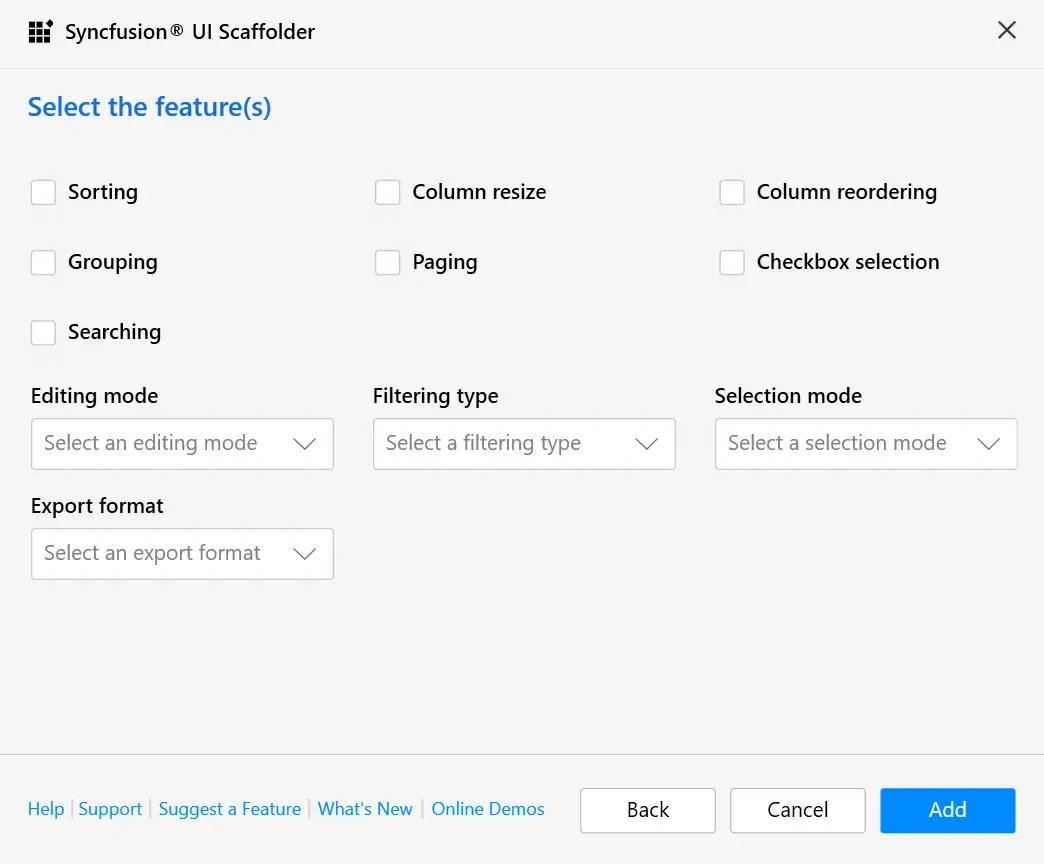
In the feature dialog for the selected control, choose the fields and options you want, then click Add. The available fields and options vary by control; refer to the control-specific user guide for details.
-
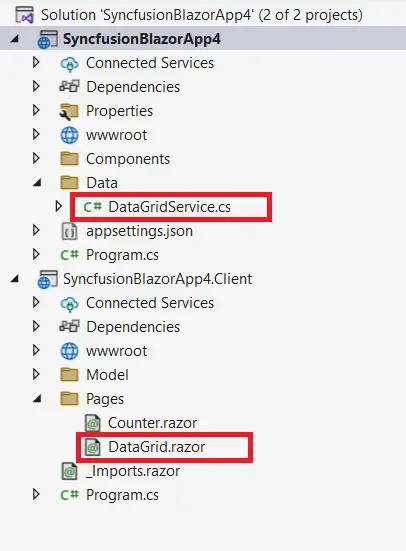
The Scaffolder generates the controller or service and the corresponding Razor files based on your selections.
-
For Local data, both service and Razor files are added:
-
For Remote data using Localhost URL, the controller and Razor files are added:
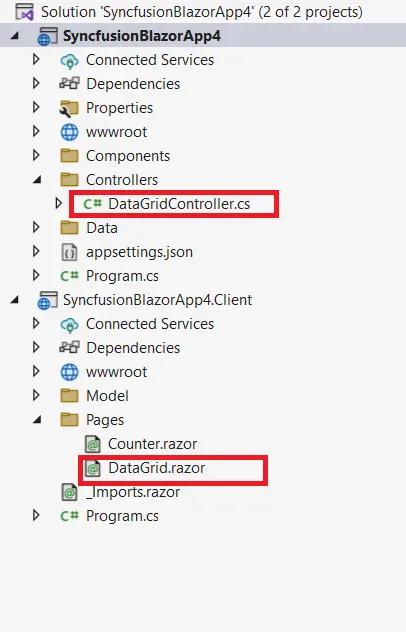
-
For Remote data with a Web API adaptor, the Razor page is added (the API must be present to enable full CRUD):
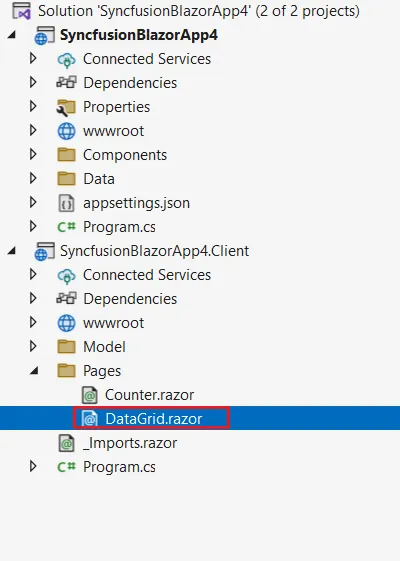
-
-
Add navigation to the generated Razor page so it is reachable from your app’s UI. For example, open
NavMenu.razor(Blazor Server/Web App) orNavMenu.razorin the Layout folder (Blazor WebAssembly) and add a<NavLink>entry that points to the new page route. -
Licensing: If you used trial installers or NuGet packages from nuget.org, register your Syncfusion® license key. Licensing was introduced in Essential Studio® 2018 Volume 2 (v16.2.0.41). See the help topic to generate and register the key. For background on the licensing change, see this blog post.
Syncfusion® Blazor command-line scaffolding
The Syncfusion® Blazor command-line scaffolding helps quickly add code that interacts with data models, reducing the time required to develop data operations. It simplifies creating view files and controller action methods for Syncfusion® Blazor components such as DataGrid, Charts, Scheduler, Diagram, Tree Grid, Rich Text Editor, Document Editor, and PDF Viewer.
Prerequisites
- .NET 8.0, .NET 9.0, or .NET 10.0 SDK installed.
- A Blazor project with a Syncfusion® Blazor NuGet package referenced.
Verify that at least one Entity Framework model exists. If your application lacks an Entity Framework model, see Microsoft’s EF Core documentation to create one. After you add the model file, double-check that the necessary DbContext and properties are present. Build the application before running scaffolding. If you change model properties, rebuild the application before performing scaffolding.
Install command-line scaffolding
Install the syncfusion.scaffolding tool globally using the following command.
dotnet tool install -g syncfusion.scaffolding
Verify the installation by running dotnet tool list -g and confirming that syncfusion.scaffolding appears in the list.
Update command-line scaffolding
Update the syncfusion.scaffolding tool globally using the following command.
dotnet tool update -g syncfusion.scaffolding
Add a scaffolded item from the command line
The following steps describe how to add a scaffolded item from the command line to a Blazor application.
Before adding a scaffolded item from the command line, verify that the dotnet-aspnet-codegenerator tool is installed by running
dotnet tool list -g. If it is not installed, install it globally withdotnet tool install -g dotnet-aspnet-codegenerator.
-
After installing the syncfusion.scaffolding tool, run the
syncfusion_scaffoldcommand to view available components.syncfusion_scaffold
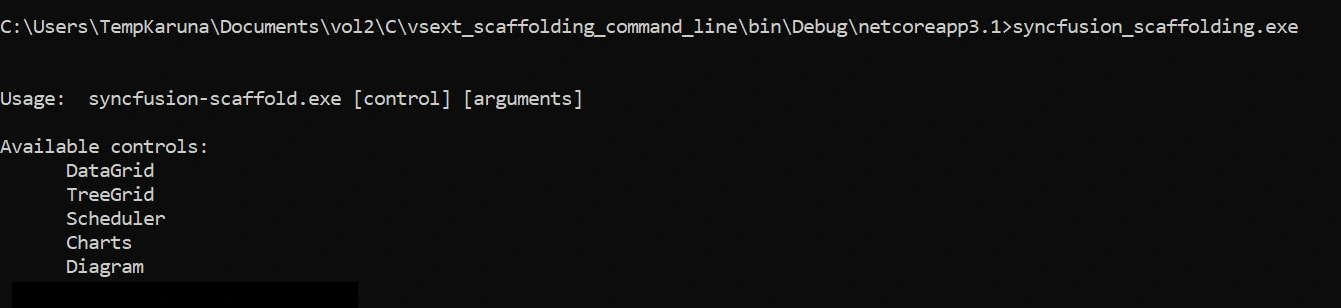
-
To add a scaffolded item from the command line, use the following syntax.
syncfusion_scaffold [control][arguments]
Parameter Description Control -p|–project Path to .csproj file in the project. All Controls -cname|–controller-filename Name of controller file to be added in project. All controls -vname|–view-filename Name of view file to be added in project. All Controls -m|–model Database model name with namespace (example: WebApplication1.Models.Tasks). All Controls -dc|–db-context DbContext name with namespace (example: WebApplication1.Models.TasksContext). All Controls -pkey|–primary-key Name of the column to use as the primary key (for example, TaskId).Data Grid/Tree Grid -tid|–treegrid-id Name of the column that uniquely identifies a node (for example, TaskId).Tree Grid -pid|–parent-id Name of the column that holds the parent reference (for example, ParentId).Tree Grid/Diagram -x|–x-axis X-axis of Chart Charts -Y|–Y-axis Y-axis of Chart Charts -sid|–scheduler-id Id of Scheduler Event. Scheduler -stime|–start-time Start Time of Scheduler Event. Scheduler -etime|–end-time End Time of Scheduler Event. Scheduler –is-all-day Set IsALLDay for Scheduler Event. Scheduler -did|–diagram-id Id of Diagram layout. Diagram -
Running
syncfusion_scaffold [control]displays the available parameters for the specified component.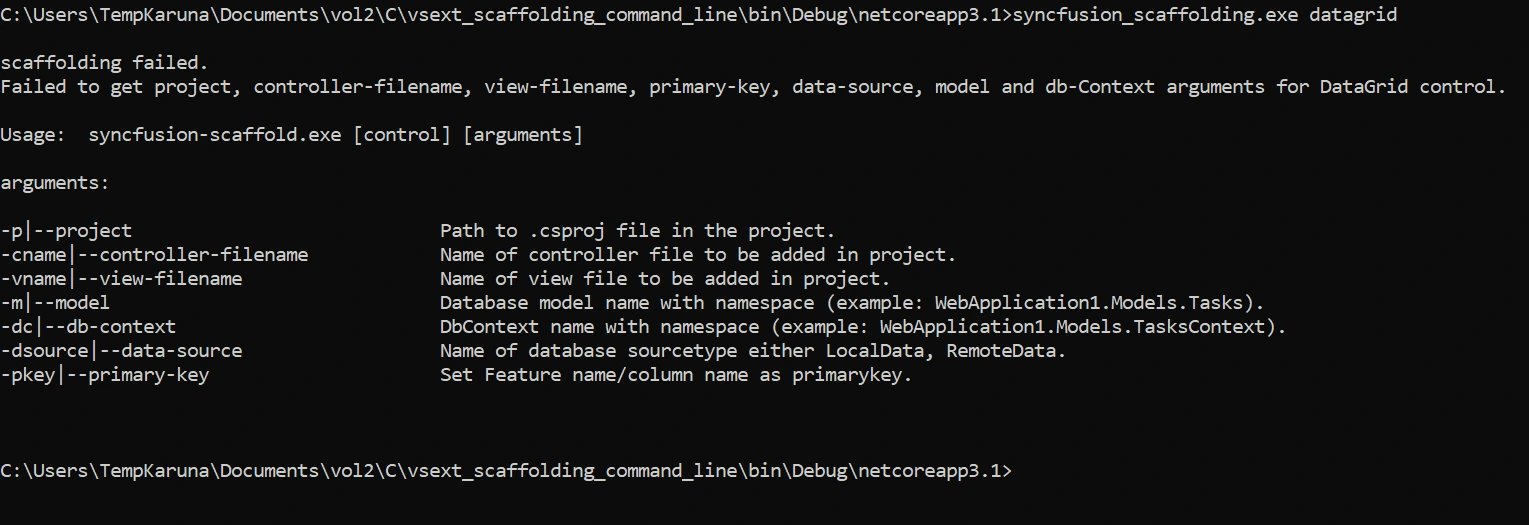
-
Run the following command to generate controller and view files from the command line by passing the required arguments for the specified component.
syncfusion_scaffold {controlName} --project "{projectFileNamewithPath}" --model {model} -dc {dbContext} -cname {controllerName} -vname {viewName} [controlMandatoryParameter] [controlMandatoryParameterValue]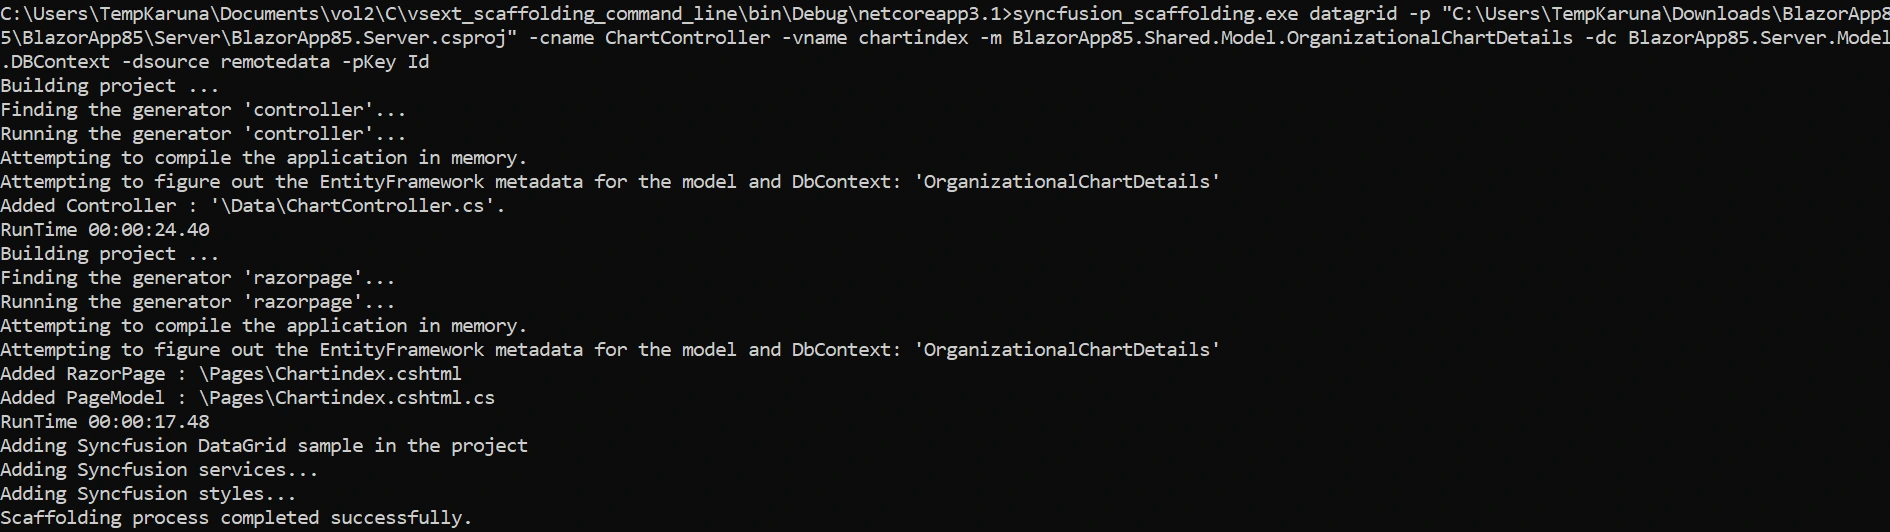
-
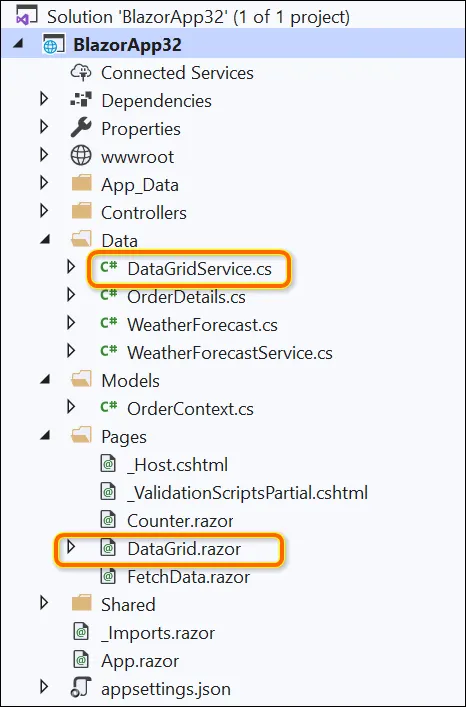
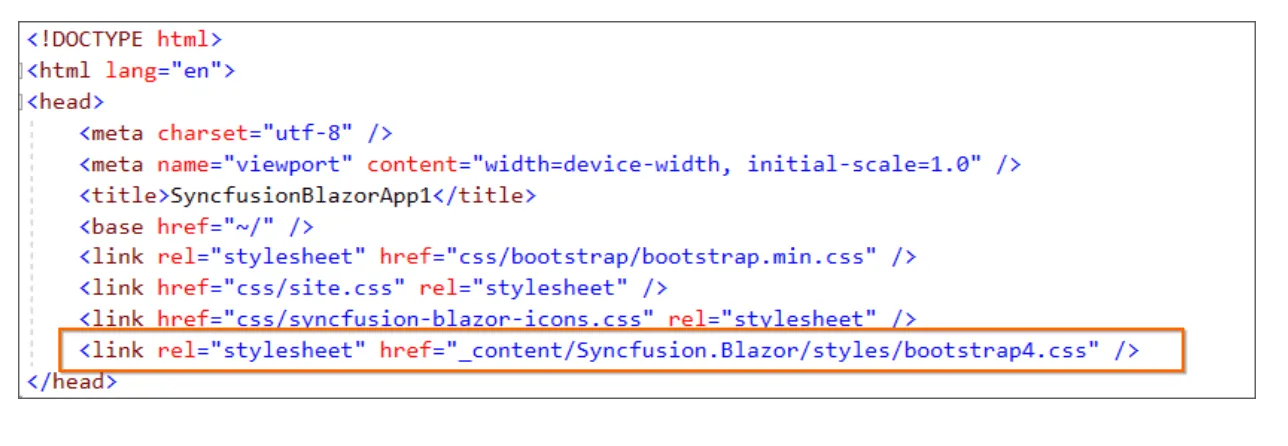
After generation, the controller and view files are created successfully, and the required Syncfusion® NuGet packages and styles are added to render the component.
How to render a Syncfusion® component
Refer to the following user guide links to render a Syncfusion® component after scaffolding:
- Blazor WebAssembly App: Configure Blazor components using the Syncfusion® Blazor component NuGet package
- Blazor Server App: Configure Blazor components using the Syncfusion® Blazor component NuGet package
- Blazor Web App: Configure Blazor components using the Syncfusion® Blazor component NuGet package