How can I help you?
Getting started with Blazor Component using Syncfusion.Blazor NuGet
19 Nov 20253 minutes to read
This section explains how to add a Blazor component by using the consolidated Syncfusion.Blazor (Single NuGet) package in a Blazor Server App and a Blazor WebAssembly Standalone App in Visual Studio.
Prerequisites
Create a new Blazor App in Visual Studio
Create a Blazor Web App (Server Interactive Mode) or WebAssembly Standalone using Visual Studio via the Microsoft Templates or the Syncfusion® Blazor extension.
Install Syncfusion® Blazor Single NuGet in the App
To add the Blazor Calendar component to the app, open NuGet Package Manager in Visual Studio (Tools → NuGet Package Manager → Manage NuGet Packages for Solution), search for, and install Syncfusion.Blazor. Alternatively, use the following Package Manager command.
Install-Package Syncfusion.Blazor -Version 32.2.3NOTE
Syncfusion® Blazor components are available in nuget.org. Refer to the NuGet packages topic for the available package list with component details. The Syncfusion.Blazor Single NuGet package is a comprehensive package that includes all components, with the exception of PDF Viewer and Document Editor.
Register Syncfusion® Blazor Service
Open ~/Components/_Imports.razor and import the Syncfusion.Blazor and Syncfusion.Blazor.Calendars namespaces.
@using Syncfusion.Blazor
@using Syncfusion.Blazor.Calendars
Now, register the Syncfusion® Blazor Service in the ~/Program.cs file of your Blazor WebApp Server Interactive Mode or WebAssembly Standalone app.
using Microsoft.AspNetCore.Components;
using Microsoft.AspNetCore.Components.Web;
using Syncfusion.Blazor;

var builder = WebApplication.CreateBuilder(args);

// Add services to the container.
builder.Services.AddRazorPages();
builder.Services.AddServerSideBlazor();
builder.Services.AddSyncfusionBlazor();

var app = builder.Build();
....
using Microsoft.AspNetCore.Components.Web;
using Microsoft.AspNetCore.Components.WebAssembly.Hosting;
using Syncfusion.Blazor;
var builder = WebAssemblyHostBuilder.CreateDefault(args);
builder.RootComponents.Add<App>("#app");
builder.RootComponents.Add<HeadOutlet>("head::after");
builder.Services.AddScoped(serviceProvider => new HttpClient { BaseAddress = new Uri(builder.HostEnvironment.BaseAddress) });
builder.Services.AddSyncfusionBlazor();
await builder.Build().RunAsync();
....Add stylesheet and script resources
The theme stylesheet and script can be accessed from NuGet through Static Web Assets. Reference the stylesheet and script in the <head> of the main page as follows:
-
For .NET 8, .NET 9 and .NET 10 WebAssembly Standalone app , include it in wwwroot/index.html file.
-
For .NET 8, .NET 9 and .NET 10 Blazor WebApp Server Interactive Mode, include it in ~/Components/App.razor.
<head>
    ....
    <link href="_content/Syncfusion.Blazor/styles/bootstrap5.css" rel="stylesheet" />
    <script  src="_content/Syncfusion.Blazor/scripts/syncfusion-blazor.min.js"  type="text/javascript"></script>
</head>
NOTE
If you are using Syncfusion.Blazor single NuGet, you don’t have to refer Syncfusion.Blazor.Themes NuGet. Since style sheets already inside the assets of Syncfusion.Blazor NuGet.
Check out the Blazor Themes topic to discover various methods (Static Web Assets, CDN, and CRG) for referencing themes in your Blazor application. Also, check out the Adding Script Reference topic to learn different approaches for adding script references in your Blazor application.
Add Syncfusion® Blazor component
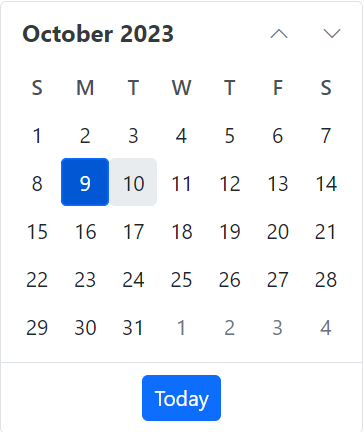
- Now, add the Syncfusion® Blazor Calendar component in the ~/Components/Pages/Index.razor file.
<SfCalendar TValue="DateTime" />- Press Ctrl+F5 (Windows) or ⌘+F5 (macOS) to run the app. Then, the Syncfusion® Blazor Calendar component will be rendered in the default web browser.
