How can I help you?
Getting Started with Blazor WASM App with Authentication Library
9 Mar 20263 minutes to read
This article provides step-by-step instructions for building and securing a Blazor WebAssembly Standalone App with the Blazor WebAssembly Authentication library using Visual Studio.
Prerequisites
Create a new Blazor WebAssembly Standalone App in Visual Studio
You can create a Blazor WebAssembly Standalone App using Visual Studio via Microsoft Templates or the Syncfusion® Blazor Extension by setting the Authentication type to Individual Accounts. This selection adds authentication support and doesn’t result in storing users in a database.
Configure the application with Google OAuth 2.0 (OIDC)
-
Set up Google OAuth 2.0 authentication. For more information, see the Google Cloud documentation.
-
Replace the
appsettings.jsonfile with the following content to configure the application withGoogle OAuth 2.0.
{
  "Local": {
    "Authority": "https://accounts.google.com/",
    "ClientId": "2...7-e...q.apps.googleusercontent.com",
    "PostLogoutRedirectUri": "https://<example.com>/authentication/logout-callback",
    "RedirectUri": "https://<example.com>/authentication/login-callback",
    "ResponseType": "id_token"
  }
}- Replace the
ClientIdwith the OAuth 2.0 client ID of your created project.
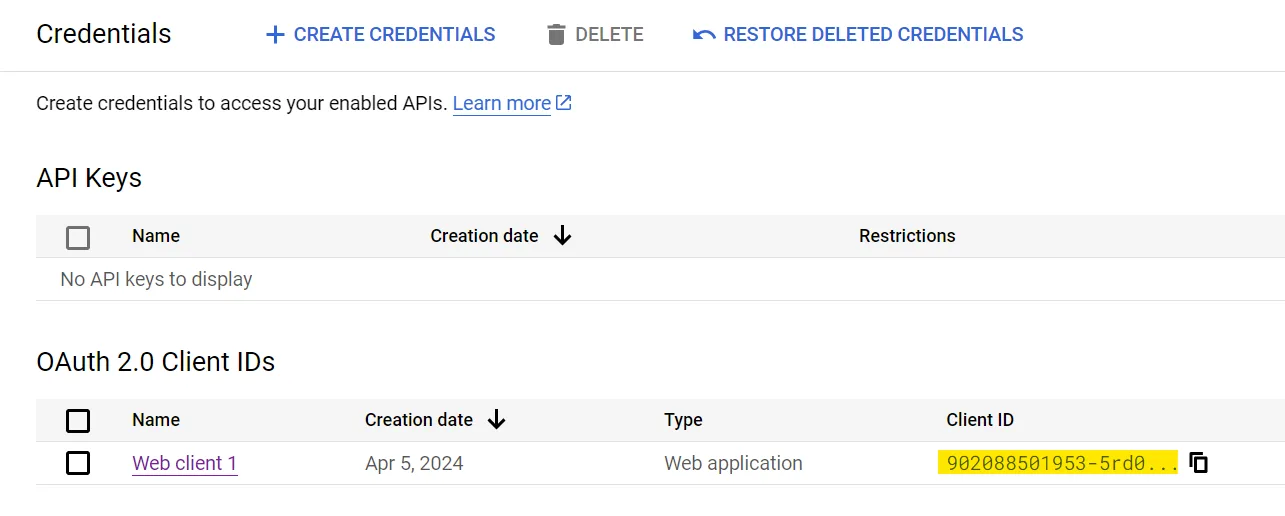
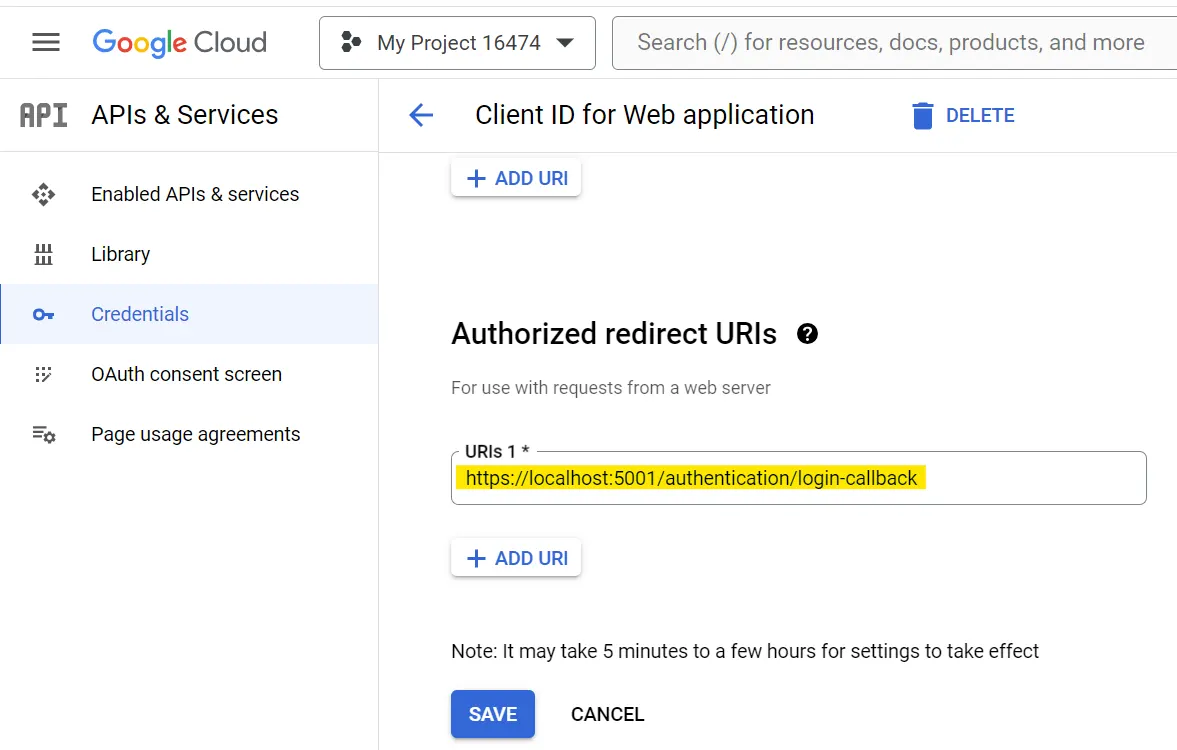
- The
RedirectUri(https:///authentication/login-callback) must be registered in the Google APIs console as shown below.
Install Syncfusion® Blazor Calendars and Themes NuGet in the App
Here’s an example of how to add Blazor Calendar component in the app, open the NuGet package manager in Visual Studio (Tools → NuGet Package Manager → Manage NuGet Packages for Solution), search and install Syncfusion.Blazor.Calendars and Syncfusion.Blazor.Themes. Alternatively, you can utilize the following package manager command to achieve the same.
Install-Package Syncfusion.Blazor.Calendars -Version 33.2.3
Install-Package Syncfusion.Blazor.Themes -Version 33.2.3
NOTE
Syncfusion® Blazor components are available on nuget.org. Refer to the NuGet packages topic for the available package list with component details.
Register Syncfusion® Blazor Service
Open the ~/_Imports.razor file and import the Syncfusion.Blazor and Syncfusion.Blazor.Calendars namespaces.
@using Syncfusion.Blazor
@using Syncfusion.Blazor.Calendars
Now, register the Syncfusion® Blazor service in the ~/Program.cs file of the Blazor WebAssembly Standalone App.
....
using Syncfusion.Blazor;
....
builder.Services.AddSyncfusionBlazor();
....
Add stylesheet and script resources
The theme stylesheet and script can be accessed from NuGet through Static Web Assets. Reference the stylesheet in the <head> section and the script at the end of the <body> of the main page as follows:
- For .NET 10, .NET 9 and .NET 8 Blazor WebAssembly Standalone app, include it in the ~/Components/App.razor file.
<head>
    ....
    <link href="_content/Syncfusion.Blazor.Themes/bootstrap5.css" rel="stylesheet" />
</head>

<body>
    ....
    <script src="_content/Syncfusion.Blazor.Core/scripts/syncfusion-blazor.min.js" type="text/javascript"></script>
</body>
NOTE
Check out the Blazor Themes topic to discover various methods (Static Web Assets, CDN, and CRG) for referencing themes in your Blazor application. Also, check out the Adding Script Reference topic to learn different approaches for adding script references in your Blazor application.
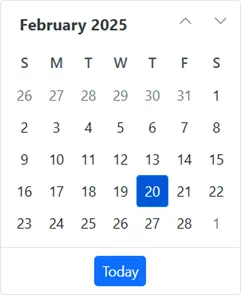
Add Syncfusion® Blazor component
Add the Syncfusion® Blazor Calendar component in the ~/Pages/Home.razor file under an AuthorizeView.
<AuthorizeView>
    <Authorized>
        <SfCalendar TValue="DateTime" />
    </Authorized>
    <NotAuthorized>
        <h1>Authentication Failure!</h1>
        <p>You're not signed in.</p>
    </NotAuthorized>
</AuthorizeView>- Press Ctrl+F5 (Windows) or ⌘+F5 (macOS) to launch the application. This renders the Syncfusion® Blazor Calendar component in the default web browser.