Getting Started with Blazor Inline AI Assist in Blazor Web App
28 Jul 202612 minutes to read
This section briefly explains how to include the Blazor Inline AI Assist component in a Blazor Web App using Visual Studio, Visual Studio Code, and the .NET CLI.
Create a new Blazor Web App
Create a Blazor Web App using Visual Studio via Microsoft Templates or the Syncfusion® Blazor Extension.
Run the following command to create a new Blazor Web App.
dotnet new blazor -o BlazorWebApp --interactivity Auto
cd BlazorWebApp
cd BlazorWebApp.Client
Alternatively, create a Blazor Web App using Visual Studio Code via Microsoft Templates, the Syncfusion® Blazor Extension, or the C# Dev Kit extension.
Run the following command to create a new Blazor Web App.
dotnet new blazor -o BlazorWebApp --interactivity Auto
cd BlazorWebApp
cd BlazorWebApp.Client
NOTE
Configure the appropriate Interactive render mode and Interactivity location while creating a Blazor Web App. For detailed information, refer to the interactive render mode documentation.
Install the required Blazor packages
Install the Syncfusion.Blazor.InteractiveChat and Syncfusion.Blazor.Themes NuGet packages. All Syncfusion Blazor packages are available on nuget.org. See the NuGet packages topic for details. If using the WebAssembly or Auto render modes in the Blazor Web App, install these packages in the .Client project.
- Go to Tools → NuGet Package Manager → Manage NuGet Packages for Solution.
- Search the required NuGet packages (
Syncfusion.Blazor.InteractiveChatandSyncfusion.Blazor.Themes) and install them.
Alternatively, you can install the same packages using the Package Manager Console with the following commands.
Install-Package Syncfusion.Blazor.InteractiveChat -Version 34.2.2
Install-Package Syncfusion.Blazor.Themes -Version 34.2.2
Open the terminal and run the following commands.
dotnet add package Syncfusion.Blazor.InteractiveChat -v 34.2.2
dotnet add package Syncfusion.Blazor.Themes -v 34.2.2
Open the command prompt and run the following commands.
dotnet add package Syncfusion.Blazor.InteractiveChat -v 34.2.2
dotnet add package Syncfusion.Blazor.Themes -v 34.2.2
Add import namespaces
After the packages are installed, open the ~/_Imports.razor file in the .Client project and import the Syncfusion.Blazor and Syncfusion.Blazor.InteractiveChat namespaces.
@using Syncfusion.Blazor
@using Syncfusion.Blazor.InteractiveChat
Register the Blazor service
Open the Program.cs file in Blazor Web App and register the Blazor service and include the required namespace reference using Syncfusion.Blazor; at the top. If the Interactive Render Mode is set to WebAssembly or Auto, register the Blazor service in Program.cs files of both the server and client projects in your Blazor Web App.
builder.Services.AddSyncfusionBlazor();Add stylesheet and script resources
The theme stylesheet and script can be accessed from NuGet through Static Web Assets. Include the stylesheet at the end of the <head> section in the App.razor file.
<link href="_content/Syncfusion.Blazor.Themes/fluent2.css" rel="stylesheet" />Include the required script references at the end of the <body> section in the App.razor file to enable Inline AI Assist functionality.
<script src="_content/Syncfusion.Blazor.Core/scripts/syncfusion-blazor.min.js" type="text/javascript"></script>Add Blazor Inline AI Assist component
Open a Razor file located in the ~/Pages/*.razor (for example, Home.razor) and add the Blazor Inline AI Assist component inside the .Client project razor file.
NOTE
If the interactivity location is set to
Per page/componentin the Web App, define a render mode at the top of the razor file. (For example,InteractiveServer,InteractiveWebAssemblyorInteractiveAuto). If the Interactivity is set toGlobalwithAutoorWebAssembly, the render mode is automatically configured in theApp.razorfile by default.
@rendermode InteractiveAuto

@using Syncfusion.Blazor.InteractiveChat

<style>
    #editableText {
        width: 100%;
        min-height: 120px;
        max-height: 300px;
        overflow-y: auto;
        font-size: 16px;
        padding: 12px;
        border-radius: 4px;
        border: 1px solid;
    }
</style>
<div id="container" style="height: 350px; width: 650px;">
    <button id="summarizeButton" style="margin-bottom: 10px;" @onclick="ShowPopup"> Content Summarize </button>
    <div id="editableText" contenteditable="true">
        <p>
            Inline AI Assist component provides intelligent text processing
            capabilities that enhance user productivity. It leverages advanced
            natural language processing to understand context and deliver
            precise suggestions. Users can seamlessly integrate AI-powered
            features into their applications.
        </p>
        <p>
            With real-time response streaming and customizable prompts,
            developers can create interactive experiences. The component
            supports multiple response modes including inline editing and
            popup-based interactions.
        </p>
    </div>
    <SfInlineAIAssist @ref="inlineAssist" RelateTo="#summarizeButton" Target="#container" PromptRequested="PromptRequest">
    </SfInlineAIAssist>
</div>
@code
{
    private SfInlineAIAssist inlineAssist = new();
    private async Task PromptRequest(PromptRequestedEventArgs args)
    {
        await Task.Delay(1000);
        string defaultResponse =
            "For real-time prompt processing, connect the Inline AI Assist component to your preferred AI service, such as OpenAI or Azure Cognitive Services. Ensure you obtain the necessary API credentials to authenticate and enable seamless integration.";
        await inlineAssist.UpdateResponseAsync(defaultResponse);
    }
    private async Task ShowPopup()
    {
        await inlineAssist.ShowPopupAsync();
    }
}
Run the application
Press Ctrl+F5 (Windows) or ⌘+F5 (macOS) to launch the application. The Blazor Inline AI Assist component will render in your default web browser.
Open the terminal and navigate to the main project folder (for example, BlazorWebApp) and run the following command.
cd ..
cd BlazorWebApp
dotnet run
Open the command prompt and navigate to the main project folder (for example, BlazorWebApp) and run the following command.
cd ..
cd BlazorWebApp
dotnet run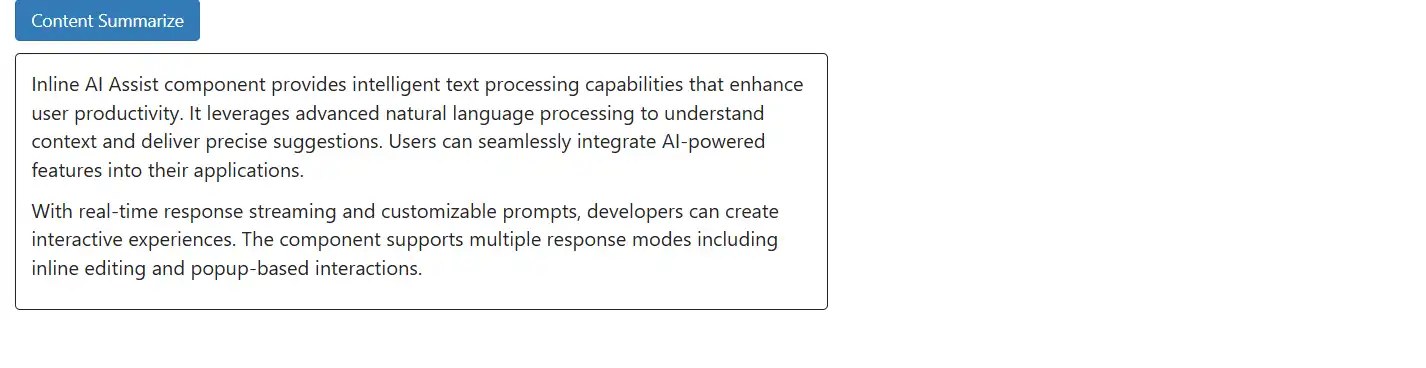
Response display modes
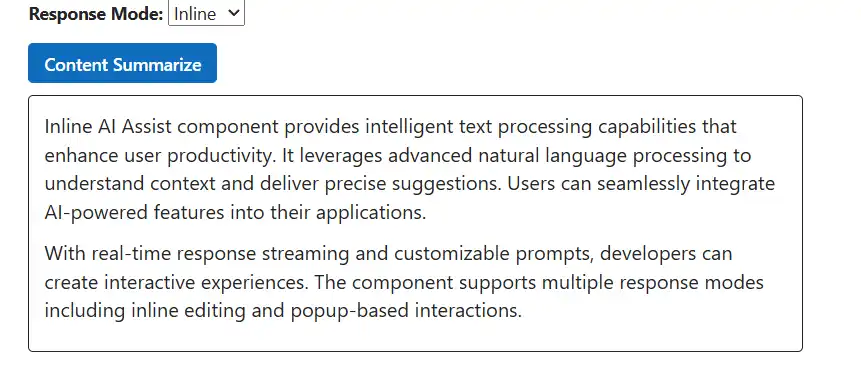
Responses can be shown in two modes: Inline (updates content in-place) and Popup (shows responses in a floating popup). Toggle this behavior with the ResponseMode property.
@using Syncfusion.Blazor.InteractiveChat
@using Syncfusion.Blazor.Buttons
<style>
    #editableText {
        width: 100%;
        min-height: 120px;
        max-height: 300px;
        overflow-y: auto;
        font-size: 16px;
        padding: 12px;
        border-radius: 4px;
        border: 1px solid;
    }
</style>
<div class="container" style="height: 350px; width: 650px;">
    <div style="margin-bottom: 10px;">
        <label for="responseMode">Response Mode:</label>
        <select id="responseMode" @onchange="OnResponseModeChangeAsync">
            <option value="Popup">Popup</option>
            <option value="Inline">Inline</option>
        </select>
    </div>
    <SfButton id="summarizeButton" IsPrimary="true" Style="margin-bottom: 10px;" @onclick="OnSummarizeClick">Content Summarize</SfButton>
    <div id="editableText" contenteditable="true">
        @((MarkupString)editableContent)
    </div>
    <SfInlineAIAssist @ref="inlineAssist" ResponseMode="@currentResponseMode" RelateTo="#summarizeButton" PromptRequested="OnPromptRequestAsync"> <ResponseActions ItemSelect="OnItemSelectAsync"></ResponseActions>
    </SfInlineAIAssist>
</div>
@code
{
    private SfInlineAIAssist inlineAssist = new SfInlineAIAssist();
    private ResponseDisplayMode currentResponseMode = ResponseDisplayMode.Popup;
    private string editableContent = @"<p>Inline AI Assist component provides intelligent text processing capabilities that enhance user productivity. It leverages advanced natural language processing to understand context and deliver precise suggestions. Users can seamlessly integrate AI-powered features into their applications.</p>
        <p>With real-time response streaming and customizable prompts, developers can create interactive experiences. The component supports multiple response modes including inline editing and popup-based interactions.</p>";
    private async Task OnPromptRequestAsync(PromptRequestedEventArgs args)
    {
        await Task.Delay(1000);
        string defaultResponse = "For real-time prompt processing, connect the Inline AI Assist component to your preferred AI service, such as OpenAI or Azure Cognitive Services. Ensure you obtain the necessary API credentials to authenticate and enable seamless integration.";
        await inlineAssist.UpdateResponseAsync(defaultResponse);
    }
    private async Task OnItemSelectAsync(ResponseItemSelectEventArgs args)
    {
        if (args.Item.Label == "Accept")
        {
            var lastPrompt = inlineAssist?.Prompts.LastOrDefault();
            if (lastPrompt != null && !string.IsNullOrEmpty(lastPrompt.Response))
            {
                editableContent = $"<p>{lastPrompt.Response}</p>";
            }
            await inlineAssist!.HidePopupAsync();
        }
        else if (args.Item.Label == "Discard")
        {
            await inlineAssist!.HidePopupAsync();
        }
    }
    private async Task OnSummarizeClick()
    {
        await inlineAssist.ShowPopupAsync();
    }

    private async Task OnResponseModeChangeAsync(ChangeEventArgs args)
    {
        if (Enum.TryParse<ResponseDisplayMode>(args.Value?.ToString(), out var mode))
        {
            currentResponseMode = mode;
            await InvokeAsync(StateHasChanged);
            await inlineAssist.ShowPopupAsync();
        }
    }
}
Note: Starting from version 33.1x, when a user submits a prompt to the Inline AI Assist, the component automatically scrolls and focuses on the latest prompt and response. This behavior eliminates the need for users to manually scroll down to see the new response, ensuring they always view the most recent AI response without interruption. Prior to version 33.1x, the previous responses remained visible when new responses were added.