Getting Started with Blazor Predefined Dialogs in Blazor Web App
10 Jul 20269 minutes to read
This section briefly explains how to include the Blazor Predefined Dialogs component in your Blazor Web App using Visual Studio, Visual Studio Code, and the .NET CLI.
Create a new Blazor Web App
Create a Blazor Web App using Visual Studio via Microsoft Templates or the Blazor Extension.
Run the following command to create a new Blazor Web App.
dotnet new blazor -o BlazorWebApp --interactivity Auto
cd BlazorWebApp
cd BlazorWebApp.Client
Alternatively, create a Blazor Web App using Visual Studio Code via Microsoft Templates, the Blazor Extension, or the C# Dev Kit extension.
Run the following command to create a new Blazor Web App.
dotnet new blazor -o BlazorWebApp --interactivity Auto
cd BlazorWebApp
cd BlazorWebApp.Client
NOTE
Configure the appropriate Interactive render mode and Interactivity location while creating a Blazor Web App. For detailed information, refer to the interactive render mode documentation.
Install the required Blazor packages
Install the Syncfusion.Blazor.Popups and Syncfusion.Blazor.Themes NuGet packages. All Syncfusion Blazor packages are available on nuget.org. See the NuGet packages topic for details. If using the WebAssembly or Auto render modes in the Blazor Web App, install these packages in the .Client project.
- Go to Tools → NuGet Package Manager → Manage NuGet Packages for Solution.
- Search the required NuGet packages (
Syncfusion.Blazor.PopupsandSyncfusion.Blazor.Themes) and install them.
Alternatively, you can install the same packages using the Package Manager Console with the following commands.
Install-Package Syncfusion.Blazor.Popups -Version 34.1.29
Install-Package Syncfusion.Blazor.Themes -Version 34.1.29
Open the terminal and run the following commands.
dotnet add package Syncfusion.Blazor.Popups -v 34.1.29
dotnet add package Syncfusion.Blazor.Themes -v 34.1.29
Open the command prompt and run the following commands.
dotnet add package Syncfusion.Blazor.Popups -v 34.1.29
dotnet add package Syncfusion.Blazor.Themes -v 34.1.29
Add import namespaces
After the packages are installed, open the ~/_Imports.razor file in the .Client project and import the Syncfusion.Blazor and Syncfusion.Blazor.Popups namespaces.
@using Syncfusion.Blazor
@using Syncfusion.Blazor.Popups
Register the Blazor service
Open the Program.cs file in Blazor Web App and register the Blazor service. If the Interactive Render Mode is set to WebAssembly or Auto, register the Blazor service in Program.cs files of both the server and client projects in your Blazor Web App.
....
using Syncfusion.Blazor;
....
builder.Services.AddScoped<Syncfusion.Blazor.Popups.SfDialogService>();
builder.Services.AddSyncfusionBlazor();
....
Add stylesheet and script resources
The theme stylesheet and script can be accessed from NuGet through Static Web Assets. Include the stylesheet and script references in the ~/Components/App.razor file.
...
<link href="_content/Syncfusion.Blazor.Themes/fluent2.css" rel="stylesheet" />
...
<script src="_content/Syncfusion.Blazor.Core/scripts/syncfusion-blazor.min.js" type="text/javascript"></script>
Add Blazor Dialog Provider
SfDialogProvider opens predefined dialogs based on SfDialogService settings from anywhere in the application. Add SfDialogProvider in MainLayout.razor or in a specific page, but include it only once in the app. When added to MainLayout.razor, predefined dialogs are available throughout the application; when added to a specific page, dialogs are available only within that page.
- Now, add
SfDialogProviderin the ~/Components/Layout/MainLayout.razor file.
<Syncfusion.Blazor.Popups.SfDialogProvider/>Open Predefined Dialog
After adding SfDialogService and SfDialogProvider, open predefined dialogs from anywhere in the application using the AlertAsync, ConfirmAsync or PromptAsync methods in DialogService.
Show alert dialog
An alert dialog box is used to display errors, warnings, or informational messages that require user acknowledgment. This is achieved using the DialogService.AlertAsync method. The alert dialog displays an OK button. When the user selects OK, the alert dialog closes.
Add Blazor Predefined Dialogs component
Open a Razor file located in the ~/Pages/*.razor (for example, Home.razor) and add the Blazor Predefined Dialogs component inside the .Client project razor file.
NOTE
If the interactivity location is set to
Per page/componentin the Web App, define a render mode at the top of the razor file. (For example,InteractiveServer,InteractiveWebAssemblyorInteractiveAuto). If the Interactivity is set toGlobalwithAutoorWebAssembly, the render mode is automatically configured in theApp.razorfile by default.
In the following example, an alert dialog is displayed upon clicking a Button component.
@using Syncfusion.Blazor.Popups
@using Syncfusion.Blazor.Buttons
@inject SfDialogService DialogService
<SfDialogProvider />
    <div>
        <SfButton @onclick="@AlertBtn">Alert</SfButton>
    </div>
    <div class="status" style ="padding-top:10px">@DialogStatus</div>
@code {
    private string DialogStatus { get; set; }
    private async Task AlertBtn()
    {
        await DialogService.AlertAsync("10% of battery remaining", "Low Battery");
        this.DialogStatus = "The user closed the Alert dialog";
    }
}
Run the application
Press Ctrl+F5 (Windows) or ⌘+F5 (macOS) to launch the application. The Blazor Predefined Dialogs component will render in your default web browser.
Open the terminal and navigate to the main project folder (for example, BlazorWebApp) and run the following command.
cd ..
cd BlazorWebApp
dotnet run
Open the command prompt and navigate to the main project folder (for example, BlazorWebApp) and run the following command.
cd ..
cd BlazorWebApp
dotnet run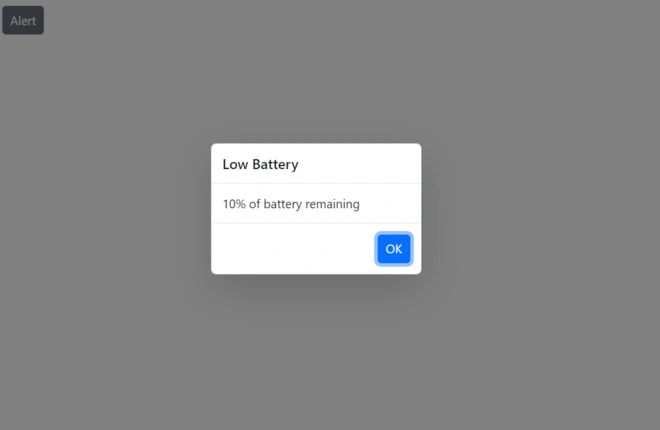
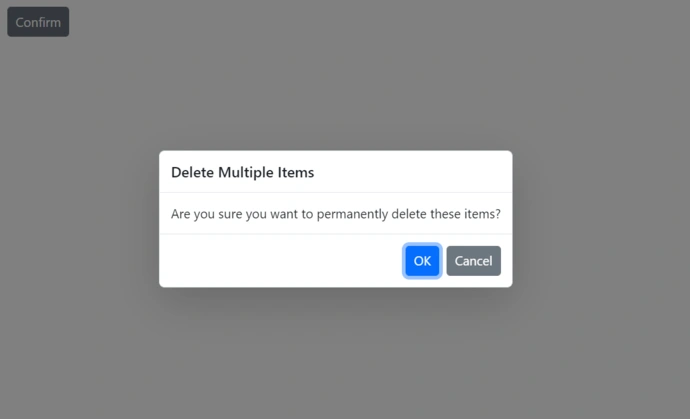
Show confirm dialog
A confirm dialog displays a specified message with OK and Cancel buttons and returns a boolean value based on the user action. Selecting OK returns true; selecting Cancel returns false. Use the DialogService.ConfirmAsync method to show a confirm dialog, typically before a critical action. After the user responds, the dialog closes automatically.
In the following example, the confirm dialog is displayed and returns a value based on the OK or Cancel button click.
@using Syncfusion.Blazor.Popups
@using Syncfusion.Blazor.Buttons
@inject SfDialogService DialogService
 <SfDialogProvider />
    <div>
        <SfButton @onclick="@ConfirmBtn">Confirm</SfButton>
    </div>
    <div class="status" style ="padding-top:10px">
    @DialogStatus
</div>
@code {
    private string DialogStatus { get; set; }
    private async Task ConfirmBtn()
    {
        bool isConfirm = await DialogService.ConfirmAsync("Are you sure you want to permanently delete these items?", "Delete Multiple Items");
        string confirmMessage = isConfirm ? "confirmed" : "canceled";
        this.DialogStatus = $"The user {confirmMessage} the dialog box.";
    }
}
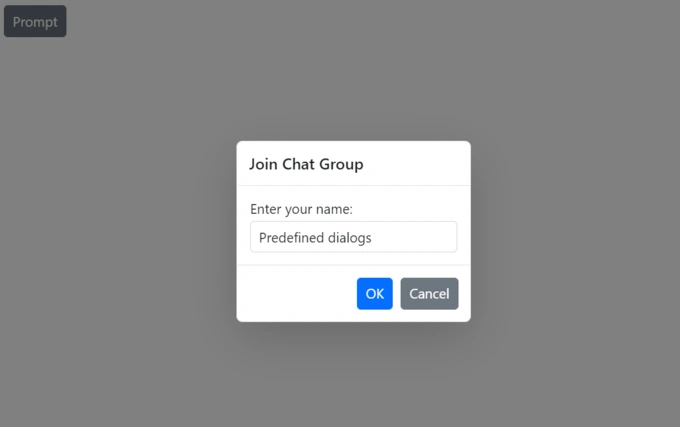
Show prompt dialog
A prompt dialog is used to collect input from the user using the DialogService.PromptAsync method. When the user selects OK, the input value is returned; selecting Cancel returns null. After the user responds, the dialog closes automatically.
In the following example, the prompt dialog is displayed and returns a value based on the OK or Cancel button click.
@using Syncfusion.Blazor.Popups
@using Syncfusion.Blazor.Buttons
@inject SfDialogService DialogService
 <SfDialogProvider />
    <div>
        <SfButton @onclick="@PromptBtn">Prompt</SfButton>
    </div>
    <div class="status" style ="padding-top:10px">
    @DialogStatus
</div>
@code {
    private string DialogStatus { get; set; }

    private async Task PromptBtn()
    {
        string promptText = await DialogService.PromptAsync("Enter your name:", "Join Chat Group");

        this.DialogStatus = $"Input from the user is returned as \"{promptText}\".";
    }
}