How can I help you?
Getting Started with Blazor Ribbon Component
24 Dec 202512 minutes to read
This guide explains how to add the Blazor Ribbon component in a Blazor WebAssembly App using Visual Studio, Visual Studio Code, and the .NET CLI.
Prerequisites
Create a new Blazor App in Visual Studio
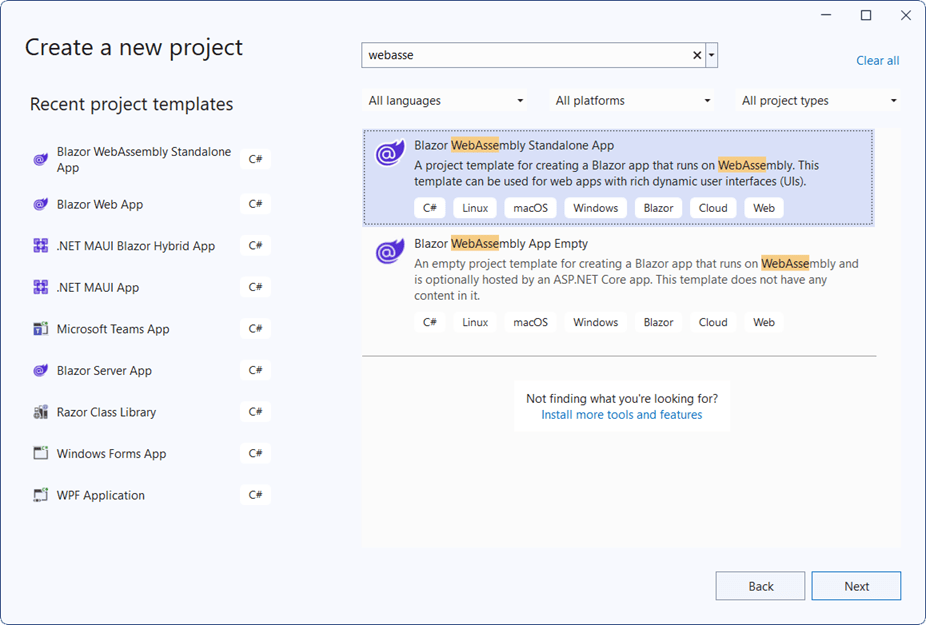
Create a Blazor WebAssembly App using Visual Studio via Microsoft Templates or the Syncfusion® Blazor Extension. For detailed instructions, refer to the Blazor WASM App Getting Started documentation.

Install Syncfusion® Blazor Ribbon and Themes NuGet in the App
To add the Blazor Ribbon component in the app, open the NuGet package manager in Visual Studio (Tools → NuGet Package Manager → Manage NuGet Packages for Solution), then search and install Syncfusion.Blazor.Ribbon and Syncfusion.Blazor.Themes. Alternatively, run the following commands in the Package Manager Console to achieve the same.
Install-Package Syncfusion.Blazor.Ribbon -Version 32.2.3
Install-Package Syncfusion.Blazor.Themes -Version 32.2.3
NOTE
Syncfusion® Blazor components are available in nuget.org. Refer to the NuGet packages topic for the available NuGet packages list with component details.
Prerequisites
Create a new Blazor App in Visual Studio Code
Create a Blazor WebAssembly App using Visual Studio Code via Microsoft Templates or the Syncfusion® Blazor Extension. For detailed instructions, refer to the Blazor WASM App Getting Started documentation.
Alternatively, create a WebAssembly application by using the following command in the integrated terminal(Ctrl+`).
dotnet new blazorwasm -o BlazorApp
cd BlazorApp
Install Syncfusion® Blazor Ribbon and Themes NuGet in the App
- Press Ctrl+` to open the integrated terminal in Visual Studio Code.
- Ensure in the project root directory where the
.csprojfile is located. - Run the following command to install the Syncfusion.Blazor.Ribbon and Syncfusion.Blazor.Themes NuGet packages and ensure all dependencies are installed.
dotnet add package Syncfusion.Blazor.Ribbon -v 32.2.3
dotnet add package Syncfusion.Blazor.Themes -v 32.2.3
dotnet restore
NOTE
Syncfusion® Blazor components are available in nuget.org. Refer to the NuGet packages topic for the available NuGet packages list with component details.
Prerequisites
Install the latest version of .NET SDK. If the .NET SDK is already installed, determine the installed version by running the following command in a command prompt (Windows), terminal (macOS), or command shell (Linux).
dotnet --versionCreate a Blazor WebAssembly App using .NET CLI
Run the following command to create a new Blazor WebAssembly App in a command prompt (Windows) or terminal (macOS) or command shell (Linux). For detailed instructions, refer to this Blazor WASM App Getting Started documentation.
dotnet new blazorwasm -o BlazorApp
cd BlazorApp
Install Syncfusion® Blazor Ribbon and Themes NuGet in the App
To add the Blazor Ribbon component to the application, run the following commands in a command prompt (Windows), command shell (Linux), or terminal (macOS) to install the Syncfusion.Blazor.Ribbon and Syncfusion.Blazor.Themes NuGet packages. See Install and manage packages using the dotnet CLI for more details.
dotnet add package Syncfusion.Blazor.Ribbon -Version 32.2.3
dotnet add package Syncfusion.Blazor.Themes -Version 32.2.3
dotnet restore
NOTE
Syncfusion® Blazor components are available in nuget.org. Refer to the NuGet packages topic for the available NuGet packages list with component details.
Add Import Namespaces
Open the ~/_Imports.razor file and import the Syncfusion.Blazor and Syncfusion.Blazor.Ribbon namespaces.
@using Syncfusion.Blazor
@using Syncfusion.Blazor.Ribbon
Register Syncfusion® Blazor Service
Register the Syncfusion® Blazor Service in the ~/Program.cs file of the Blazor WebAssembly App.
using Microsoft.AspNetCore.Components.Web;
using Microsoft.AspNetCore.Components.WebAssembly.Hosting;
using Syncfusion.Blazor;

var builder = WebAssemblyHostBuilder.CreateDefault(args);
builder.RootComponents.Add<App>("#app");
builder.RootComponents.Add<HeadOutlet>("head::after");

builder.Services.AddScoped(sp => new HttpClient { BaseAddress = new Uri(builder.HostEnvironment.BaseAddress) });

builder.Services.AddSyncfusionBlazor();
await builder.Build().RunAsync();
....
Add stylesheet and script resources
The theme stylesheet and script can be accessed from NuGet through Static Web Assets. Include the stylesheet and script references within the <head> section of the ~/index.html file.
<head>
    ....
    <link href="_content/Syncfusion.Blazor.Themes/bootstrap5.css" rel="stylesheet" />
    <script src="_content/Syncfusion.Blazor.Core/scripts/syncfusion-blazor.min.js" type="text/javascript"></script>
</head>
NOTE
Check out the Blazor Themes topic to discover various methods (Static Web Assets, CDN, and CRG) for referencing themes in Blazor application. Also, check out the Adding Script Reference topic to learn different approaches for adding script references in Blazor application.
Add Syncfusion® Blazor Ribbon component
Add the Syncfusion® Blazor Ribbon component in the ~/Pages/Index.razor file.
Adding ribbon tab
In Ribbon component, options are organized into tabs for easy access. You can use the RibbonTabs tag directive to group all the tabs and RibbonTab tag directive to define each ribbon tab as shown below:
<SfRibbon>
    <RibbonTabs>
        <RibbonTab HeaderText="Home"></RibbonTab>
    </RibbonTabs>
</SfRibbon>
Adding ribbon group
To define a ribbon group under each tab, you can use the RibbonGroups tag directive like below. The Orientation property of ribbon group defines whether the collection of items inside the group will be rendered column-wise or row-wise.
<SfRibbon>
    <RibbonTabs>
        <RibbonTab HeaderText="Home">
            <RibbonGroups>
                <RibbonGroup HeaderText="Clipboard" Orientation="Orientation.Row"></RibbonGroup>
            </RibbonGroups>
        </RibbonTab>
    </RibbonTabs>
</SfRibbon>
Adding ribbon item
You can use the RibbonCollection tag directive to define each ribbon collection that contains one or more items. To define each ribbon item, you can use the RibbonItem tag directive with the Type property to specify the type of item to be rendered, using the RibbonItemType such as Button, a DropDown, a ComboBox, and more.
@using Syncfusion.Blazor.Ribbon;
@using Syncfusion.Blazor.SplitButtons;

<SfRibbon>
    <RibbonTabs>
        <RibbonTab HeaderText="Home">
            <RibbonGroups>
                <RibbonGroup HeaderText="Clipboard">
                    <RibbonCollections>
                        <RibbonCollection>
                            <RibbonItems>
                                <RibbonItem Type=RibbonItemType.SplitButton Disabled=true>
                                    <RibbonSplitButtonSettings Content="Paste" IconCss="e-icons e-paste" Items="@formatItems"></RibbonSplitButtonSettings>
                                </RibbonItem>
                            </RibbonItems>
                        </RibbonCollection>
                        <RibbonCollection>
                            <RibbonItems>
                                <RibbonItem Type=RibbonItemType.Button>
                                    <RibbonButtonSettings Content="Cut" IconCss="e-icons e-cut" ></RibbonButtonSettings>
                                </RibbonItem>
                                <RibbonItem Type=RibbonItemType.Button>
                                    <RibbonButtonSettings Content="Copy" IconCss="e-icons e-copy"></RibbonButtonSettings>
                                </RibbonItem>
                                <RibbonItem Type=RibbonItemType.Button>
                                    <RibbonButtonSettings Content="Format Painter" IconCss="e-icons e-format-painter"></RibbonButtonSettings>
                                </RibbonItem>
                            </RibbonItems>
                        </RibbonCollection>
                    </RibbonCollections>
                </RibbonGroup>
            </RibbonGroups>
        </RibbonTab>
    </RibbonTabs>
</SfRibbon>

@code{
    List<DropDownMenuItem> formatItems = new List<DropDownMenuItem>()
    {
        new DropDownMenuItem{ Text = "Keep Source Format" },
        new DropDownMenuItem{ Text = "Merge Format" },
        new DropDownMenuItem{ Text = "Keep Text Only" }
    };
}
Press Ctrl+F5 (Windows) or ⌘+F5 (macOS) to run the application. The Syncfusion® Blazor Ribbon component will be rendered in the default web browser.