How can I help you?
Getting Started with Blazor DataManager Component in Web App
4 Dec 202514 minutes to read
The Syncfusion® Blazor DataManager component acts as a data gateway for Syncfusion® Blazor controls that support data binding. It enables interaction with local or remote data sources using queries and adaptors. This guide provides step-by-step instructions to configure the component in a Blazor Web App created with Visual Studio or Visual Studio Code.
Prerequisites
- Ensure the development environment meets the system requirements for Syncfusion® Blazor components before proceeding with the setup.
Create a new Blazor Web App in Visual Studio
A Blazor Web App can be created using Visual Studio with the built-in Microsoft templates or the Syncfusion® Blazor Extension.
- Open Visual Studio 2022 (version 17.8 or later).
- Select Create a new project.
- Choose Blazor Web App from the template list and click Next.
- Specify the project name, location, and solution settings, then click Next.
- Select the target framework as .NET 9.0 or later (choose the latest installed version).
- Choose the Interactive render mode(Server, WebAssembly, or Auto) and Interactivity location.
- Review the remaining options and click Create to generate the project.
Install Syncfusion® Blazor Data and Themes NuGet in the Blazor Web App
To integrate the Blazor DataManager component, install the required Syncfusion® NuGet packages in the solution:
-
Open NuGet Package Manager in Visual Studio:
Tools → NuGet Package Manager → Manage NuGet Packages for Solution.
-
Search and install the following packages:
-
For projects using WebAssembly or Auto interactive render modes, ensure these packages are installed in the Client project.
-
Alternatively, use the Package Manager Console:
Install-Package Syncfusion.Blazor.Data -Version 32.2.3
Install-Package Syncfusion.Blazor.Themes -Version 32.2.3
NOTE
Syncfusion® Blazor components are available on nuget.org. For a complete list of packages, refer to NuGet packages.
Prerequisites
- Ensure the development environment meets the system requirements for Syncfusion® Blazor components before proceeding with the setup.
Create a new Blazor Web App in Visual Studio Code
A Blazor Web App can be created using Visual Studio Code with the built-in Microsoft templates or the Syncfusion® Blazor Extension.
- Install the latest .NET SDK that supports .NET 9 or later.
- Open Visual Studio Code and launch the integrated terminal (Ctrl + `).
- Execute the following command to create a Blazor Web App with Auto Interactive render mode:
dotnet new blazor -o BlazorWebApp -int Auto
cd BlazorWebApp
cd BlazorWebApp.Client
NOTE
For other interactive render modes and interactivity locations, refer to Render Modes documentation.
Install Syncfusion® Blazor Data and Themes NuGet in the App
To integrate the Blazor DataManager component, install the required Syncfusion® NuGet packages using the integrated terminal:
- Open the integrated terminal in Visual Studio Code (Ctrl + `).
- Navigate to the directory containing the .csproj file.
-
Run the following commands to install the packages:
dotnet add package Syncfusion.Blazor.Data -v 32.2.3
dotnet add package Syncfusion.Blazor.Themes -v 32.2.3
dotnet restore
NOTE
Syncfusion® Blazor components are available in nuget.org. Refer to the NuGet packages topic for the available NuGet packages list with component details.
Prerequisites
Latest version of the .NET SDK. If you previously installed the SDK, you can determine the installed version by executing the following command in a command prompt (Windows) or terminal (macOS) or command shell (Linux).
dotnet --versionCreate a Blazor Web App using .NET CLI
Run the following command to create a new Blazor Web App in a command prompt (Windows) or terminal (macOS) or command shell (Linux).
Configure the appropriate interactive render mode and interactivity location when setting up a Blazor Web Application. For detailed information, refer to the interactive render mode documentation.
For example, in a Blazor Web App with the Auto interactive render mode, use the following commands.
dotnet new blazor -o BlazorWebApp -int Auto
cd BlazorWebApp
cd BlazorWebApp.Client
This command creates a new Blazor Web App and places it in a new directory called BlazorWebApp inside your current location. See the Create a Blazor App and dotnet new CLI command topics for more details.
Install Syncfusion® Blazor Data and Themes NuGet in the App
Here’s an example of how to add the Blazor DataManager component to the application by using the following commands in a command prompt (Windows), terminal (Linux and macOS), or PowerShell to install the Syncfusion.Blazor.Data and Syncfusion.Blazor.Themes NuGet packages. See Install and manage packages using the dotnet CLI for more details.
If using the WebAssembly or Auto render modes in the Blazor Web App, install Syncfusion® Blazor component NuGet packages in the client project.
dotnet add package Syncfusion.Blazor.Data --version 32.2.3
dotnet add package Syncfusion.Blazor.Themes --version 32.2.3
dotnet restore
NOTE
Syncfusion® Blazor components are available in nuget.org. Refer to the NuGet packages topic for the available NuGet package list with component details.
Add Import Namespaces
- Import the required namespaces in the _Imports.razor file:
@using Syncfusion.Blazor
@using Syncfusion.Blazor.Data- For WebAssembly or Auto interactive render modes, update this file in the Client project.
- For Server interactive render mode, update this file in the Components folder.
- Register the Syncfusion® Blazor service in the Program.cs file:
Auto or WebAssembly Render Mode
Register the service in both Server and Client projects:
...
...
using Syncfusion.Blazor;

var builder = WebApplication.CreateBuilder(args);

// Add services to the container.
builder.Services.AddRazorComponents()
    .AddInteractiveServerComponents()
    .AddInteractiveWebAssemblyComponents();
builder.Services.AddSyncfusionBlazor();

var app = builder.Build();
....
...
using Syncfusion.Blazor;
var builder = WebAssemblyHostBuilder.CreateDefault(args);
builder.Services.AddSyncfusionBlazor();
await builder.Build().RunAsync();Server Render Mode
For Server mode, register the service in the Program.cs file:
...
using Syncfusion.Blazor;

var builder = WebApplication.CreateBuilder(args);

// Add services to the container.
builder.Services.AddRazorComponents()
    .AddInteractiveServerComponents();
builder.Services.AddSyncfusionBlazor();

var app = builder.Build();
....
Add stylesheet and script resources
Syncfusion® Blazor themes and scripts are available through Static Web Assets. Add the following references in the ~/Components/App.razor file:
In the <head> section:
<head>
    <link href="_content/Syncfusion.Blazor.Themes/bootstrap5.css" rel="stylesheet" />
</head>
At the end of the <body> section:
<body>
    <script src="_content/Syncfusion.Blazor.Core/scripts/syncfusion-blazor.min.js" type="text/javascript"></script>
</body>
NOTE
- Refer to Blazor Themes for various methods to reference themes in a Blazor application:
* [Static Web Assets](https://blazor.syncfusion.com/documentation/appearance/themes#static-web-assets)
* [CDN](https://blazor.syncfusion.com/documentation/appearance/themes#cdn-reference)
* [Custom Resource Generator (CRG)](https://blazor.syncfusion.com/documentation/common/custom-resource-generator)
- For script reference options, see Adding Script References.
Add Blazor DataManager component
The SfDataManager component acts as a data gateway for Syncfusion® Blazor components that support data binding. It enables interaction with local or remote data sources using queries.
Binding to JSON data
Local JSON data can be bound to the DataGrid component by assigning a collection of objects to the Json property of the SfDataManager component.
@using Syncfusion.Blazor.Grids
@using Syncfusion.Blazor.Data

<SfGrid TValue="EmployeeData" ID="Grid">
    <SfDataManager Json="@Employees"></SfDataManager>
    <GridColumns>
        <GridColumn Field="@nameof(EmployeeData.EmployeeID)" TextAlign="TextAlign.Center" HeaderText="Employee ID" Width="120"></GridColumn>
        <GridColumn Field="@nameof(EmployeeData.Name)" HeaderText="First Name" Width="130"></GridColumn>
        <GridColumn Field="@nameof(EmployeeData.Title)" HeaderText="Title" Width="120"></GridColumn>
    </GridColumns>
</SfGrid>

@code {

    public List<EmployeeData> Employees { get; set; } = new()
    {
        new EmployeeData { EmployeeID = 1, Name = "Nancy Fuller", Title = "Vice President" },
        new EmployeeData { EmployeeID = 2, Name = "Steven Buchanan", Title = "Sales Manager" },
        new EmployeeData { EmployeeID = 3, Name = "Janet Leverling", Title = "Sales Representative" },
        new EmployeeData { EmployeeID = 4, Name = "Andrew Davolio", Title = "Inside Sales Coordinator" },
        new EmployeeData { EmployeeID = 5, Name = "Steven Peacock", Title = "Inside Sales Coordinator" },
        new EmployeeData { EmployeeID = 6, Name = "Janet Buchanan", Title = "Sales Representative" },
        new EmployeeData { EmployeeID = 7, Name = "Andrew Fuller", Title = "Inside Sales Coordinator" },
        new EmployeeData { EmployeeID = 8, Name = "Steven Davolio", Title = "Inside Sales Coordinator" },
        new EmployeeData { EmployeeID = 9, Name = "Janet Davolio", Title = "Sales Representative" },
        new EmployeeData { EmployeeID = 10, Name = "Andrew Buchanan", Title = "Sales Representative" }
    };

    public class EmployeeData
    {
        public int EmployeeID { get; set; }
        public string? Name { get; set; }
        public string? Title { get; set; }
    }
}
Binding to OData
Remote data can be bound by setting the Url property and specifying the appropriate adaptor using the Adaptor property of the SfDataManager component.
@using Syncfusion.Blazor
@using Syncfusion.Blazor.Data
@using Syncfusion.Blazor.Grids

<SfGrid TValue="Order" ID="Grid" AllowPaging="true">
    <SfDataManager Url="https://services.odata.org/Northwind/Northwind.svc/Orders"
                   Adaptor="Adaptors.ODataAdaptor">
    </SfDataManager>
    <GridColumns>
        <GridColumn Field="@nameof(Order.OrderID)" HeaderText="Order ID" IsPrimaryKey="true"
                    TextAlign="TextAlign.Right" Width="120"></GridColumn>
        <GridColumn Field="@nameof(Order.CustomerID)" HeaderText="Customer Name" Width="150"></GridColumn>
        <GridColumn Field="@nameof(Order.OrderDate)" HeaderText="Order Date" Format="d"
                    Type="ColumnType.Date" TextAlign="TextAlign.Right" Width="130"></GridColumn>
        <GridColumn Field="@nameof(Order.Freight)" HeaderText="Freight" Format="C2"
                    TextAlign="TextAlign.Right" Width="120"></GridColumn>
    </GridColumns>
</SfGrid>

@code {

    public class Order
    {
        public int? OrderID { get; set; }
        public string? CustomerID { get; set; }
        public DateTime? OrderDate { get; set; }
        public double? Freight { get; set; }
    }
}
Component binding
The Syncfusion® Blazor DataManager component can be integrated with any Syncfusion® data-bound component to manage local or remote data operations.
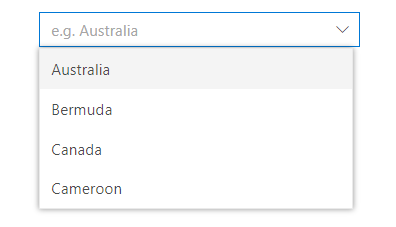
This configuration demonstrates how the DataManager is bound to the SfDropDownList component to enable consistent interaction with local or remote data sources.
Local data binding
Local data can be bound to components such as SfDropDownList by assigning a collection of objects to the Json property of the SfDataManager component.
@using Syncfusion.Blazor.Data
@using Syncfusion.Blazor.DropDowns

<SfDropDownList Placeholder="e.g. Australia" TItem="Country" TValue="string">
    <SfDataManager Json="@Countries"></SfDataManager>
    <DropDownListFieldSettings Value="Name"></DropDownListFieldSettings>
</SfDropDownList>

@code {
    public class Country
    {
        public string? Name { get; set; }
        public string? Code { get; set; }
    }

    public List<Country> Countries = new()
    {
        new Country { Name = "Australia", Code = "AU" },
        new Country { Name = "Bermuda", Code = "BM" },
        new Country { Name = "Canada", Code = "CA" },
        new Country { Name = "Cameroon", Code = "CM" }
    };
}
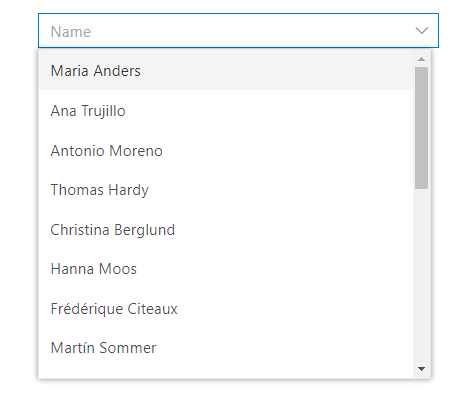
Remote data binding
Remote data can be bound by setting the Url property and specifying the appropriate adaptor using the Adaptor property of the SfDataManager component.
@using Syncfusion.Blazor
@using Syncfusion.Blazor.Data
@using Syncfusion.Blazor.DropDowns

<SfDropDownList Placeholder="Name" TItem="Contact" TValue="Contact">
    <SfDataManager Url="https://services.odata.org/V4/Northwind/Northwind.svc/Customers" Adaptor="Adaptors.ODataV4Adaptor"></SfDataManager>
    <DropDownListFieldSettings Value="CustomerID" Text="ContactName"></DropDownListFieldSettings>
</SfDropDownList>

@code {

    public class Contact
    {
        public string? ContactName { get; set; }
        public string? CustomerID { get; set; }
    }
}
NOTE