How can I help you?
Getting started with Blazor LinearGauge in Blazor Web App
10 Dec 202512 minutes to read
The Blazor LinearGauge is an ideal component for visualizing numeric values in a linear scale with features like multiple axes, different orientations, and more.
This section briefly explains about how to include Blazor LinearGauge component in your Blazor Web App using Visual Studio, Visual Studio Code, and the .NET CLI.
Prerequisites
Create a new Blazor Web App in Visual Studio
Create a Blazor Web App using Visual Studio 2022 via Microsoft Templates or the Syncfusion® Blazor Extension. For detailed instructions, refer to this Blazor Web App Getting Started documentation.
Configure the appropriate Interactive render mode and Interactivity location while creating a Blazor Web App.

Install Syncfusion® Blazor LinearGauge NuGet in the App
To add the Blazor LinearGauge component in the app, open the NuGet package manager in Visual Studio (Tools → NuGet Package Manager → Manage NuGet Packages for Solution), then search and install Syncfusion.Blazor.LinearGauge.
If using the WebAssembly or Auto render modes in the Blazor Web App, install Syncfusion® Blazor component NuGet packages in the client project.
Alternatively, run the following commands in the Package Manager Console to achieve the same.
Install-Package Syncfusion.Blazor.LinearGauge -Version 32.2.3NOTE
Syncfusion® Blazor components are available in nuget.org. Refer to the NuGet packages topic for the available NuGet packages list with component details.
Prerequisites
Create a new Blazor Web App in Visual Studio Code
Create a Blazor Web App using Visual Studio Code via Microsoft Templates or the Syncfusion® Blazor Extension. For detailed instructions, refer to this Blazor Web App Getting Started documentation.
Configure the appropriate interactive render mode and interactivity location when setting up a Blazor Web App. For detailed information, refer to the interactive render mode documentation.
For example, to create a Blazor Web App with the Auto interactive render mode, use the following commands:
dotnet new blazor -o BlazorWebApp -int Auto
cd BlazorWebApp
cd BlazorWebApp.Client
Install Syncfusion® Blazor LinearGauge NuGet in the App
If using the WebAssembly or Auto render modes in the Blazor Web App, install Syncfusion® Blazor component NuGet packages in the client project.
- Press Ctrl+` to open the integrated terminal in Visual Studio Code.
- Ensure you’re in the project root directory where your
.csprojfile is located. - Run the following command to install a Syncfusion.Blazor.LinearGauge NuGet package and ensure all dependencies are installed.
dotnet add package Syncfusion.Blazor.LinearGauge -v 32.2.3
dotnet restore
NOTE
Syncfusion® Blazor components are available in nuget.org. Refer to the NuGet packages topic for the available NuGet packages list with component details.
Prerequisites
Install the latest version of .NET SDK. If you previously installed the SDK, you can determine the installed version by executing the following command in a command prompt (Windows) or terminal (macOS) or command shell (Linux).
dotnet --versionCreate a Blazor Web App using .NET CLI
Run the following command to create a new Blazor Web App in a command prompt (Windows) or terminal (macOS) or command shell (Linux). For detailed instructions, refer to this Blazor Web App Getting Started documentation.
Configure the appropriate interactive render mode and interactivity location when setting up a Blazor Web Application. For detailed information, refer to the interactive render mode documentation.
For example, to create a Blazor Web App with the Auto interactive render mode, use the following commands:
dotnet new blazor -o BlazorApp -int Auto
cd BlazorApp
cd BlazorApp.Client
This command creates a new Blazor Web App and places it in a new directory called BlazorApp inside your current location. See the Create a Blazor App and dotnet new CLI command topics for more details.
Install Syncfusion® Blazor LinearGauge and Themes NuGet in the App
Here’s an example of how to add Blazor LinearGauge component in the application using the following command in the command prompt (Windows) or terminal (Linux and macOS) to install a Syncfusion.Blazor.LinearGauge and Syncfusion.Blazor.Themes NuGet package. See Install and manage packages using the dotnet CLI topics for more details.
If using the WebAssembly or Auto render modes in the Blazor Web App, install Syncfusion® Blazor component NuGet packages in the client project.
dotnet add package Syncfusion.Blazor.LinearGauge --version 32.2.3
dotnet add package Syncfusion.Blazor.Themes --version 32.2.3
dotnet restore
NOTE
Syncfusion® Blazor components are available in nuget.org. Refer to the NuGet packages topic for the available NuGet packages list with component details.
Add Import Namespaces
Open the ~/_Imports.razor file from the client project and import the Syncfusion.Blazor and Syncfusion.Blazor.LinearGauge namespaces.
@using Syncfusion.Blazor
@using Syncfusion.Blazor.LinearGauge
Register Syncfusion® Blazor Service
Register the Syncfusion® Blazor Service in the ~/Program.cs file of your Blazor Web App.
If the Interactive Render Mode is set to WebAssembly or Auto, register the Syncfusion® Blazor service in the ~/Program.cs files of the main server project and associated .Client project.
...
...
using Syncfusion.Blazor;

var builder = WebApplication.CreateBuilder(args);

// Add services to the container.
builder.Services.AddRazorComponents()
    .AddInteractiveServerComponents()
    .AddInteractiveWebAssemblyComponents();
builder.Services.AddSyncfusionBlazor();

var app = builder.Build();
....
...
using Syncfusion.Blazor;
var builder = WebAssemblyHostBuilder.CreateDefault(args);
builder.Services.AddSyncfusionBlazor();
await builder.Build().RunAsync();Add script resources
The script can be accessed from NuGet through Static Web Assets. Include the script reference at the end of the <body> in the ~/Components/App.razor file as shown below:
<body>
    ....
    <script src="_content/Syncfusion.Blazor.Core/scripts/syncfusion-blazor.min.js" type="text/javascript"></script>
</body>
NOTE
Check out the Adding Script Reference topic to learn different approaches for adding script references in your Blazor application.
Add Syncfusion® Blazor LinearGauge component
Add the Syncfusion® Blazor LinearGauge component to a Razor page located under the Pages folder (e.g., Pages/Home.razor) in either the Server or Client project. If an interactivity location as Per page/component in the web app, define a render mode at top of the component, as follows:
| Interactivity location | RenderMode | Code |
|---|---|---|
| Per page/component | Auto | @rendermode InteractiveAuto |
| WebAssembly | @rendermode InteractiveWebAssembly | |
| None | — |
NOTE
If an Interactivity Location is set to
Globaland the Render Mode is set toAutoorWebAssembly, the render mode is configured in theApp.razorfile by default.
@* desired render mode define here *@
@rendermode InteractiveAuto<SfLinearGauge>
<LinearGaugeAxes>
<LinearGaugeAxis>
<LinearGaugePointers>
<LinearGaugePointer></LinearGaugePointer>
</LinearGaugePointers>
</LinearGaugeAxis>
</LinearGaugeAxes>
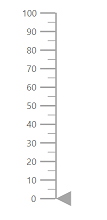
</SfLinearGauge>- Press Ctrl+F5 (Windows) or ⌘+F5 (macOS) to launch the application. This will render the Syncfusion® Blazor LinearGauge component in the default web browser.

NOTE
Set pointer value
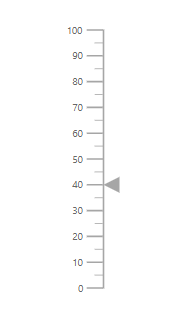
Pointers are used to indicate values on an axis. You can change the pointer value using the PointerValue property in the LinearGaugePointer.
NOTE
In LinearGauge, you can configure multiple axes. On each axis, you can add a pointer.
<SfLinearGauge>
    <LinearGaugeAxes>
        <LinearGaugeAxis>
            <LinearGaugePointers>
                <LinearGaugePointer PointerValue="40">
                </LinearGaugePointer>
            </LinearGaugePointers>
        </LinearGaugeAxis>
    </LinearGaugeAxes>
</SfLinearGauge>
Add a title for Blazor LinearGauge
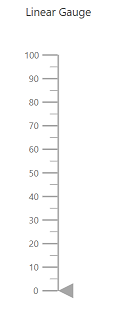
The title can be added to the linear gauge to provide a piece of quick information to the users about the context of the rendered linear gauge. You can add the title to the linear gauge using Title property in SfLinearGauge.
<SfLinearGauge Title="Linear Gauge">
    <LinearGaugeAxes>
        <LinearGaugeAxis>
            <LinearGaugePointers>
                <LinearGaugePointer></LinearGaugePointer>
            </LinearGaugePointers>
        </LinearGaugeAxis>
    </LinearGaugeAxes>
</SfLinearGauge>
Add ranges in the Blazor LinearGauge
The range is used to specify a group of scale values in the gauge. You can set the range start and end using Start and End properties in the LinearGaugeRange. You can add any number of ranges for an axis using LinearGaugeRange.
<SfLinearGauge>
    <LinearGaugeAxes>
        <LinearGaugeAxis Minimum="0" Maximum="200">
            <LinearGaugeAxisLabelStyle Format="{value}°C"></LinearGaugeAxisLabelStyle>
            <LinearGaugePointers>
                <LinearGaugePointer PointerValue="140">
                </LinearGaugePointer>
            </LinearGaugePointers>
            <LinearGaugeRanges>
                <LinearGaugeRange Start="0" End="80" Color="#ff5985"></LinearGaugeRange>
                <LinearGaugeRange Start="80" End="120" Color="#ffb133"></LinearGaugeRange>
                <LinearGaugeRange Start="120" End="140" Color="#fcde0b"></LinearGaugeRange>
                <LinearGaugeRange Start="140" End="200" Color="#27d5ff"></LinearGaugeRange>
            </LinearGaugeRanges>
        </LinearGaugeAxis>
    </LinearGaugeAxes>
</SfLinearGauge>