Azure OpenAI Configuration
29 Jun 20266 minutes to read
The Blazor Smart Rich Text Editor supports Azure OpenAI for enterprise-grade AI capabilities with enhanced security and compliance features.
Prerequisites
- Active Azure subscription
- Azure OpenAI Service resource deployed
- Deployed model (e.g., gpt-4, gpt-35-turbo)
- Azure credentials with necessary permissions
Deploy Azure OpenAI Service
Step 1: Create Azure OpenAI Resource
- Sign in to Azure Portal
- Click Create a resource
- Search for Azure OpenAI
- Click Create
- Fill in the resource details:
- Subscription: Select your subscription
- Resource group: Create or select existing
- Region: Choose appropriate region
- Name: Give your resource a unique name
- Pricing tier: Select S0 or higher
Step 2: Deploy a Model
- Go to Azure AI Studio (https://oai.azure.com/)
- Select your Azure OpenAI resource
- Navigate to Deployments
- Click Create new deployment
- Configure:
-
Deployment name: e.g.,
gpt-35-turbo-deployment -
Model name: Select model (e.g.,
gpt-35-turbo,gpt-4) - Model version: Choose version
- Deployment type: Standard
-
Deployment name: e.g.,
Step 3: Obtain Credentials
From your Azure OpenAI resource in Azure Portal, copy:
-
Endpoint:
https://<resource-name>.openai.azure.com/ - Key: Found under Keys and Endpoint
- Deployment name: Created in Step 2
Setup the Smart Rich Text Editor Component
Follow the Getting Started guide to configure and render the Smart Rich Text Editor component in the application and that prerequisites are met.
Install NuGet packages
Install the following NuGet packages to your project:
You can install these packages using different methods as shown below:
-
In Visual Studio Navigate to:
Tools → NuGet Package Manager → Manage NuGet Packages for Solution
- Search for the required packages.
- Select the package and click Install.
-
In Visual Studio Navigate to:
Tools → NuGet Package Manager → Package Manager Console
-
Run the following commands:
Install-Package Microsoft.Extensions.AI
Install-Package Microsoft.Extensions.AI.OpenAI
Install-Package Azure.AI.OpenAI- Open your project.
- Open the terminal:
- In Visual Studio Code: use the integrated terminal (Ctrl + `)
- Or use any system terminal for CLI
- Run the following commands:
dotnet add package Microsoft.Extensions.AI
dotnet add package Microsoft.Extensions.AI.OpenAI
dotnet add package Azure.AI.OpenAI
Configuration
Step 1: Setup in Program.cs
Add the following configuration to your Program.cs file:
using Syncfusion.Blazor;
using Syncfusion.Blazor.AI;
using Azure.AI.OpenAI;
using Microsoft.Extensions.AI;
using System.ClientModel;

var builder = WebApplication.CreateBuilder(args);

// Add services to the container
builder.Services.AddRazorPages();
builder.Services.AddServerSideBlazor();

// Register Blazor Service
builder.Services.AddSyncfusionBlazor();

// Configure Azure OpenAI - load from configuration
string azureOpenAIKey = builder.Configuration["AzureOpenAI:Key"]
    ?? throw new InvalidOperationException("AzureOpenAI:Key not configured");
string azureOpenAIEndpoint = builder.Configuration["AzureOpenAI:Endpoint"]
    ?? throw new InvalidOperationException("AzureOpenAI:Endpoint not configured");
string azureOpenAIDeployment = builder.Configuration["AzureOpenAI:DeploymentName"]
    ?? throw new InvalidOperationException("AzureOpenAI:DeploymentName not configured");

AzureOpenAIClient azureOpenAIClient = new AzureOpenAIClient(
    new Uri(azureOpenAIEndpoint),
    new ApiKeyCredential(azureOpenAIKey)
);
IChatClient azureOpenAIChatClient = azureOpenAIClient
    .GetChatClient(azureOpenAIDeployment)
    .AsIChatClient();

builder.Services.AddSingleton<IChatClient>(azureOpenAIChatClient);
// Register Smart Rich Text Editor Components with Azure OpenAI
builder.Services.AddSingleton<IChatInferenceService, SyncfusionAIService>();

var app = builder.Build();

// ... rest of your application setup
Step 2: Configure Azure OpenAI Credentials in appsettings.json
{
  "AzureOpenAI": {
    "Key": "your-azure-openai-api-key",
    "Endpoint": "https://<your-resource-name>.openai.azure.com/",
    "DeploymentName": "your-deployment-name"
  }
}
NOTE
Store sensitive keys in user secrets or environment variables, not in appsettings.json.
Step 3: Use Azure OpenAI with Smart Rich Text Editor Component
@using Syncfusion.Blazor.SmartRichTextEditor

<SfSmartRichTextEditor>
    <AssistViewSettings Placeholder="Use Azure OpenAI to enhance your content..." />
    <div>
        <strong>Use Azure OpenAI with Smart Rich Text Editor:</strong>
        <ul>
            <li>Select text and use <b>AI Commands</b> to generate or refine content</li>
            <li>Press <b>Alt + Enter</b> to open the Azure OpenAI query dialog</li>
            <li>Use Azure OpenAI to fix grammar, adjust tone, or rephrase text</li>
        </ul>
    </div>
</SfSmartRichTextEditor>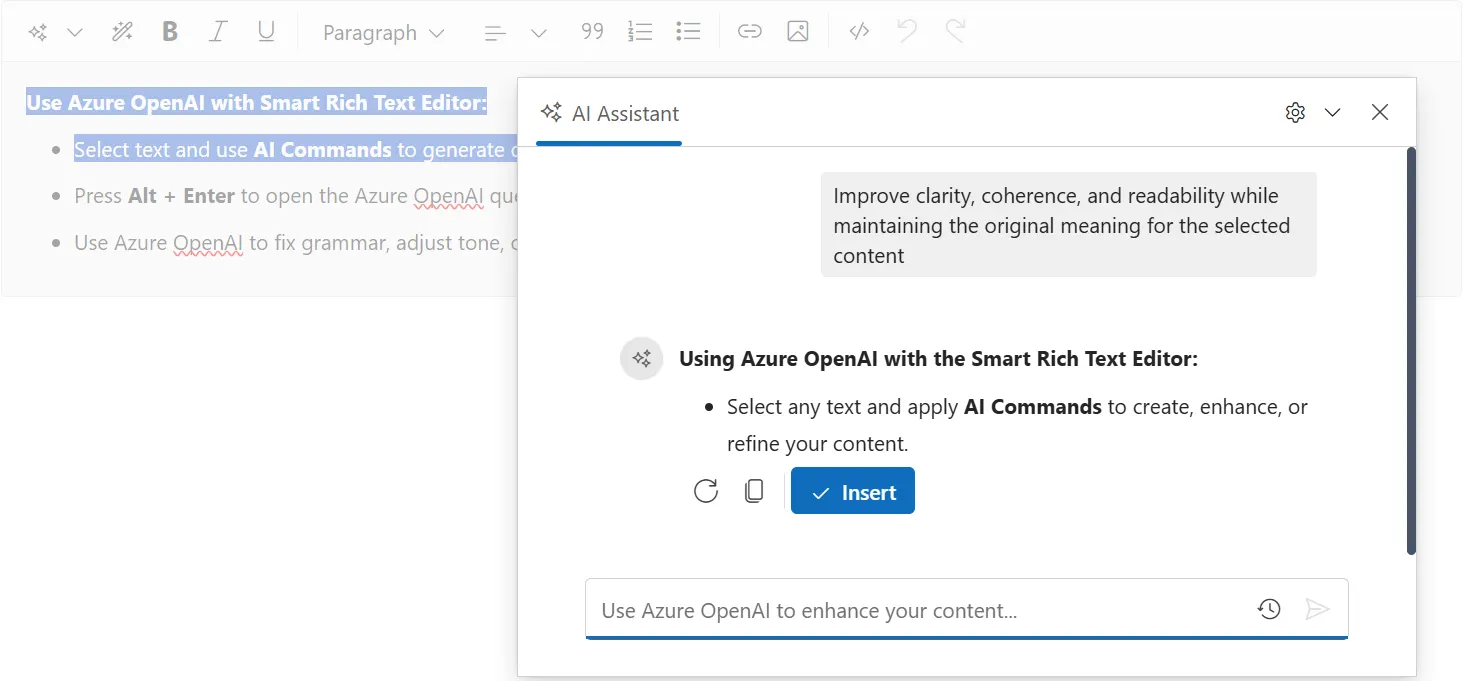
Troubleshooting
Common Issues
Error: ResourceNotFound (404)
- Verify endpoint URL is correct
- Check resource name matches your Azure resource
- Ensure resource exists in specified region
Error: InvalidAuthenticationTokenTenant (401)
- Verify API key is correct
- Check key hasn’t expired
- Ensure using the correct region’s key
Error: Model not found (404)
- Verify deployment name matches your Azure deployment
- Check deployment is active and ready
- Ensure model is properly deployed
Timeout Issues
- Check Azure OpenAI resource capacity
- Verify network connectivity
- Consider timeout configuration