OpenAI Configuration
29 Jun 20264 minutes to read
The Blazor Smart Rich Text Editor supports OpenAI’s GPT models for intelligent content assistance.
Prerequisites
- Active OpenAI account with API access
- Valid API key from OpenAI
- Internet connectivity to access OpenAI services
Get Your OpenAI API Key
- Visit OpenAI Platform
- Sign in with your OpenAI account (create one if needed)
- Navigate to API Keys section
- Click Create new secret key
- Copy and securely store your API key
Supported Models
OpenAI offers various models for different use cases:
-
gpt-4-turbo: Most capable, latest model -
gpt-4: Advanced reasoning and complex tasks -
gpt-3.5-turbo: Fast and cost-effective -
gpt-3.5-turbo-16k: Extended context window
Note: Model availability and names may change. Refer to OpenAI documentation for current options.
Setup the Smart Rich Text Editor Component
Follow the Getting Started guide to configure and render the Smart Rich Text Editor component in the application and that prerequisites are met.
Install NuGet packages
Install the following NuGet packages to your project:
You can install these packages using different methods as shown below:
-
In Visual Studio Navigate to:
Tools → NuGet Package Manager → Manage NuGet Packages for Solution
- Search for the required packages.
- Select the package and click Install.
-
In Visual Studio Navigate to:
Tools → NuGet Package Manager → Package Manager Console
-
Run the following commands:
Install-Package Microsoft.Extensions.AI
Install-Package Microsoft.Extensions.AI.OpenAI- Open your project.
- Open the terminal:
- In Visual Studio Code: use the integrated terminal (Ctrl + `)
- Or use any system terminal for CLI
- Run the following commands:
dotnet add package Microsoft.Extensions.AI
dotnet add package Microsoft.Extensions.AI.OpenAI
Configuration
Step 1: Setup in Program.cs
Add the following configuration to your Program.cs file:
using Syncfusion.Blazor;
using Syncfusion.Blazor.AI;
using Microsoft.Extensions.AI;
using OpenAI;

var builder = WebApplication.CreateBuilder(args);

// Add services to the container
builder.Services.AddRazorPages();
builder.Services.AddServerSideBlazor();

// Register Blazor Service
builder.Services.AddSyncfusionBlazor();

// Configure OpenAI
string openAIApiKey = "Your API Key";
string openAIModel = "Your Model Name";
OpenAIClient openAIClient = new OpenAIClient(openAIApiKey);
IChatClient openAIChatClient = openAIClient.GetChatClient(openAIModel).AsIChatClient();
builder.Services.AddSingleton<IChatClient>(openAIChatClient);

// Register Smart Rich Text Editor Components with OpenAI
builder.Services.AddSingleton<IChatInferenceService, SyncfusionAIService>();

var app = builder.Build();

// ... rest of your application setup
Step 2: Use OpenAI with Smart Rich Text Editor Component
@using Syncfusion.Blazor.SmartRichTextEditor

<SfSmartRichTextEditor>
    <AssistViewSettings Placeholder="Use OpenAI to enhance your content..." />
    <div>
        <strong>Use OpenAI with Smart Rich Text Editor:</strong>
        <ul>
            <li>Select text and use <b>AI Commands</b> to generate or refine content</li>
            <li>Press <b>Alt + Enter</b> to open the AI query dialog</li>
            <li>Generate summaries, rephrase sentences, or improve grammar using AI</li>
        </ul>
    </div>
</SfSmartRichTextEditor>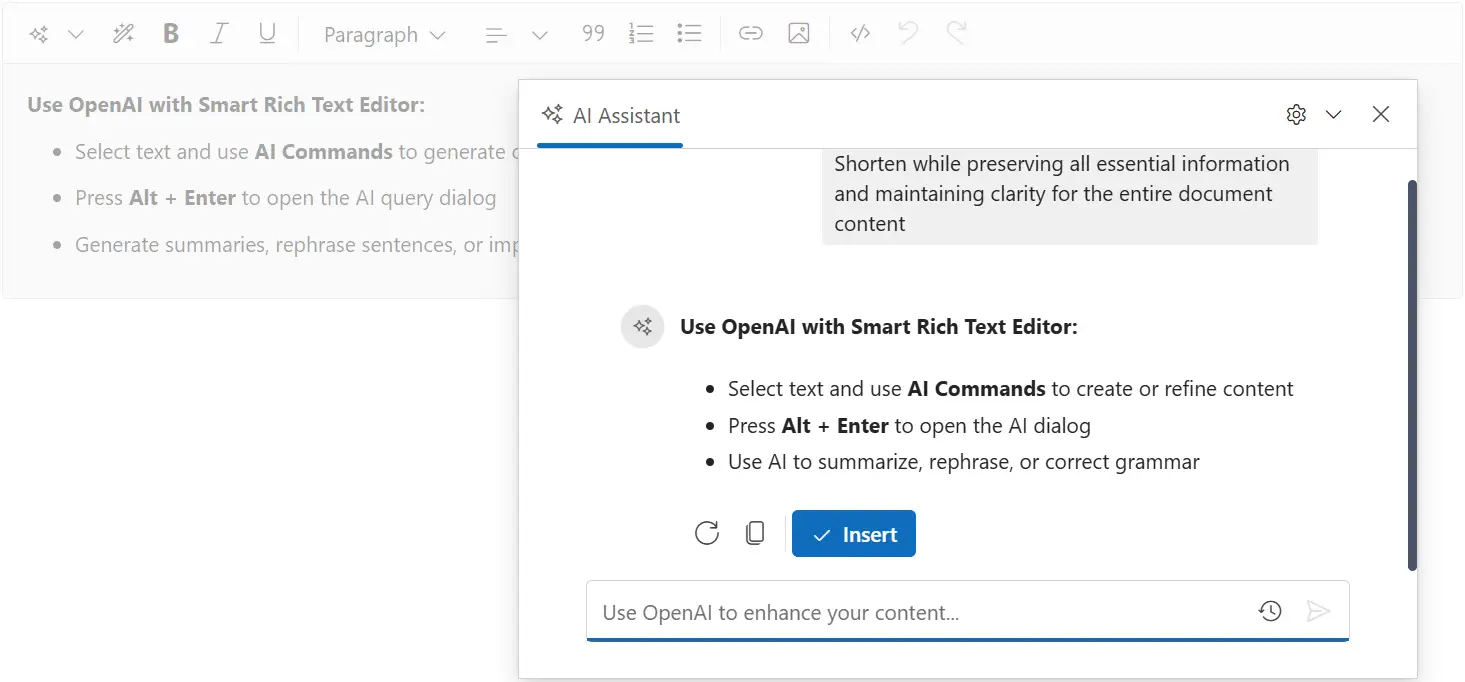
Troubleshooting
Common Issues
Authentication Error: 401 Unauthorized
- Verify API key is correct
- Check API key is still valid and hasn’t expired
- Ensure API key has necessary permissions
Rate Limit Error: 429 Too Many Requests
- Reduce request frequency
- Implement request throttling
- Check usage limits on OpenAI account
Model Not Found Error
- Verify model name is correct (check model list)
- Ensure model is available in your region/account
No Response from AI
- Check internet connectivity
- Verify API key permissions
- Review OpenAI service status